Have you ever seen someone effortlessly gliding down a path on a scooter, powered by their happy, four-legged companion, and thought, ‘I wish we could do that!’? Well, you’re in luck! Dog scootering, also known as urban mushing, is a fantastic way to bond with your energetic pup, provide them with excellent physical and mental stimulation, and explore the outdoors together. It might look complicated, but with the right approach, a little patience, and a whole lot of positive reinforcement, you can teach your dog to be a confident scooter partner. This guide is designed to take you from a complete beginner to a confident team in just five days. We’ll break down everything you need, from essential gear to the day-by-day training steps that build a foundation of safety and fun. So, grab your helmet, get some high-value treats, and let’s get ready to roll!
Gearing Up for Success: Essential Equipment
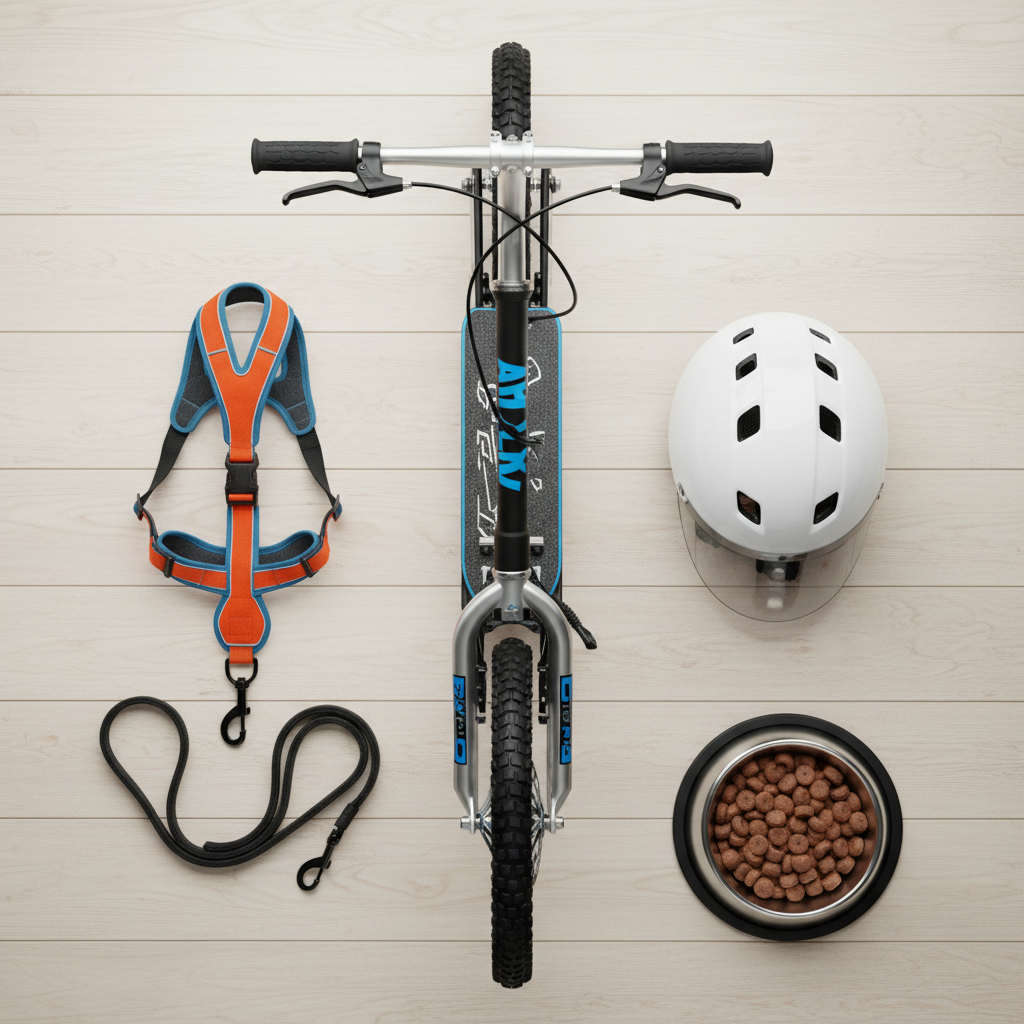
Before you even think about hitting the pavement, it’s crucial to have the right equipment. Using the wrong gear isn’t just ineffective; it can be dangerous for both you and your dog. Here’s a checklist of everything you’ll need to get started on the right paw.
The Right Scooter
Not just any scooter will do. You need a sturdy, off-road, or ‘dirt’ scooter with pneumatic (air-filled) tires and reliable brakes. These are far more stable than standard kick scooters and can handle small bumps and uneven surfaces much better. Look for one with a low deck to stand on, making it easier to kick and balance.
The Perfect Harness
This is the most important piece of equipment for your dog. Never, ever use a standard collar or walking harness. You need a specific pulling or mushing harness, often called an X-back or H-back harness. These are designed to distribute the pulling force evenly across your dog’s chest and shoulders, preventing injury to their neck and back. It should fit snugly but not restrict movement or breathing.
The Bungee Line
A bungee line is a special leash with a built-in shock absorber. This is critical for protecting both your body and your dog’s from the sudden jolts of starting, stopping, and turning. It connects your scooter’s handlebars to your dog’s harness. Look for one that’s the appropriate length for your dog’s size, typically around 6 to 8 feet.
Safety Gear for You
Your safety is just as important! Always wear a helmet. Knee pads, elbow pads, and gloves are also highly recommended, especially when you’re just starting out. You’re likely to take a tumble or two while you and your dog are learning to work as a team.
Other Necessities
- High-Value Treats: Think small, delicious morsels your dog absolutely loves, like tiny pieces of chicken, cheese, or special training treats. You’ll need lots of these!
- Water and a Collapsible Bowl: Scootering is hard work. Always carry water to keep your pup hydrated.
- Dog Booties (Optional): If you’ll be on rough pavement or in very hot or cold conditions, booties can protect your dog’s paw pads from injury.
The 5-Day Training Plan: From Zero to Scooter Hero

Welcome to the core of our training program! This 5-day plan is designed to build skills progressively, ensuring your dog is confident and happy every step of the way. Remember to keep sessions short (10-15 minutes) and always end on a positive note.
Day 1: Introduction & Positive Association
Today is all about making the scooter the most exciting new toy your dog has ever seen. The goal is to create a 100% positive association. Bring the scooter into your home or a quiet backyard. Let your dog sniff it and explore it on their own terms. Every time they show interest—a sniff, a glance, a tail wag—praise them enthusiastically and give them a high-value treat. Move the scooter a little. If the noise of the wheels startles them, reward them for staying calm. Place treats on the deck of the scooter for them to find. Do not try to put your dog on the scooter or attach them to it today. The entire session is just: Scooter = Awesome Treats and Praise!
Day 2: Harness Up & Basic Cues
Now, let’s introduce the harness. Put the special pulling harness on your dog, making it a fun experience with lots of treats and praise. Let them wear it around the house for a bit to get used to the feel. Today, we also introduce the ‘line out’ command. Attach the bungee line to their harness (but not to the scooter yet). Hold the end of the line and encourage your dog to move ahead of you and put gentle tension on the line. The moment they do, say ‘Line Out!’ or ‘Hike!’ and reward them. We’re teaching them that feeling tension on the harness means ‘move forward’. Practice this a few times in your yard or a quiet park.
Day 3: Introducing Motion (Walking)
It’s time to put it all together, but without the speed. Go to a quiet, safe area. Put the harness on your dog and attach the bungee line to both the harness and the scooter. Now, walk beside your scooter, holding the handlebars. Do not get on it yet. Encourage your dog to walk ahead of you. Use your ‘Hike!’ cue. Every few steps they take pulling the scooter’s weight, praise them like they just won an Olympic medal. Keep the first session very short, just a few minutes of walking. The goal is for them to get comfortable with the sensation of pulling the scooter and hearing its sounds behind them.
Day 4: The First Short Rides
This is the exciting day! Find a flat, straight, and smooth path with no distractions. Get your dog harnessed and hooked up. Give your ‘Hike!’ command and, as they start to pull, take one or two gentle kicks and step onto the scooter. Ride for just 10-20 feet, then use your ‘Whoa!’ (stop) command, come to a smooth stop, and shower your dog with praise and treats. The key is to keep it incredibly short and successful. We want them to think, ‘Wow, that was easy and fun!’ Repeat this a few times, with breaks in between. Don’t push for distance; focus on successful starts and stops.
Day 5: Building Confidence & Distance
You’ve built the foundation, and now it’s time to build on it. Today, you’ll start linking those short rides together. Go for slightly longer stretches, perhaps 50-100 feet. Start introducing gentle turns, using your ‘Gee’ (right) and ‘Haw’ (left) commands just before you initiate the turn with the handlebars. Help your dog by guiding the scooter. Keep the pace relaxed and focus on teamwork. As your dog gets more confident, you can gradually increase the distance. Always remember to watch your dog for signs of fatigue or stress and end the session while they’re still having a blast.
Essential Commands for Safe Scootering
Clear communication is the key to a safe and enjoyable ride. While your dog won’t learn these overnight, consistently using these specific cues from the very beginning will build a reliable language between you two.
Think of these as your scooter’s steering wheel and brakes. Practice them on walks even when you’re not scootering to reinforce their meaning.
| Command | Meaning | How to Teach It |
|---|---|---|
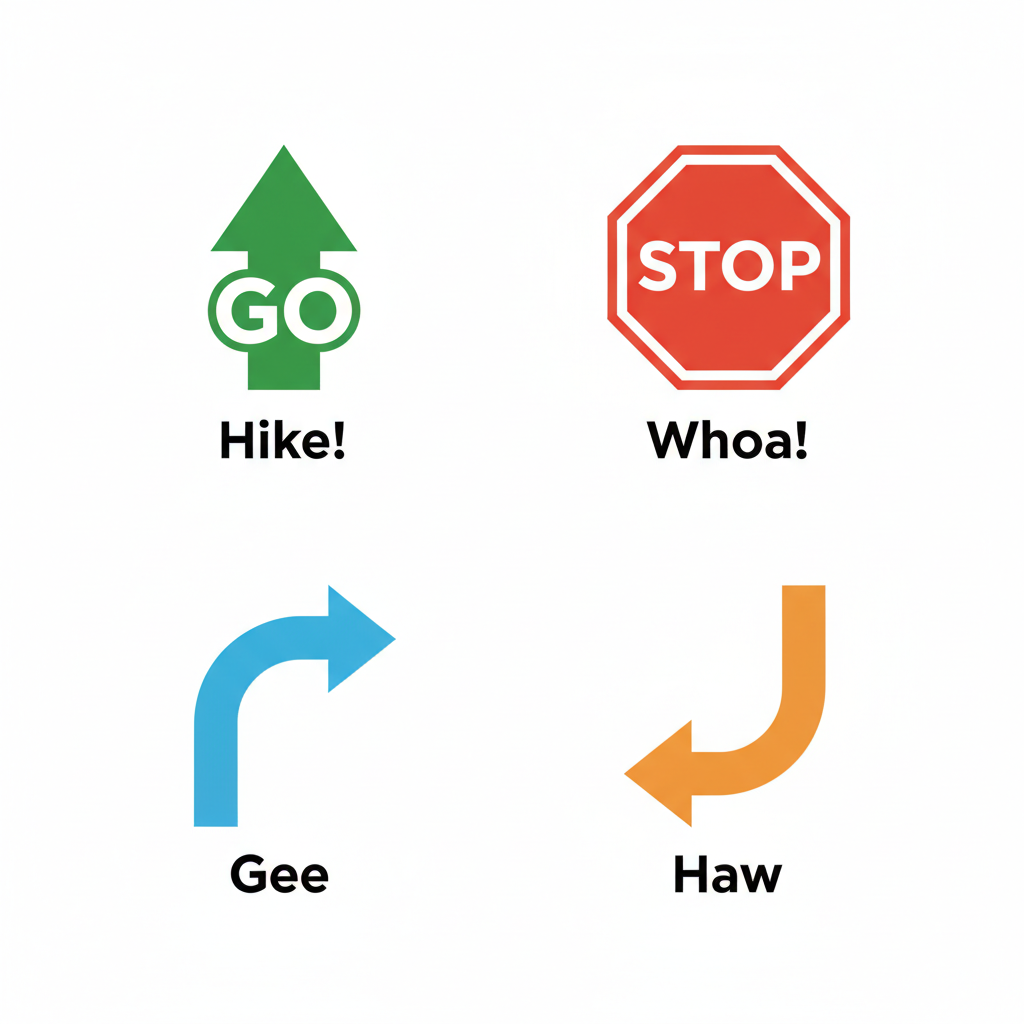
| Hike! / Let’s Go! | Start moving forward or speed up. | Start by saying it every time you begin walking or jogging with your dog on leash. Reward forward movement. During scooter training, use it right before you give a starting kick. |
| Whoa! / Stop! | Slow down and come to a complete stop. | Say ‘Whoa!’ in a calm, low voice as you begin to slow down on a walk. Reward them when they stop with you. On the scooter, say the command just before you apply the brakes. |
| Gee / Right | Turn to the right. | On walks, as you approach a right turn, say ‘Gee’ and use gentle leash pressure to guide them right. Reward them as soon as they turn. On the scooter, say the cue and then guide the handlebars to the right. |
| Haw / Left | Turn to the left. | Same as teaching ‘Gee,’ but for left turns. Say ‘Haw’ and guide them to the left, followed by a reward. Consistency is key for them to learn the difference. |
| On By / Leave It | Ignore a distraction (like a squirrel or another dog) and keep moving forward. | This is an advanced but vital command. Practice ‘Leave It’ in everyday situations first. On the scooter, when you see a distraction ahead, say ‘On By!’ in an upbeat, encouraging voice and reward them heavily once you’ve passed it. |
Expert Tip: Keep your verbal cues short, consistent, and distinct from one another. Use an excited tone for ‘Hike!’ and a calm, firm tone for ‘Whoa!’. Your dog will learn to read your tone as much as the word itself.
Troubleshooting Common Roadblocks
Even with the best plan, you might hit a few bumps in the road. Don’t worry, it’s completely normal! Here’s how to handle some common challenges you might face during your training.
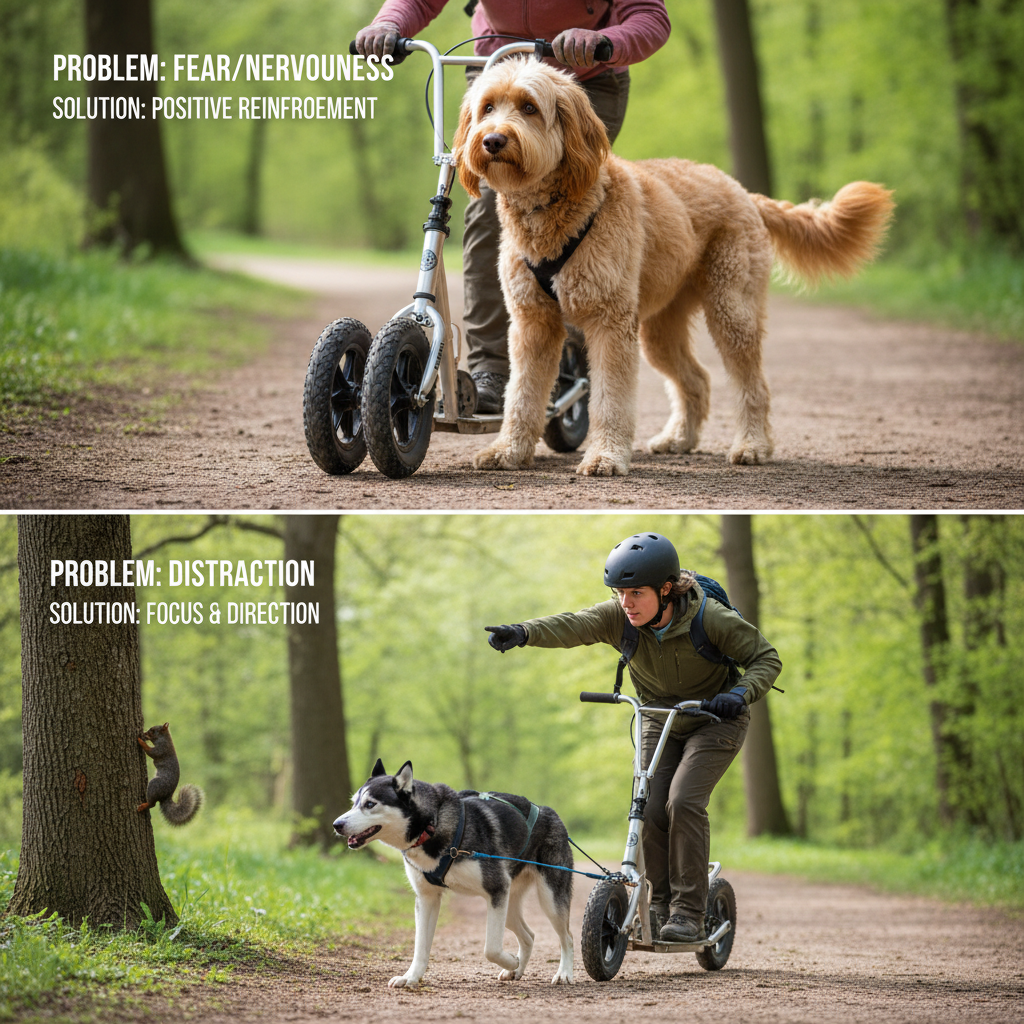
My Dog is Scared of the Scooter
Fear is a common first reaction. The solution is to go back to Day 1 and slow down. Rebuild that positive association. Spend several days just rewarding your dog for being near the scooter. Don’t even try to move it. Let them eat their dinner next to it. Play their favorite game near it. The goal is to desensitize them until the scooter is just a boring, non-threatening object that happens to be associated with great things.
My Dog Won’t Pull
Some dogs don’t naturally understand the concept of pulling. First, ensure the harness fits correctly and is comfortable. Then, go back to the ‘Line Out’ game from Day 2, but make it more exciting. Have a friend stand a short distance in front of your dog and call them excitedly. When your dog pulls towards them, praise and reward. You’re teaching them that tension on the harness is what gets them to the fun thing! Never punish them for not pulling; keep it positive.
My Dog is Easily Distracted
Squirrels, other dogs, interesting smells—the world is full of distractions! This is where the ‘On By’ or ‘Leave It’ command is your best friend. Start practicing in a very low-distraction environment first. The moment you see your dog look at something, before they have a chance to react, give your ‘On By’ cue in a happy, encouraging voice and reward them for looking back at you and continuing forward. You need to be more interesting than the distraction.
My Dog Pulls to One Side
This can happen if the dog is trying to sniff things on the side of the trail or if they just have a preference. Ensure your bungee line is attached to the center of your handlebars. Work on your ‘Gee’ and ‘Haw’ commands on walks to improve their steering. You can also practice in an area with a clear visual border, like the edge of a paved path, to help them understand the desired direction is straight ahead.
Safety First: The Unwritten Rules of the Road
Fun is the goal, but safety is the absolute prerequisite. Following these rules will ensure that you and your pup can enjoy this sport for years to come.
Know Your Dog
Not every dog is built for scootering. The sport is best suited for medium to large breeds over 35 pounds who are in good physical health. Brachycephalic (flat-faced) breeds like Pugs or Bulldogs are generally not suited for this kind of strenuous activity. Always consult your veterinarian before starting any new high-impact sport to ensure your dog is healthy enough, especially checking their joints and cardiovascular health. Pups should also be fully grown (usually 12-18 months) before they start pulling weight to protect their developing joints.
Check the Pavement Temperature
This is a non-negotiable rule. If the pavement is too hot for you to comfortably hold the back of your hand on it for seven seconds, it’s too hot for your dog’s paws. On warm days, stick to early morning or late evening rides, or find shady, soft-surface trails. Asphalt can get incredibly hot and cause serious burns to their paw pads.
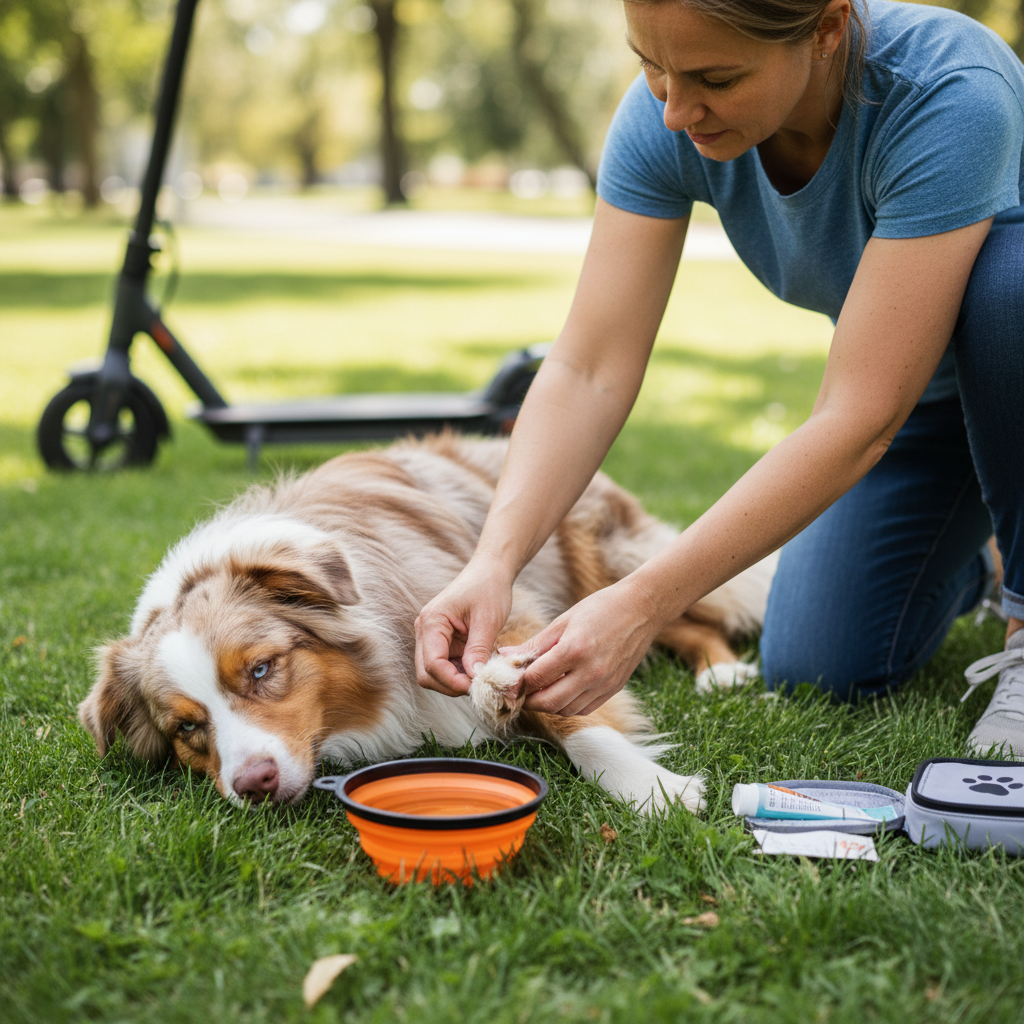
Paw Care is Paramount
After every single run, inspect your dog’s paws. Check for any cuts, scrapes, or signs of wear and tear on their pads. Keeping their nails trimmed will also help prevent injury. Using a paw balm can help keep their pads from drying out and cracking.
Hydration and Fuel
Always carry more water than you think you’ll need. Offer your dog water before, during (on breaks), and after your run. Also, avoid feeding your dog a large meal right before or right after a strenuous run to reduce the risk of bloat, a life-threatening condition.
Start Slow, Finish Strong
Don’t try to go for a 5-mile run on your first week. Just like a human training for a marathon, your dog needs to build up their fitness and stamina gradually. Start with short, easy runs and slowly increase the distance and difficulty over several weeks. Always warm up with a brisk walk and cool down with a slow walk at the end of every session.