Have you ever watched your dog pull on the leash with boundless energy and thought, “If only I could channel that power into something fun?” Well, you’re in luck! Welcome to the exhilarating world of urban mushing, also known as dog scootering. It’s a fantastic way to bond with your high-energy canine, give them an incredible physical and mental workout, and explore your local parks and trails in a whole new way.
Forget the snowy landscapes and teams of huskies you see in the movies. Urban mushing adapts the principles of dogsledding for just about any environment, using a scooter instead of a sled. It’s a team sport where you and your dog work together, building communication, trust, and an unbeatable partnership. Whether you have a natural puller like a Husky or a Malamute, or just an energetic medium-to-large breed dog who loves to run, scootering could be your new favorite hobby.
This guide is your starting line. We’ll walk you through everything a beginner needs to know, from the essential gear that keeps you both safe to the step-by-step training that turns your enthusiastic pup into a confident mushing partner. So, grab a helmet, get ready to learn some fun new commands, and prepare for an adventure that will leave you both tired and happy. Let’s roll!
Gearing Up: The Essential Equipment for Safe Scootering
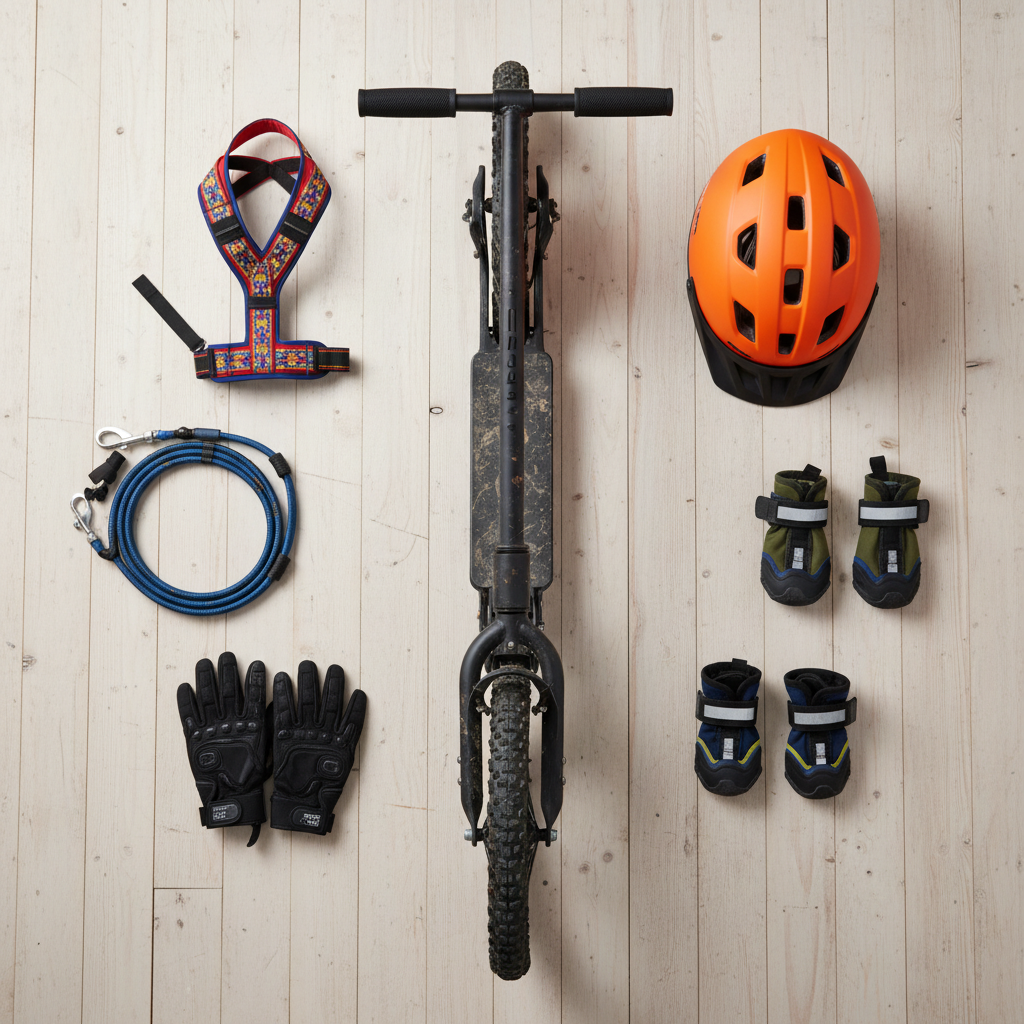
Before you hit the pavement, getting the right gear is non-negotiable. This isn’t just about performance; it’s about the safety and comfort of both you and your dog. Using improper equipment, like a standard collar or a flimsy scooter, can lead to serious injury. Here’s a breakdown of the must-have items to get you started on the right paw.
For Your Dog: The Powerhouse’s Kit
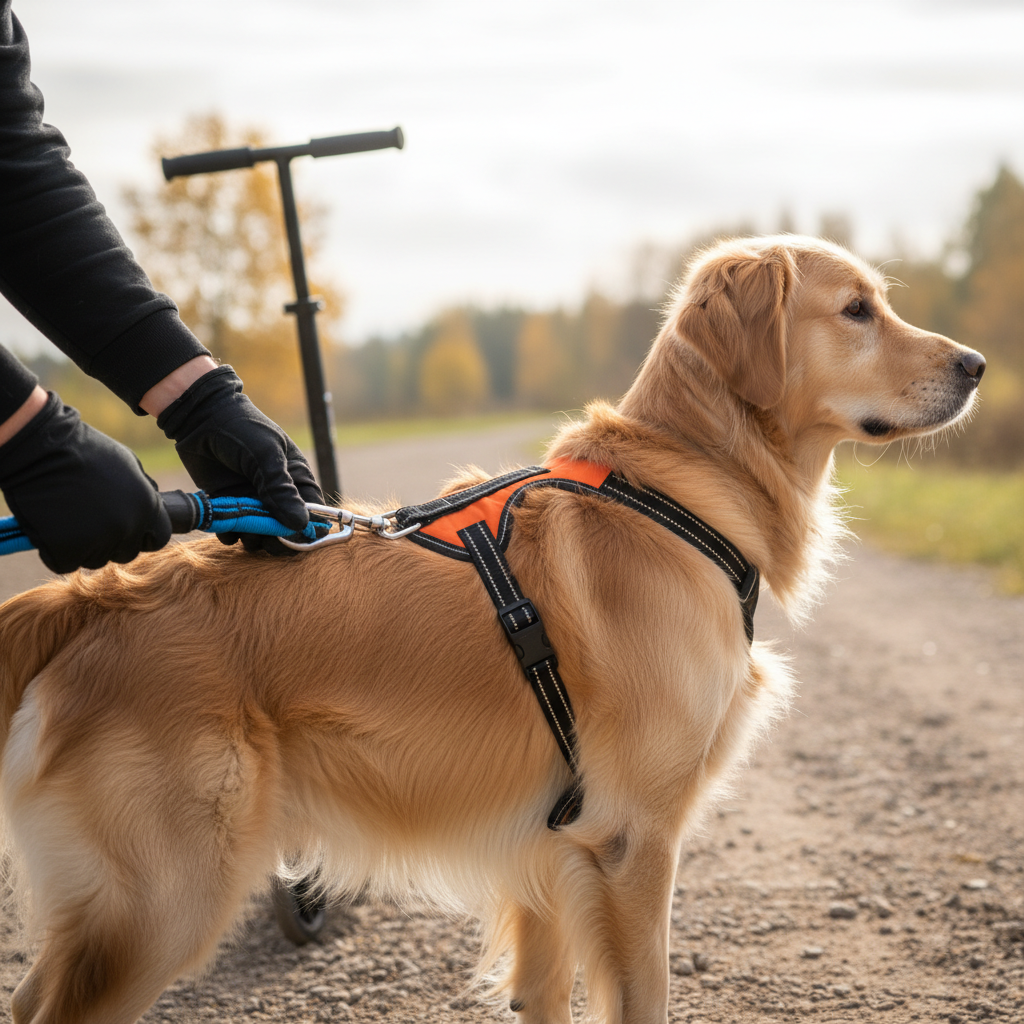
- A Proper Pulling Harness: This is the most critical piece of equipment for your dog. Never use a standard walking collar or a no-pull front-clip harness for this activity. A proper mushing harness, like an X-back or a half-harness, is designed to distribute the pulling force evenly across your dog’s chest and shoulders, allowing for full range of motion without restricting their breathing. It protects their neck and spine from injury.
- A Bungee Line (Gangline): This is not just any leash. A bungee line, typically 6 to 8 feet long, connects your dog’s harness to your scooter. The built-in shock absorber is crucial as it protects both you and your dog from jarring movements when starting, stopping, or navigating uneven terrain.
- Booties (Optional but Recommended): Pavement, gravel, and rough trails can be tough on your dog’s paw pads. Canine booties can prevent cuts, scrapes, and wear-and-tear, especially on longer runs or in hot or cold weather.
- Water and a Collapsible Bowl: Your dog will be working hard. Always carry fresh water to keep them hydrated and prevent overheating.
For You: The Navigator’s Setup
- A Suitable Scooter: Don’t grab your kid’s Razor scooter for this! You need a sturdy, off-road capable kick scooter. Look for one with large, air-filled tires (like a BMX bike), effective front and back brakes, and a wide footboard for stability.
- A Helmet: This is an absolute must. Accidents can happen, and protecting your head is priority number one. A good quality bike or skate helmet is perfect.
- Gloves and Protective Gear: Padded gloves can prevent blisters and improve your grip. Knee and elbow pads are also a great idea, especially when you’re just starting out.
- A Hip Belt or Scooter Attachment: While you can attach the bungee line directly to the scooter’s head tube, many mushers prefer a quick-release attachment or wearing a canicross belt. This can lower the center of gravity and make it easier to detach from your dog in an emergency.
Teaching the Lingo: Essential Mushing Commands
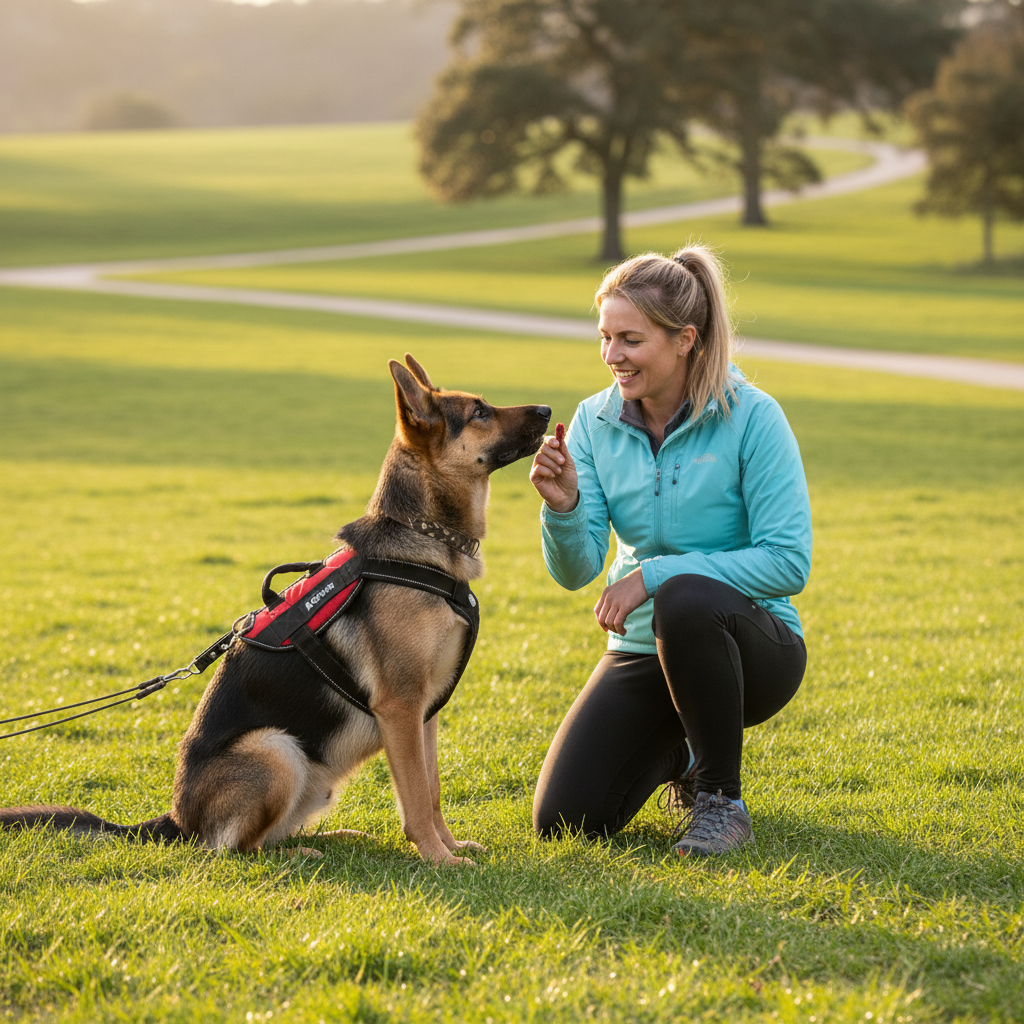
Urban mushing is a team sport, and like any good team, communication is key. You’re not just a passenger; you’re the navigator, and your dog is the engine. They need to understand your verbal cues to know when to go, stop, slow down, and which way to turn. Start teaching these commands in a low-distraction environment, like your backyard or a quiet park, long before you ever hook them up to the scooter.
The Core Four Commands:
- “Hike!” (or “Let’s Go!”): This is your “go” command. It tells your dog it’s time to start moving forward and pull. Use an excited, encouraging tone of voice. Practice this on walks by saying “Hike!” just as you start moving.
- “Whoa!” (or “Stop!”): This is your brake. It’s arguably the most important command for safety. It means stop immediately. Teach this by saying “Whoa!” firmly and then stopping your walk. Reward your dog heavily when they stop with you. Practice until it’s rock solid.
- “On By!” (or “Leave It!”): This command is your secret weapon against distractions. Squirrels, other dogs, interesting smells—they will all try to derail your run. “On By!” tells your dog to ignore the distraction and keep moving forward. Practice this on walks by pointing out a distraction, saying “On By!” and rewarding them enthusiastically when they look away from it and continue walking with you.
- “Easy!”: This cue tells your dog to slow down. It’s useful for approaching intersections, going downhill, or just managing pace. Practice by saying “Easy!” in a calm voice while you simultaneously slow your walking pace. Reward them for matching your speed.
Directional Cues (The Next Level):
Once you’ve mastered the basics, you can introduce turns. These are incredibly helpful for navigating trails.
- “Gee!”: This means turn right.
- “Haw!”: This means turn left.
Expert Tip: Train these commands without the scooter first. Put your dog in their harness, attach a leash (not the bungee line), and go for a walk or run. Practice calling out the commands and rewarding them with high-value treats and praise when they respond correctly. Keep training sessions short and fun to build a positive association. Consistency is everything!
Your Step-by-Step Training Plan: From Zero to Mushing Hero
Now that you have the gear and the lingo, it’s time to put it all together. This process should be gradual, positive, and fun. Rushing it can create fear or bad habits. The goal is to build your dog’s confidence and excitement for the sport. Let’s break it down into manageable steps.
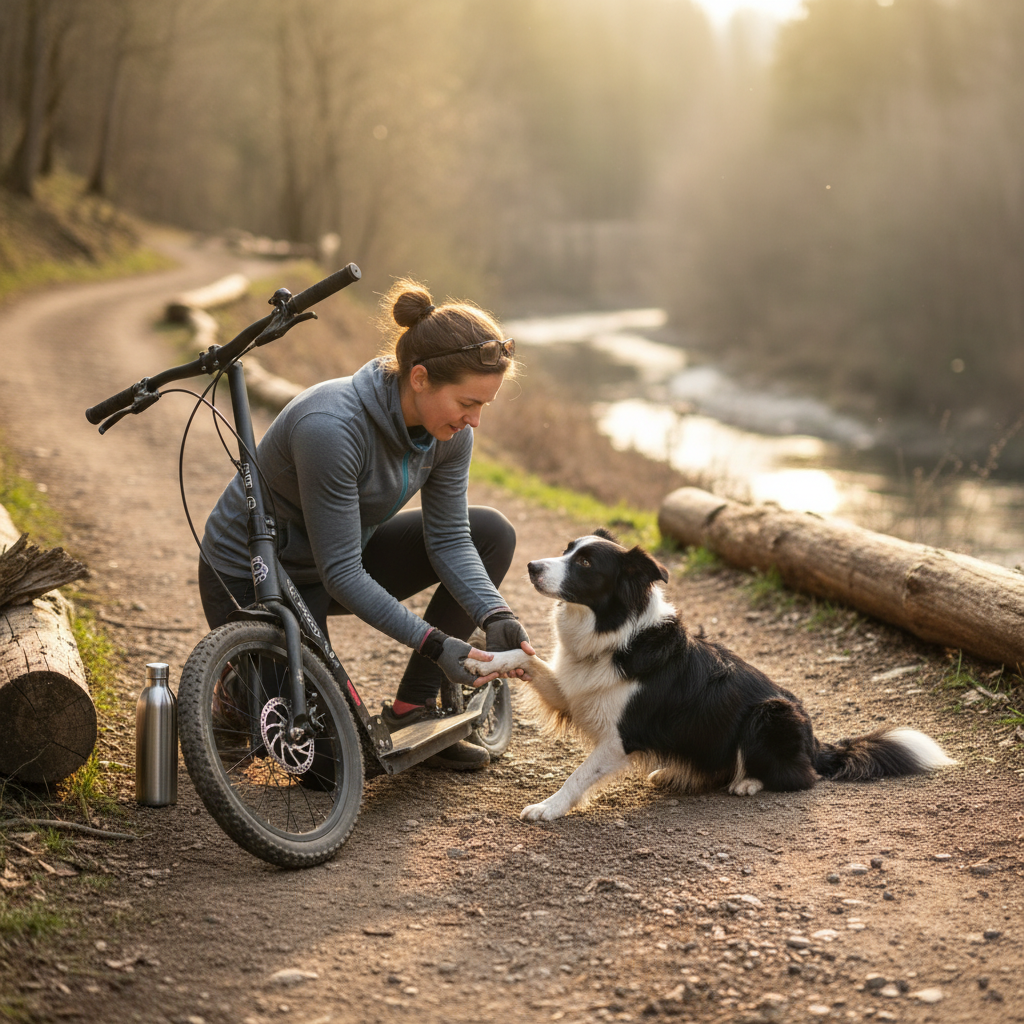
Step 1: Gear Introduction
First, just let your dog get used to the equipment. Leave the harness and scooter out in your living room. Let them sniff it. Place treats on the scooter’s footboard. Put the harness on your dog for a few minutes at a time while doing something fun, like feeding them dinner or playing with a favorite toy. The goal is to create a positive association: harness = good things happen!
Step 2: Harness & Line Training (No Scooter!)
Put your dog in their pulling harness and attach the bungee line to it. Hold the other end and go for a walk. Encourage your dog to walk out in front of you. Use your “Hike!” command to ask them to pull gently against the line’s tension. Praise them like crazy when they do! Keep these sessions short (5-10 minutes) and exciting. This teaches them that it’s okay to pull in this specific harness, which is different from their regular walking collar where you discourage pulling.
Step 3: Introducing the Scooter (Human Only)
Next, it’s time for your dog to get used to the scooter in motion. Ask a friend to help, or find a quiet, safe place. Have your dog sit and stay (or have your friend hold their leash) a safe distance away. You should get on the scooter and ride it around calmly. Make some noise with the brakes, roll over some small bumps. Let your dog see, hear, and smell the scooter as a normal, non-threatening object. Reward your dog for their calm behavior.
Step 4: The First Hook-Up
This is the big moment! Find a wide, straight, soft-surface path, like a dirt trail or grassy field. Avoid hard pavement for the first few tries.
- Put your dog in their harness.
- Attach the bungee line to the harness.
- Attach the other end of the line to your scooter.
- Get on your scooter, with one foot on the ground, ready to push off and brake.
- Give your excited “Hike!” command and push off to help them get started.
Go for just 20-30 feet on the first try. As soon as they pull, shower them with praise and use your “Whoa!” command to stop. End the session on this super positive, successful note. The goal isn’t distance; it’s building the idea that pulling the scooter is the best game ever.
Step 5: Building Duration and Distance
Once your dog is confidently pulling for short distances, you can gradually start increasing the length of your runs. Start with a quarter-mile, then a half-mile, and so on. Always end the session while your dog is still having fun and has energy left. This keeps them eager for the next run. During these runs, practice your “On By!”, “Easy!”, “Gee!”, and “Haw!” commands in real-world situations. Remember to always assist by kicking, especially when starting out or going uphill, to make the job easier and more rewarding for your dog.
Safety First: The Golden Rules of the Road and Trail
Scootering is incredibly fun, but it’s also a high-speed sport. Your number one priority is keeping yourself, your dog, and others around you safe. Adhering to a few golden rules will ensure your adventures are memorable for all the right reasons.
Know Your Dog’s Limits
- Age and Health: Dogs should be fully grown before they start any high-impact activity like scootering. For most medium-to-large breeds, this is between 1.5 and 2 years old. Their growth plates need to be closed to prevent skeletal damage. Always get a clean bill of health from your vet before starting.
- Breed Considerations: While many breeds can enjoy this sport, it’s best suited for dogs over 35 pounds who have a natural inclination to run and pull. Brachycephalic (flat-faced) breeds like Pugs or Bulldogs are not suited for this activity due to breathing difficulties.
- Temperature Check: Dogs can overheat easily. Avoid running in high temperatures or humidity. A good rule of thumb is the “Sum of 100” rule: if the temperature (°F) plus the humidity percentage is over 100-120, it’s too hot to run. Early mornings or late evenings are best in warmer months.
Trail and Road Etiquette
- Yield to Others: You are faster and larger than pedestrians. Always be prepared to slow down, stop, and yield the right-of-way. Give a friendly verbal warning like “On your left!” well in advance.
- Stay in Control: Only go as fast as you can safely stop. Keep your hands on the handlebars and be ready to use your brakes at all times.
- Scoop the Poop: This should go without saying. Being a responsible dog owner is part of being a good ambassador for the sport.
Pre- and Post-Run Checklists
| Checklist Item | Description |
|---|---|
| Before the Run | Check your equipment for any wear and tear (harness, line, scooter brakes). Do a quick paw check on your dog. Make sure they’ve had a chance to go to the bathroom. |
| After the Run | Offer your dog fresh water. Check their paw pads for any cuts or scrapes. Give them a light cool-down walk. Check their harness for any rubbing or chafing spots. |
Important Takeaway: Never, ever let go of the scooter and allow your dog to run free while attached. This is extremely dangerous for your dog and anyone they might encounter. If you fall, hold on to the handlebars and use your “Whoa!” command.
Conclusion
Starting your urban mushing journey is the beginning of a remarkable new chapter in your relationship with your dog. It’s more than just exercise; it’s about teamwork, communication, and pure, unadulterated joy. Seeing the world from behind your happy, running dog is an experience like no other.
Remember to be patient with your dog and with yourself. Every team learns at its own pace. Celebrate the small victories, keep your training sessions positive, and always prioritize safety. Before you know it, you’ll be gliding down your favorite paths, powered by your best friend, with the wind in your hair and smiles all around. Now get out there and start your adventure!
Similar Posts
Wilderness Posing: How to Teach the ‘Hug a Tree’ Photo Prop
Ready to take your outdoor dog photos to the next level? Our step-by-step guide will teach you how to train your furry friend to do the adorable ‘hug a tree’ pose. It’s a fun trick that doubles as a fantastic bonding experience!
Safe Cycling: How to Train Your Dog to Run Beside Your Bike
Dreaming of hitting the open road with your furry best friend trotting alongside your bike? It’s an amazing way to exercise and bond! Our step-by-step guide covers everything from the right gear to essential training commands to ensure every ride is safe, fun, and exhilarating for you both.
Winter Exercise: Introduction to Light Sled Pulling for Pet Dogs
Tired of the same old winter walks? Discover the thrilling world of light sled pulling! Our guide shows you how to safely introduce your pet dog to this exciting sport, strengthening your bond and busting winter boredom. Let’s get mushing!
Skating With Dogs: How to Teach Your Pup to Pull You Safely
Ready for the ultimate urban adventure with your dog? Learn how to safely teach your pup to pull you on a skateboard with our expert step-by-step guide. We cover everything from the right gear and essential commands to safety rules and troubleshooting tips.
Summer Fun: Teaching Your Dog to Brave the Backyard Sprinkler
Is your dog terrified of the sprinkler? Turn that fear into fun! Our step-by-step guide, filled with expert tips, will help your pup learn to love this classic summer cool-down activity in no time.
Potty Training Hacks: Getting Fussy Dogs to Go on Wet Grass
Struggling with a dog who refuses to go potty in the rain? You’re not alone! This guide dives into why your pup hates wet grass and provides step-by-step training methods and clever hacks to make rainy-day potty breaks stress-free for both of you.