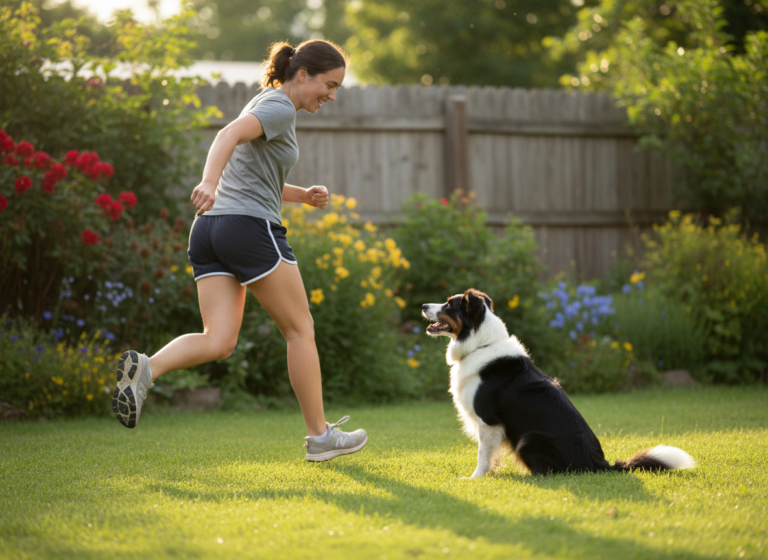
Have you ever had that heart-stopping moment? You’re on a walk, your dog is trotting happily beside you, and then—BAM—they lunge for a mysterious, half-eaten chicken wing on the sidewalk. Or maybe you’re cooking dinner, a piece of onion falls to the floor, and your pup is on it before you can even say ‘No!’ These moments are terrifying for any pet owner, and for good reason. Many common human foods, discarded items, and even plants can be toxic or dangerous for our furry best friends.
This is where food refusal training comes in. It’s not just about teaching a neat party trick; it’s about instilling a crucial, potentially life-saving skill. By teaching your dog to ignore dropped items or food offered by strangers, you’re building an invisible shield of safety around them. This guide is here to walk you through the process, step-by-step. We’ll turn those panic-filled lunges into moments of proud partnership between you and your well-trained companion. Ready to build that trust and keep your pup safe? Let’s get started!
Why ‘Leave It’ is a Non-Negotiable, Life-Saving Skill

Let’s be honest, dogs explore the world with their mouths. It’s completely natural for them. However, our human world is filled with things that are not safe for canine consumption. Teaching a solid food refusal command, often cued with ‘Leave It,’ is one of the most important things you can do for your dog’s long-term health and safety.
The Dangers Lurking on the Ground
Think about your average walk around the neighborhood. What might your dog encounter? The list is long and scary:
- Toxic Foods: Dropped grapes, raisins, chocolate, onions, garlic, or items containing the artificial sweetener xylitol are extremely dangerous.
- Choking Hazards: Cooked bones (which can splinter), bottle caps, rocks, and pieces of plastic toys can all lead to choking or internal blockages requiring emergency surgery.
- Poisons: Antifreeze spills, rat poison pellets, or discarded medications can be fatal even in small amounts.
- Unsanitary Items: Old, moldy food or animal waste can cause severe gastrointestinal upset.
Beyond the Walk: Safety at Home
This command isn’t just for the great outdoors. At home, a reliable ‘Leave It’ prevents your dog from snatching pills you’ve accidentally dropped, gobbling up dangerous food that falls off the counter, or chewing on electrical cords. It also sets boundaries and teaches impulse control, which is a foundational skill for all other aspects of good behavior. A dog that understands ‘Leave It’ is a dog that understands how to listen and defer to you, strengthening your bond and making your home a safer, more peaceful place.
Expert Tip: Think of ‘Leave It’ as your dog’s emergency brake. You hope you never have to use it in a real crisis, but you practice it regularly so it works flawlessly when you do.
Getting Started: Your Training Toolkit and Mindset
Before you jump into training, let’s get you set up for success. The right tools and, more importantly, the right mindset will make the process smoother and more effective for both you and your dog. Remember, this is a team activity!
Gather Your Supplies
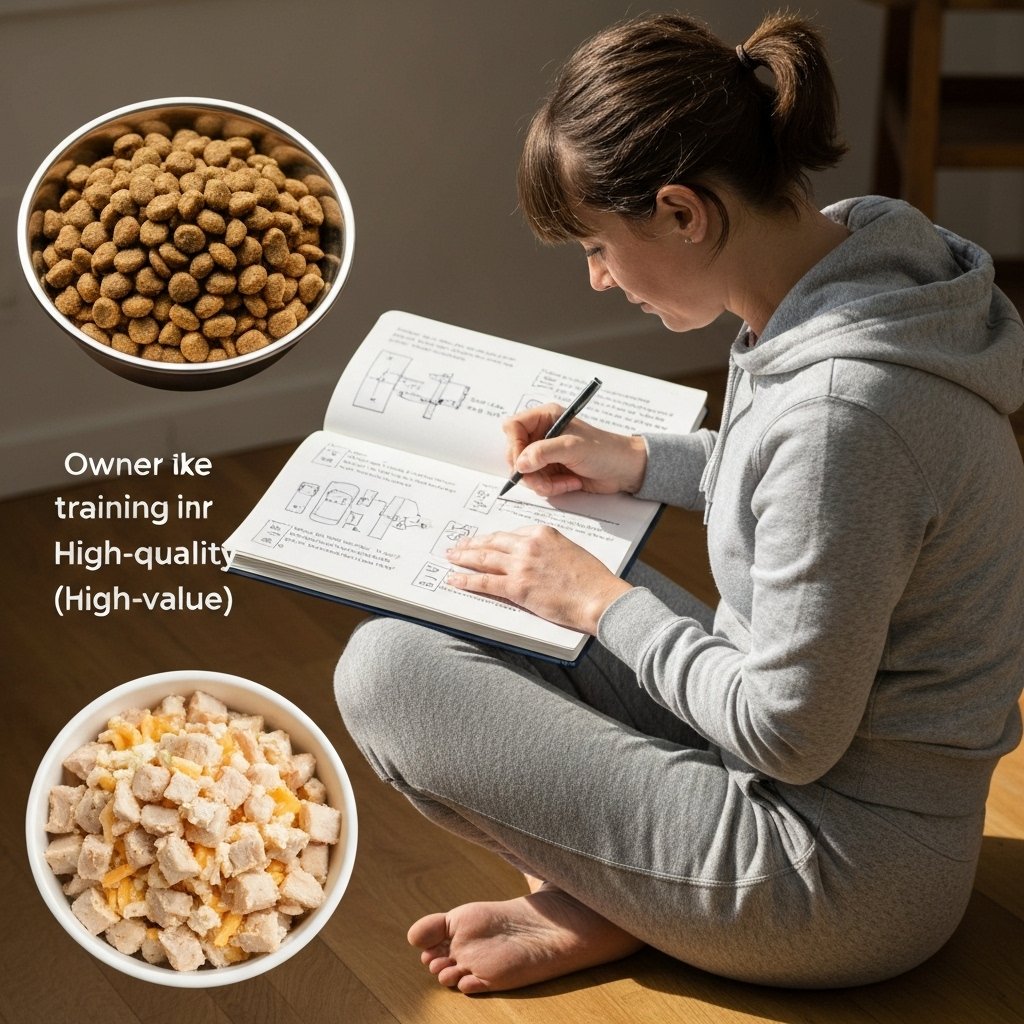
You don’t need a lot of fancy equipment, but having the right treats is key. You’ll want to create a ‘treat hierarchy’ to help your dog understand the value of their choices.
- Low-Value Treats: These are your dog’s regular kibble or boring, dry biscuits. They’re ‘okay,’ but not super exciting. You’ll use these as the ‘bait’ item your dog needs to leave.
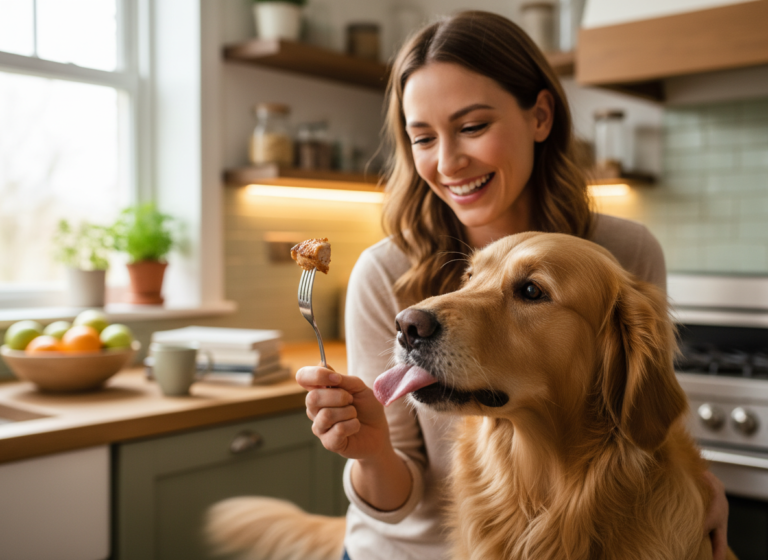
- High-Value Treats: This is the good stuff! Think small pieces of boiled chicken, cheese, hot dogs, or smelly, soft training treats. This is the jackpot reward your dog gets for making the right choice (leaving the boring treat).
You’ll also need a quiet, distraction-free space to start, like your living room or kitchen. A leash can be helpful in later stages when you start practicing in more distracting environments.
Adopt a Positive Mindset
Your attitude is the most important tool you have. Keep these principles in mind:
- Be Patient: Your dog won’t master this in one session. It takes time and repetition. Celebrate small wins and don’t get discouraged by setbacks.
- Stay Positive: This training is built on positive reinforcement. We are teaching the dog what we want them to do, not punishing them for what we don’t. Keep your tone light and encouraging. Never scold your dog for failing; simply reset and try an easier version of the exercise.
- Keep Sessions Short & Sweet: Dogs, especially puppies, have short attention spans. Aim for multiple 5-10 minute sessions throughout the day rather than one long, grueling one. Always end on a positive note when your dog is successful!
The ‘Leave It’ Command: A Step-by-Step Training Guide
Alright, you’ve got your treats and your positive attitude. It’s time to teach the command! We’re going to build this skill in layers, ensuring your dog understands each step before moving on to the next. Let’s break it down.
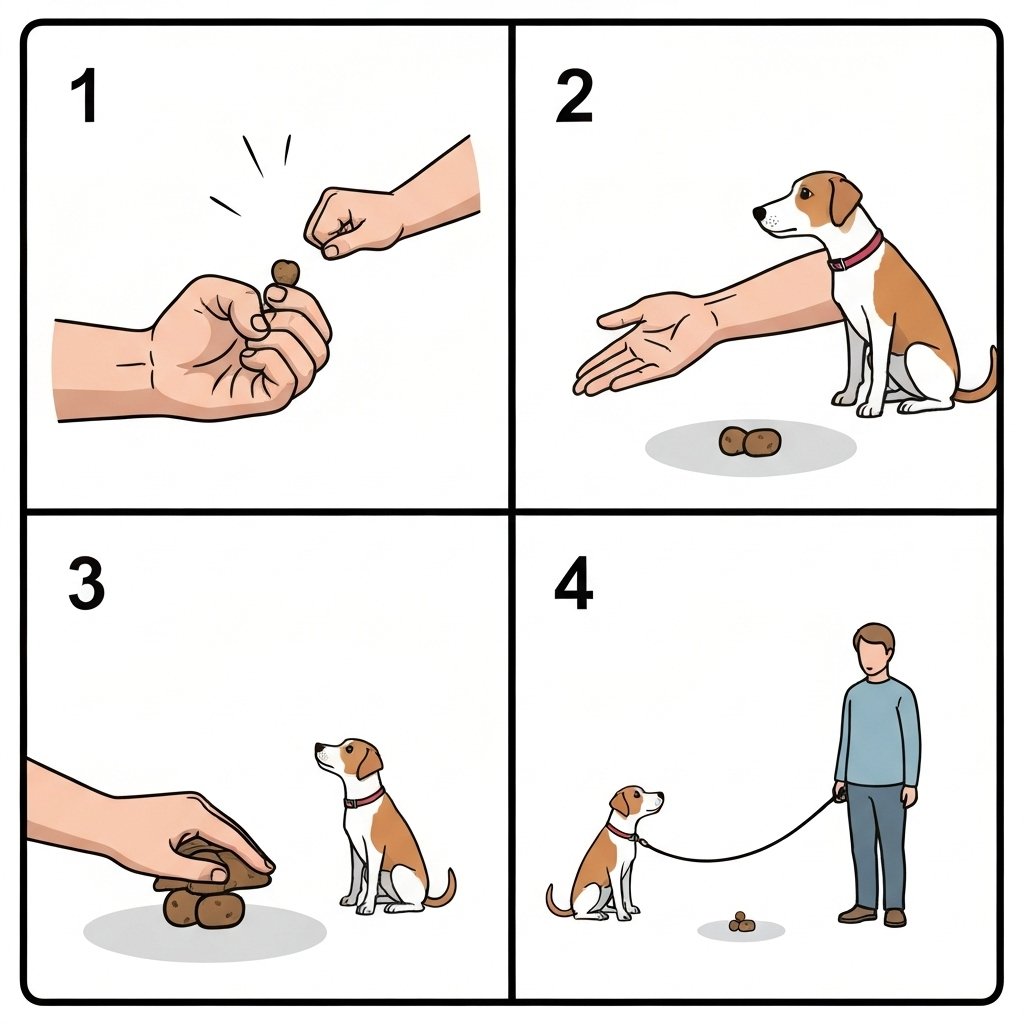
Step 1: The Closed Fist Method
The goal here is to teach your dog that ignoring something in your hand leads to a better reward.
- Place a low-value treat (kibble) in your hand and close your fist.
- Let your dog sniff your fist. They will likely lick, paw, and nudge at it. Ignore this behavior completely. Don’t say anything.
- The very second your dog pulls their head away, even for a split second, say ‘Yes!’ in an excited tone and give them a high-value treat from your other hand.
- Repeat this process several times. Your dog will quickly learn that leaving the fist alone is what gets them the reward.
Step 2: Introducing the Cue & The Open Hand
Now we add the verbal cue and make it a little harder.
- Once your dog is reliably backing away from your closed fist, you can add the cue. As you present your fist, say ‘Leave it’ in a calm, neutral tone.
- When they back away, mark with ‘Yes!’ and reward from the other hand.
- Next, up the challenge. Place the low-value treat in your open palm. As your dog goes for it, say ‘Leave it’ and quickly close your fist if they try to snatch it.
- If they hesitate or look at you instead of the treat, ‘Yes!’ and reward. The goal is for them to see the treat but choose not to take it.
Step 3: The Floor Drop
This is where it starts to feel like a real-world scenario.
- With your dog on a leash to prevent them from grabbing the treat and running, place a low-value treat on the floor, but keep your hand covering it.
- Let your dog sniff your hand. As before, wait for them to back away. When they do, ‘Yes!’ and reward with a high-value treat.
- Once they are successful, try placing the treat on the floor and lifting your hand a few inches. If they lunge, cover it quickly. If they wait, ‘Yes!’ and reward.
- Gradually increase the time they must wait before you reward them. You are building their impulse control. Important: The reward should still come from your hand, not the treat on the floor. The floor treat is ‘dead.’
Step 4: Adding Distance and Proofing
Your dog is leaving the treat on the floor alone while you’re right there. Now let’s make it more realistic.
- Ask your dog to ‘Leave it’ and take one small step back. If they hold their position, step back to them, say ‘Yes!’, and reward them.
- Gradually increase the distance you can move away from the ‘bait’ treat.
- Start practicing ‘leaving’ higher-value items. Can they leave a piece of cheese to get a piece of chicken? This is called ‘proofing’ the behavior.
- Finally, give them a release cue. After they have successfully left the item, say a word like ‘Okay!’ and toss a treat away from the bait item to reset them.
Troubleshooting Tip: If your dog keeps grabbing the item, you’ve moved too fast! Go back a step to where they were successful and practice more before moving forward. Training is a dance, sometimes you have to take a step back to move forward.
Real-World Practice: Taking ‘Leave It’ on the Road
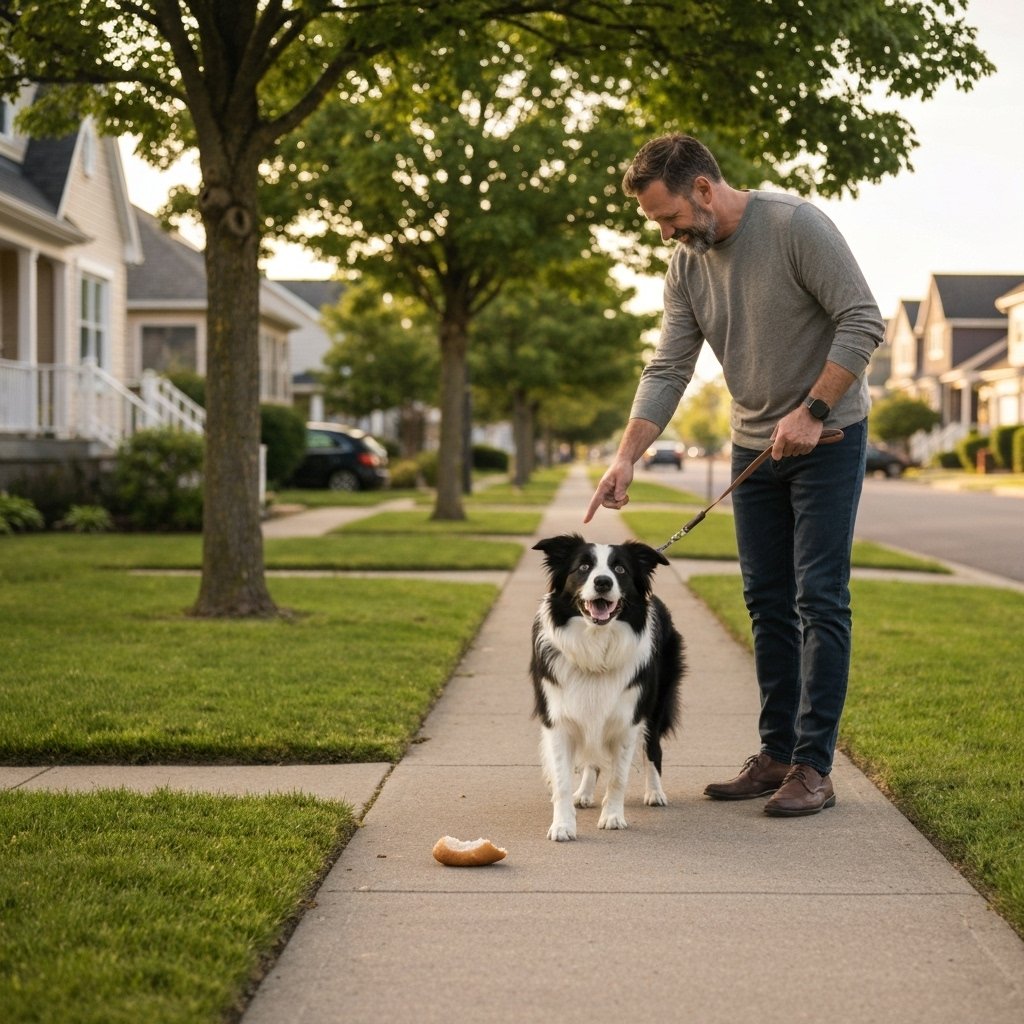
Your dog might be a ‘Leave It’ champion in the living room, but the real test is outside, where distractions are everywhere. Transitioning the skill from a controlled environment to the real world requires a deliberate and patient approach.
Start in a Low-Distraction Outdoor Area
Don’t go straight to the busiest dog park. Start in your own backyard or a quiet street. Keep your dog on a leash. This is non-negotiable for safety. The leash is your backup if the verbal command fails.
- Set Up Scenarios: Before your dog comes out, ‘plant’ some low-value bait items (like kibble) on your walking path.
- Walk the Path: As you approach a planted item and see your dog notice it, give your ‘Leave It’ command in an upbeat but firm tone.
- Reward Generously: When your dog looks away from the item and up at you, throw a party! Praise them enthusiastically and give them a super high-value jackpot reward. You want to make it clear that ignoring ground-trash is way more rewarding than investigating it.
- Use the Leash for Management: If they lunge for the item, use the leash to gently guide them away. Don’t yank or punish. Just prevent them from getting the item and try again from a greater distance, making it easier for them to succeed.
Increasing the Difficulty
Once your dog is reliable in quiet outdoor settings, you can slowly increase the level of difficulty.
- Higher-Value Bait: Try planting slightly more interesting (but still safe) items, like a piece of a plain cracker.
- More Distractions: Practice on a sidewalk with more foot traffic or at the edge of a quiet park.
- Moving Objects: This is an advanced step. Practice having your dog ‘leave’ a rolling ball or a piece of kibble you toss. This is excellent for dogs with a high prey or chase drive.
The key to real-world success is consistency. Use the ‘Leave It’ command every time you see your dog about to pick something up they shouldn’t. Every successful repetition reinforces the behavior and makes it stronger and more automatic for your dog.
Troubleshooting Common ‘Leave It’ Problems
Even with the best training plan, you might hit a few bumps in the road. That’s completely normal! Let’s look at some common challenges and how to work through them.
| The Problem | The Solution |
|---|---|
| My dog grabs the treat before I can say anything! | Your dog has too much freedom. Go back to basics. Use a leash indoors, or start with the treat fully enclosed in your fist. You’re likely moving too quickly to the ‘open hand’ or ‘floor’ stage. Slow down and focus on building that initial impulse control. |
| My dog only listens when I have a treat in my other hand. | This is a classic ‘show me the money’ problem. Start ‘fading’ the lure. Practice rewarding from a treat in your pocket or a nearby pouch instead of your other hand. Also, vary your rewards. Sometimes use a super tasty treat, other times just enthusiastic verbal praise (‘Good boy!’), or a fun game of tug. Keep them guessing! |
| It works perfectly at home, but my dog ignores me outside. | This is a problem of generalization. Dogs don’t automatically transfer skills to new environments. You need to re-train the command from the beginning in each new location. Start in the backyard, then the front yard, then a quiet street, slowly increasing the distraction level as described in the previous section. |
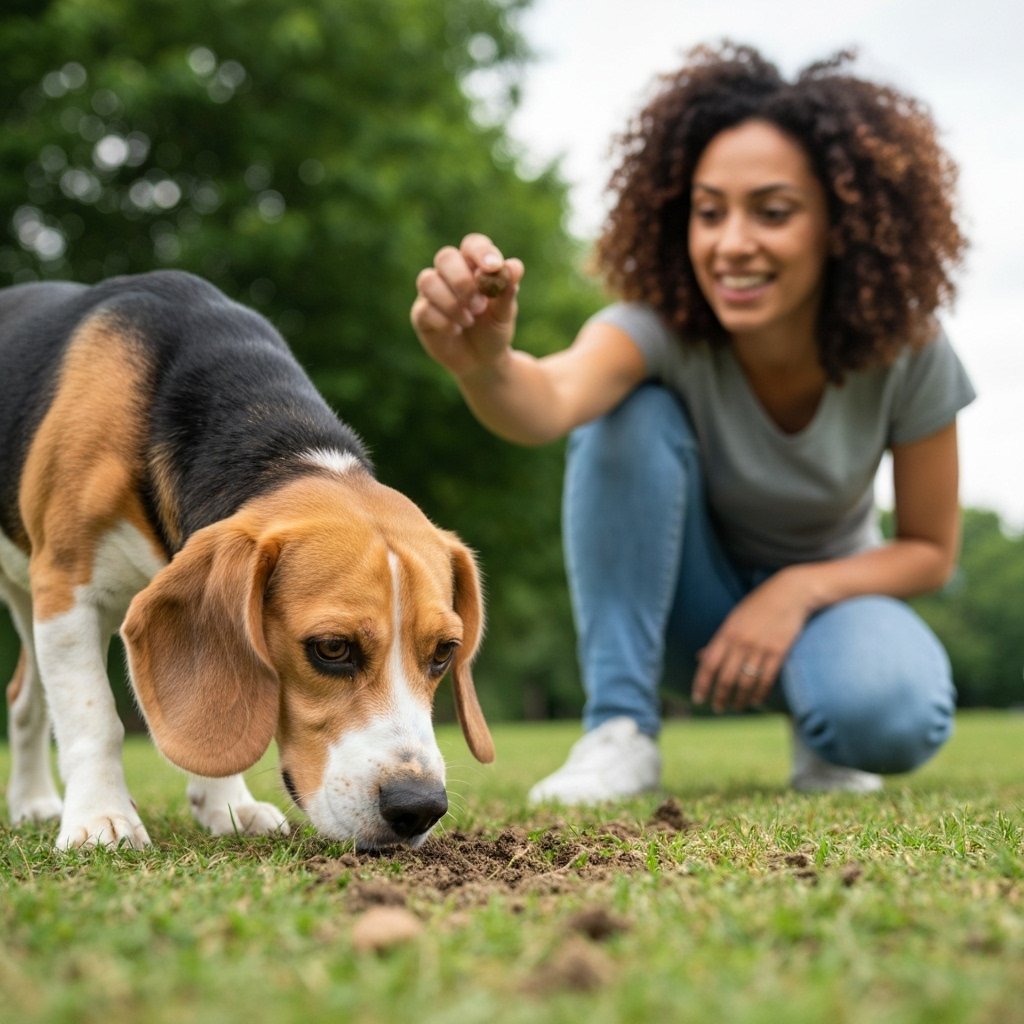
| My dog is a ‘hoover’ (e.g., a Labrador or Beagle) and seems obsessed with food. | For highly food-motivated breeds, the reward for leaving an item must be significantly better than the item itself. You can’t expect them to leave a piece of old pizza for a dry piece of kibble. Use the highest value rewards you can think of (real meat, cheese, etc.) and be extra consistent with your training. Management (like using a basket muzzle on walks if the scavenging is severe) might be necessary for safety while you train. |
Remember, the goal is not perfection, but progress. Every training session, no matter how small, is a step towards a safer and more well-behaved companion. Don’t give up!
Conclusion
Teaching your dog food refusal isn’t just another command; it’s a profound act of love and a commitment to their safety. By investing the time and patience into a solid ‘Leave It,’ you are equipping your best friend with the ability to navigate a world that isn’t always dog-friendly. You’re preventing potential vet emergencies, building incredible impulse control, and strengthening the bond of trust between you.
The journey will have its challenges, and some days will be more successful than others. But every time your dog looks up at you instead of lunging for that dropped piece of food, you’ll feel an immense sense of pride and relief. Keep your training sessions positive, celebrate the small victories, and stay consistent. Your dog’s safety is worth every single effort. Now, go grab some treats and start building that life-saving skill together!