Living in the city with a small dog is a unique adventure. The parks, the cafes, the vibrant streets… it’s all at your fingertips! But what about navigating the city’s veins—the subway? For many urban pet owners, the thought of taking their dog on public transport can be daunting. But it doesn’t have to be! With the right gear and a little bit of patient training, your pint-sized pal can become the perfect travel companion.
This guide is your ticket to freedom. We’re going to walk you through everything you need to know, from picking the absolute best backpack to turning it into your dog’s personal happy place. Forget struggling with bulky carriers or worrying about stressing out your pup. We’ll use positive, fun, and fear-free methods to make the backpack a signal for adventure. Ready to make your dog officially ‘Subway Ready’? Let’s get started!
Step 1: Choosing the Perfect Canine Commuter Backpack
Before you can even think about training, you need the right equipment. Not all dog backpacks are created equal, and choosing the wrong one can make the experience uncomfortable or even unsafe for your pup. Think of it as choosing their personal first-class cabin for the subway. Comfort and safety are non-negotiable!
Key Features to Look For:
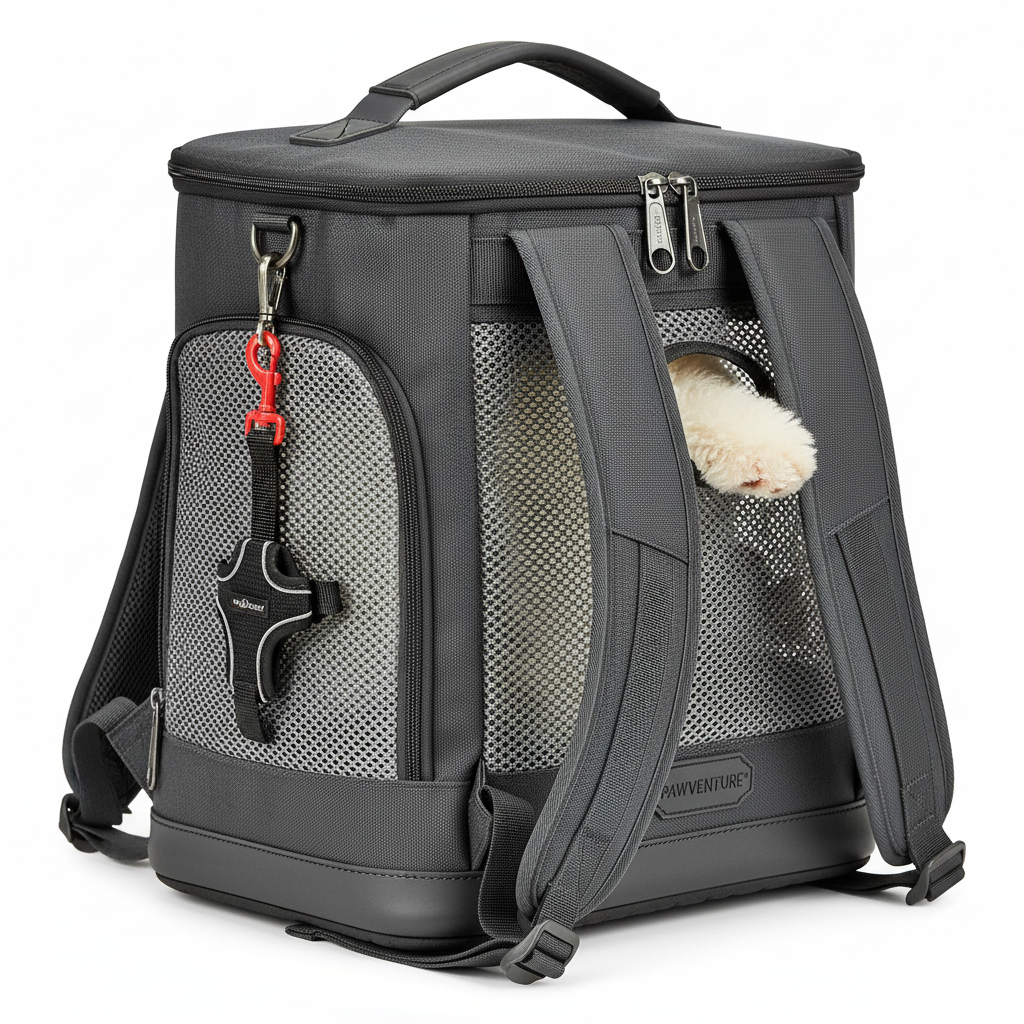
- Sturdy and Structured Base: Your dog needs to feel secure. A backpack with a firm, flat bottom prevents them from sinking or sliding around. It gives them a stable floor to sit or lie on, which dramatically reduces anxiety.
- Ample Ventilation: This is a huge safety issue. Look for backpacks with plenty of mesh windows on multiple sides. Good airflow keeps your dog from overheating and allows them to see what’s going on, which can be very reassuring.
- Safety First: An absolute must-have is an internal safety tether or clip. This short leash attaches to your dog’s harness (never their collar!) and prevents them from jumping or falling out of the bag if they get spooked. Also, check for secure, high-quality zippers that a clever pup can’t easily nudge open.
- Comfort for Both of You: Remember, you’re the one carrying the precious cargo! Look for padded shoulder straps, a chest strap, and maybe even a waist strap. These features help distribute your dog’s weight evenly, saving your back and shoulders from strain. For your dog, a padded interior and soft lining add to the cozy factor.
- The Right Size: Your dog should have enough room to sit and lie down comfortably, but not so much room that they’re tossed around with every movement. Measure your dog from their collar to the base of their tail and from the floor to the top of their shoulders. Compare these measurements to the backpack’s interior dimensions provided by the manufacturer.
Expert Tip: When in doubt, size up slightly. You can always add a familiar blanket or a small cushion to make a slightly-too-big bag feel cozier, but you can’t stretch a bag that’s too small.
Step 2: The Grand Introduction – Making the Backpack a Happy Place
First impressions matter, especially for our dogs. Your goal is to make your dog think this new backpack is the best thing since squeaky toys. We’ll do this using positive association, a simple concept where we link the backpack with things your dog already loves, like treats, praise, and toys. The golden rule here is: never force it.
Creating Positive Vibes:
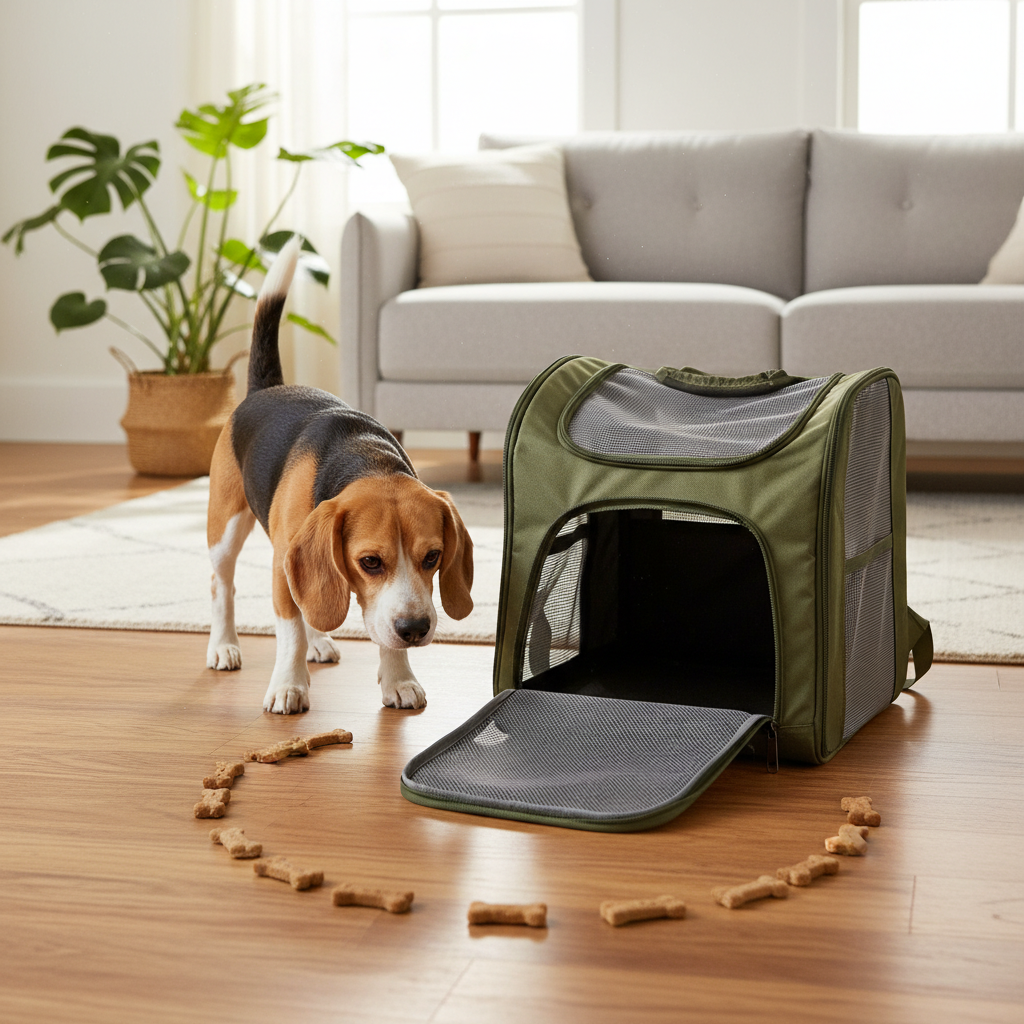
- The Casual Drop: Start by simply placing the new backpack on the floor in a room where your dog likes to hang out. Leave it open. Don’t point it out or make a big deal of it. Just let it exist in their space.
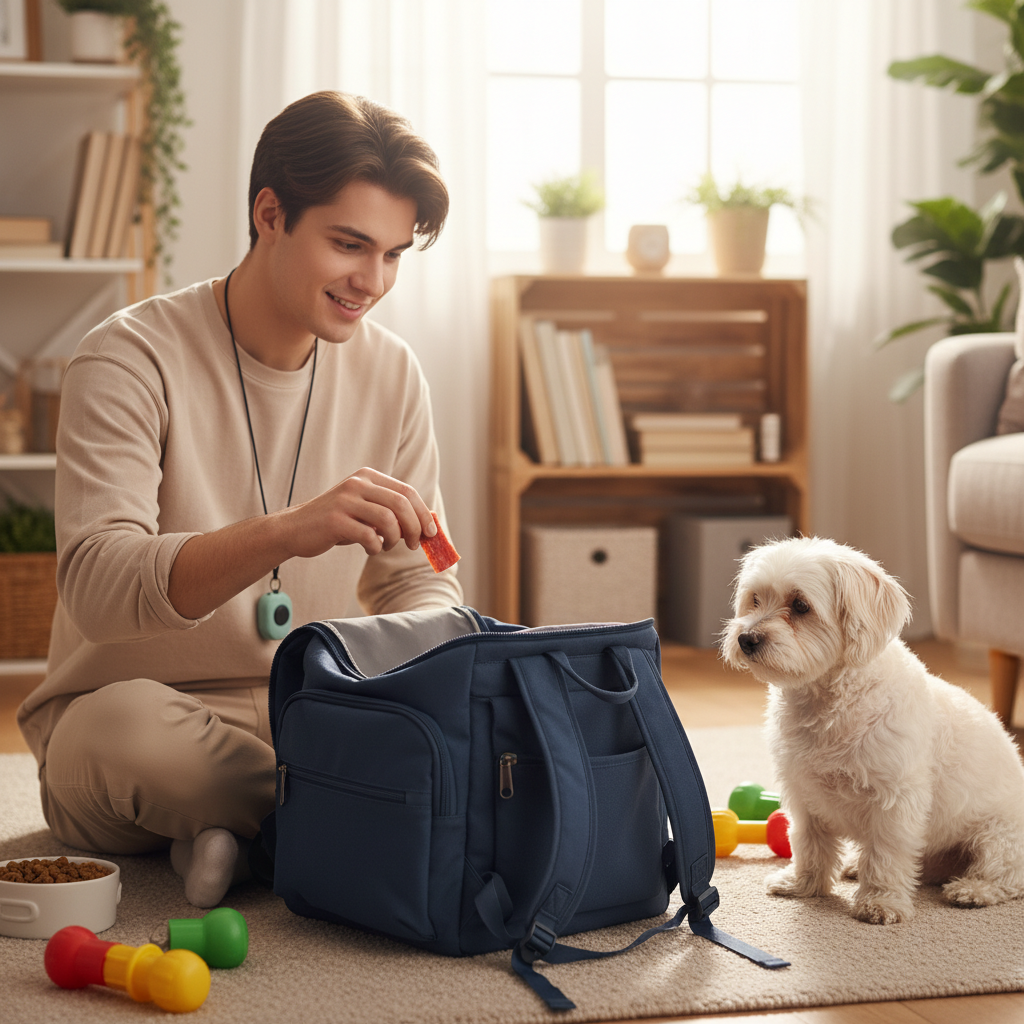
- Treat Trail: Casually drop some of your dog’s favorite high-value treats (think small pieces of chicken, cheese, or freeze-dried liver) in and around the backpack. Let your dog ‘discover’ these treasures on their own. This teaches them that good things happen when the bag is around.
- Curiosity Rewarded: Any time your dog voluntarily sniffs, touches, or shows any interest in the backpack, praise them enthusiastically and give them a treat. You’re rewarding their bravery and curiosity.
- Meal Time Magic: Start feeding your dog their meals next to the backpack. After a few days, move the bowl right up to the opening, and eventually, place the bowl just inside the bag’s entrance so they have to stick their head in to eat. This builds a powerful positive association.
Do this for a few minutes at a time, several times a day, for as long as it takes for your dog to seem completely comfortable and happy around the bag. For some dogs, this is a day; for others, it might be a week. Patience is your superpower here!
Step 3: All Aboard! The Step-by-Step Training Process

Once your dog sees the backpack as a five-star treat dispenser, it’s time to start the ‘boarding’ process. We’ll break this down into tiny, easy-to-win steps. Remember to keep sessions short (5-10 minutes) and always end on a positive note!
Phase 1: Getting In and Staying In
Use a specific verbal cue, like “Get in your bag!” or “Hometime!” in a happy, upbeat tone. Lure your dog into the bag with a treat. As soon as all four paws are inside, say “Yes!” and give them a jackpot of treats inside the bag. Let them come right back out. Repeat this until they’re hopping in eagerly when you give the cue. Once they’re comfortable, start building duration. Ask them to stay in for 2 seconds, then reward. Then 5 seconds, then 10, gradually increasing the time.
Phase 2: Zipping Up and Lifting Off
This is a big step! The first time you zip it up, only close it halfway. Treat, praise, and then unzip immediately. Gradually work your way up to zipping it fully, rewarding calm behavior the whole time. Once they are okay with being enclosed, it’s time for liftoff. Gently lift the bag an inch off the ground, hold for a second, then put it down. Reward! Slowly increase the height and duration you hold the bag. The goal is a smooth, gentle motion that doesn’t startle them.
Phase 3: Wearing the Backpack
Now, put the backpack on. The first time, just stand still for a few seconds. Talk to your dog reassuringly through the mesh. Give them a treat. Then take it off. The next session, take a few steps around your living room. Walk to the kitchen and back. Keep these initial ‘trips’ super short and positive. Your goal is to teach them that being on your back is just a normal, safe way to move around.
Phase 4: The Great Outdoors
Your first outdoor adventure should be somewhere calm, like your backyard or a quiet street during an off-peak time. Just walk around for a few minutes. Let them experience the new sights, sounds, and smells from the safety of their bag. This helps them generalize the training from the controlled environment of your home to the unpredictable real world.
Phase 5: The Subway Dress Rehearsal
Before you tackle a real train, just go to the station. Stand on the platform (a safe distance from the edge!) and let your dog get used to the noise of the trains arriving and departing, the announcements, and the crowds. Reward them for calm behavior. This desensitization step is crucial for preventing a meltdown on their first actual ride.
Training Pro-Tip: Use a special, super high-value treat that your dog only gets during backpack training. This makes the experience even more special and motivating for them.
Subway Etiquette and On-the-Go Safety
You’ve done the training, and your dog is a backpack pro. Congratulations! Now it’s time to talk about being a good citizen on the subway and keeping your pup safe during the journey.
Know the Rules of the Rails
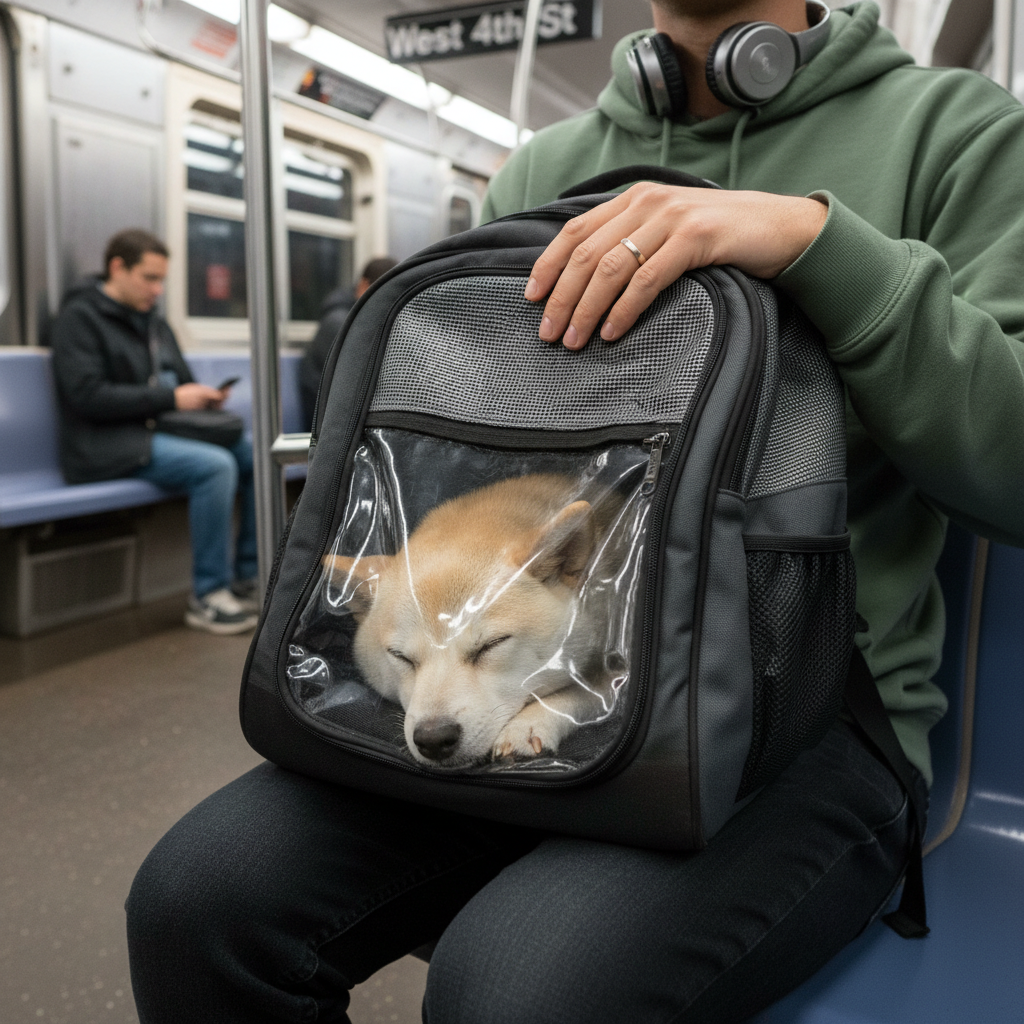
First and foremost, know your local transit authority’s rules. For example, the MTA in New York City requires that pets be “enclosed in a container and carried in a manner which would not annoy other passengers.” This means your dog must be fully inside the bag for the entire ride. No heads popping out, as cute as it is. Being a responsible owner means following the rules and not giving anyone a reason to complain.
Riding Like a Pro: Tips for a Smooth Trip
- Travel During Off-Peak Hours: For your first few trips, avoid the chaos of rush hour. A less crowded train means less stress, fewer overwhelming smells, and more space for you and your pup.
- Keep it Low-Key: Find a seat if you can and place the backpack on your lap. This is more stable and reassuring for your dog than being on the floor. Keep the bag close and avoid swinging it around.
- Pack a Go-Bag: Even for short trips, it’s wise to be prepared. Pack a small bag with a portable water bowl, a few treats for rewarding calm behavior, a favorite chew toy to keep them occupied, and, of course, poop bags.
- Mind Your Neighbors: Be aware of the people around you. Not everyone is a dog lover, and some people may have allergies or fears. Keep your dog’s carrier self-contained and don’t allow interactions unless another passenger clearly invites it.
Reading Your Dog’s Body Language
Pay close attention to your dog on the train. Are they panting excessively? Yawning a lot? Licking their lips? These can be signs of stress. If you see them, speak to your dog in a calm, soothing voice. You can offer a high-value chew or a lick mat with some peanut butter to help them relax. If they seem truly distressed, it’s better to get off at the next stop and end the trip on a neutral note than to push them too far.
Troubleshooting: Navigating Common Bumps in the Road
Even with the best training plan, you might hit a few snags. That’s completely normal! The key is to address these issues with patience and positivity, rather than frustration. Here are some common challenges and how to handle them.
“My dog whines or cries in the backpack.”
Whining is a way of communicating discomfort or anxiety. It’s important not to punish this, but to understand it. Go back a few steps in your training. Is the bag comfortable? Did you build up the duration slowly enough? Shorten your sessions and focus on making the bag an overwhelmingly positive place again. You can also try giving them a special puzzle toy or a long-lasting chew that they only get in the backpack to keep their mind busy.
“My dog tries to jump out!”
This is precisely why the internal safety tether is non-negotiable. Always have it securely attached to your dog’s harness. If your dog is trying to escape, it’s a clear sign you’ve moved too fast. They don’t yet feel secure. Go back to the zipping-up phase. Practice zipping it for just a second, then treating and releasing. Slowly build up their tolerance for being enclosed. Ensure the backpack is the right size; a bag that’s too large can make a dog feel insecure and more likely to try and move around or get out.
“My dog shakes or seems terrified.”
Shaking is a major stress signal. Stop the session immediately. Do not push a fearful dog. Your priority is their emotional well-being. Go all the way back to square one: making the backpack a happy place on the floor. This may take days or even weeks of just associating the bag with food and fun before you even attempt to put the dog inside again. You may also want to consult with a certified professional dog trainer who specializes in positive reinforcement for help with fear and anxiety.
Remember This: Every dog learns at a different pace. Don’t compare your dog’s progress to anyone else’s. Training is a journey, not a race. Celebrate the small victories and always be your dog’s biggest cheerleader!
Conclusion
And there you have it! From a strange new bag on your living room floor to a trusted travel pod for city adventures, you have the complete roadmap to success. Training your small dog to ride in a backpack is more than just a convenient hack; it’s about deepening your bond and opening up a whole new world of experiences you can share together.
Remember the core principles: patience, positivity, and lots of praise. Listen to your dog, go at their pace, and celebrate every little milestone. Before you know it, you and your perfectly-trained pup will be navigating the subway lines like seasoned pros, ready for whatever adventure the city throws your way. Happy travels!