Does this sound familiar? You say, “Time for a walk!” and your dog’s tail wags with excitement… until you pick up the harness. Suddenly, your eager companion transforms into a furry escape artist, ducking, dodging, and hiding under the nearest piece of furniture. That daily struggle can be frustrating for you and downright scary for your dog. But what if we told you it doesn’t have to be this way?
Many dogs develop an aversion to harnesses not because they’re being stubborn, but because the experience is uncomfortable or frightening for them. The feeling of being restrained, the harness being pushed over their sensitive ears and face, or a poor fit can all create negative associations. The good news is that you can change this association from fear to fun!
This guide is all about cooperative care. We’re going to ditch the wrestling match and instead, teach your dog to be an active, willing participant in the harnessing process. Using simple, positive reinforcement techniques, we’ll break down the process into easy-to-follow steps that will build your dog’s confidence and strengthen your bond. Get ready to stop the struggle and start enjoying your walks from the very first moment.
Setting Up for Success: Your Harness Training Toolkit
Setting Up for Success: Your Harness Training Toolkit
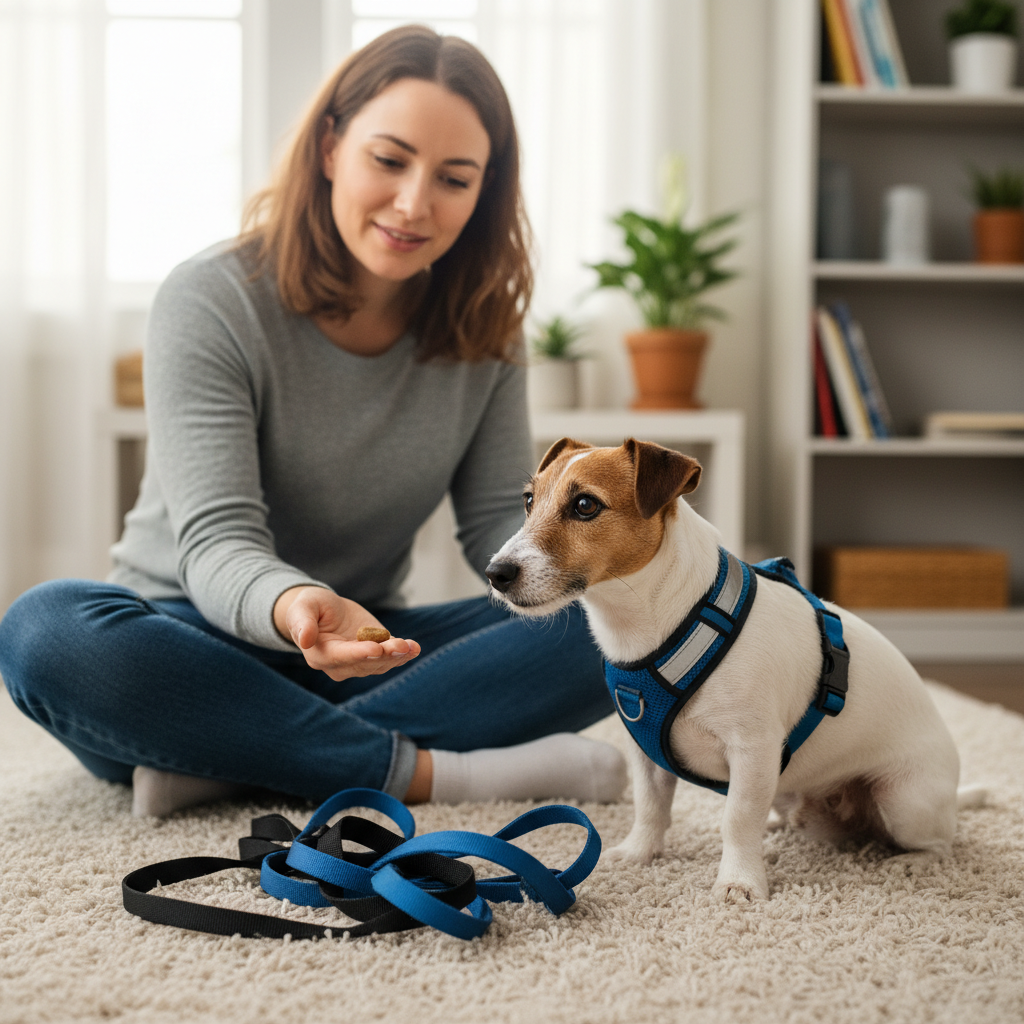
Before you even begin training, gathering the right tools and setting the right mood is half the battle. Think of it as preparing a delicious meal; you need the best ingredients and a clean kitchen! Success here is less about force and more about finesse and fantastic rewards.
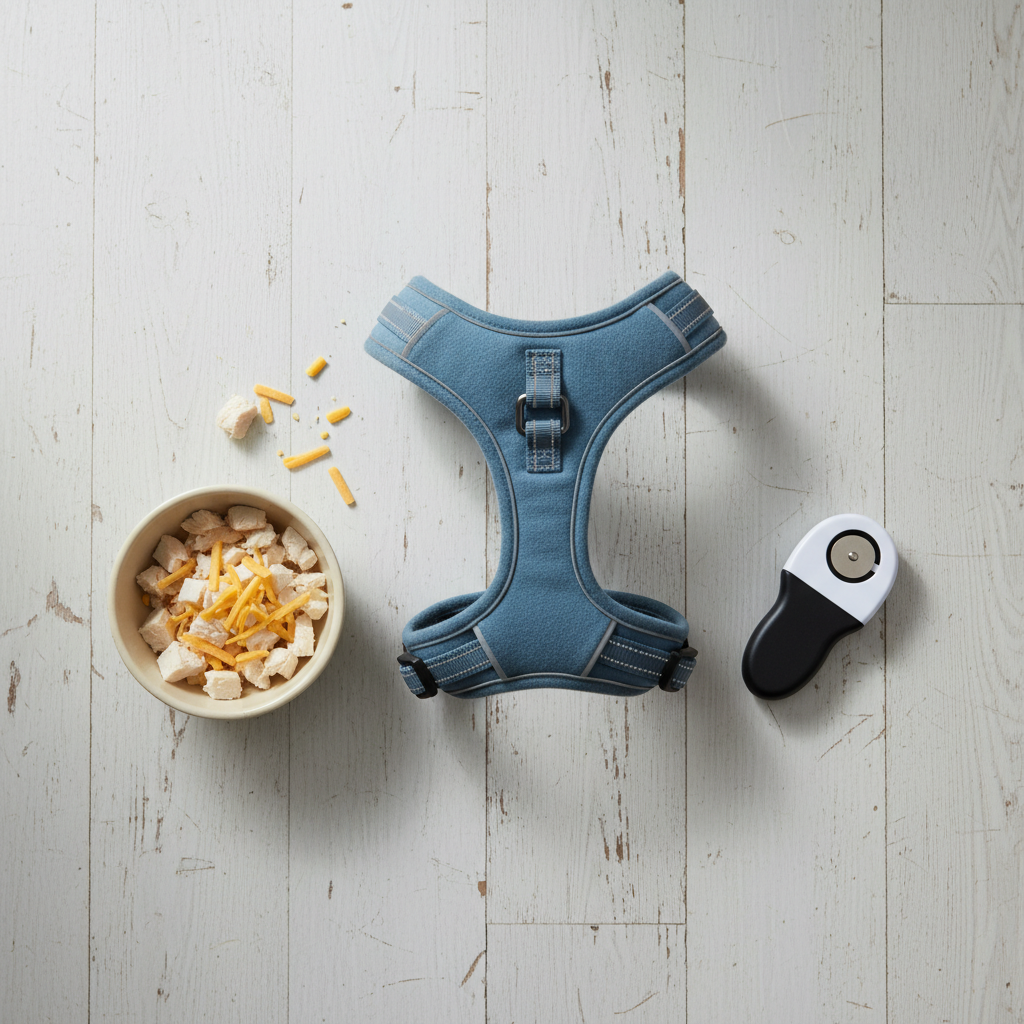
Choose a Comfortable, Well-Fitting Harness
Not all harnesses are created equal. A harness that pinches, chafes, or restricts your dog’s natural shoulder movement is a one-way ticket to Harness Hatred City. Look for:
- Y-Shape Design: These harnesses, often called Y-front or front-clip harnesses, are fantastic because they don’t restrict shoulder movement. The straps form a ‘Y’ shape across the dog’s chest, allowing for a full range of motion.
- Multiple Adjustment Points: A good harness should have at least 4-5 points of adjustment to ensure a snug but comfortable fit. You should be able to fit two fingers snugly between the harness and your dog’s body.
- Soft, Padded Material: Look for materials that won’t irritate your dog’s skin, especially around the armpits and chest.
If your dog already has a negative association with their current harness, consider starting fresh with a new one. A different color, shape, and smell can help you both make a clean start.
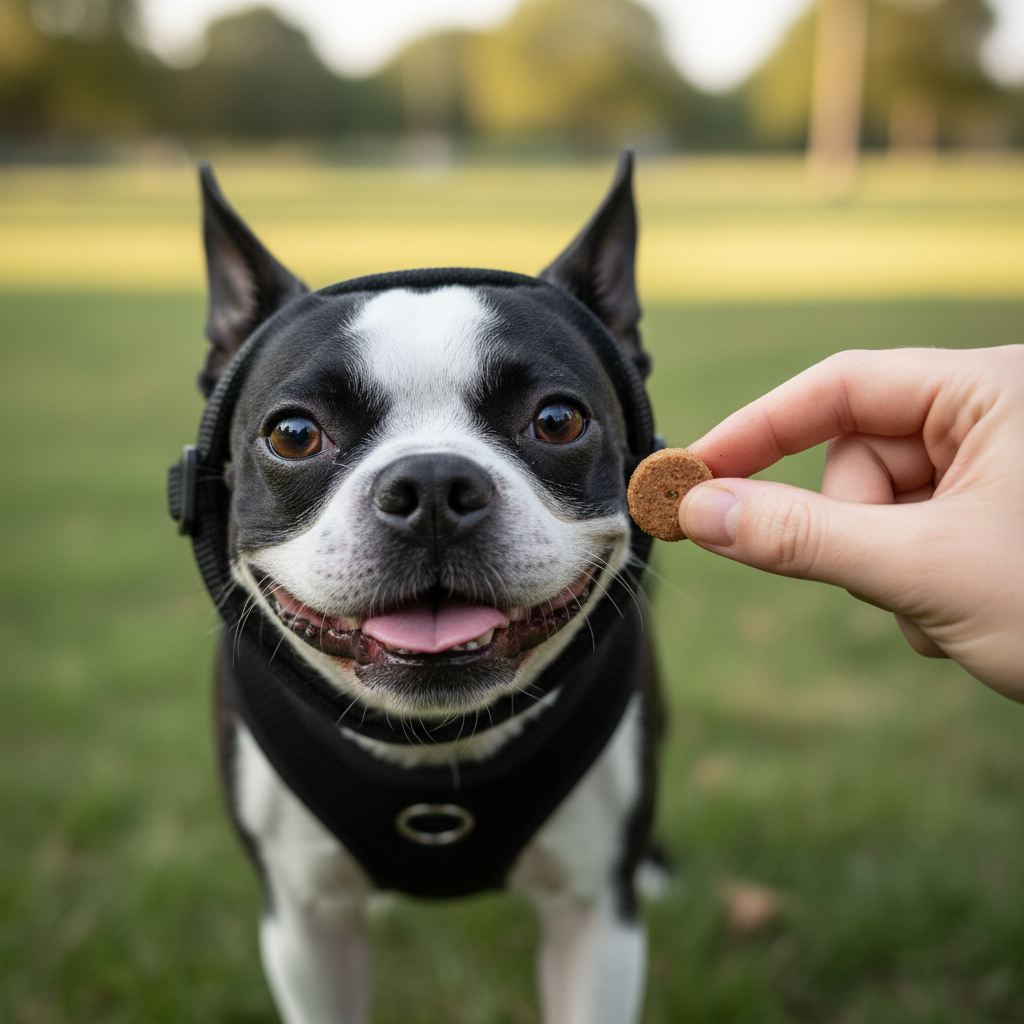
Stock Up on High-Value Treats
We’re not talking about their everyday kibble here. We need the good stuff! High-value treats are special, extra-delicious morsels that your dog absolutely loves and doesn’t get all the time. This makes them powerful motivators. Think:
- Small, pea-sized pieces of boiled chicken or turkey
- Tiny cubes of low-fat cheese like mozzarella
- Commercial soft training treats (look for ones with minimal ingredients)
- Smearable treats like peanut butter (xylitol-free!) or cream cheese on a lick mat or spoon
The key is to use small pieces so you can reward your dog frequently without filling them up too quickly.
Create a Calm and Positive Training Space
Your environment matters. Choose a time and place where you and your dog are both relaxed and free from distractions. Avoid training right when you get home from work or when the kids are running around. A quiet living room or backyard is perfect. Keep your training sessions short and sweet—just 1 to 5 minutes at a time is far more effective than one long, frustrating session. Remember, your attitude is contagious! Stay patient, upbeat, and ready to celebrate the smallest bits of progress. If you feel yourself getting frustrated, it’s time to end the session on a positive note and try again later.
From Harness-Hater to Eager Participant: A 5-Step Guide
From Harness-Hater to Eager Participant: A 5-Step Guide
This is where the magic happens! We’re going to break down the process of putting on a harness into tiny, achievable steps. The golden rule is to let your dog set the pace. If they seem stressed at any step, simply go back to the previous one where they were successful and practice that a bit more. Let’s begin!
-
Step 1: The Harness is Awesome!
Goal: Change your dog’s emotional response to the mere sight of the harness from “Oh no, that thing!” to “Oh boy, that thing means treats!”
Simply place the harness on the floor. Every time your dog looks at it, sniffs it, or shows any curiosity, say “Yes!” in a happy voice and toss them a high-value treat. Don’t ask for anything more. Just look = treat. Sniff = treat. Repeat this in short sessions until you see your dog’s ears perk up and their tail give a little wag when you bring the harness out. You’re building a new, wonderful association.
-
Step 2: Interaction is Rewarded
Goal: Encourage your dog to voluntarily touch the harness.
Hold the harness in one hand. With your other hand, hold a treat near the harness. When your dog moves toward the treat and their nose touches the harness, mark it with “Yes!” and give them the treat. You can also use a “touch” cue if your dog knows it. We want the dog to think, “When I touch this weird strap-thing, I get chicken. I should touch it more often!”
-
Step 3: Luring Through the Loop
Goal: Get your dog comfortable with putting their nose and then their snout through the neck opening.
Hold the harness so the neck loop is wide open, like a big circle. With a treat in your other hand, lure your dog’s nose toward the opening. The moment their nose pokes through, “Yes!” and treat. At this stage, they can pull their head right back out. We are NOT trying to put the harness on. We are rewarding the forward movement through the loop. Gradually, over many repetitions, lure their head a little further through each time—first the nose, then to the eyes, then past the ears—before you reward.
-
Step 4: Head All the Way Through!
Goal: Your dog voluntarily puts their entire head through the neck loop.
This is a big step, so be ready with a jackpot of treats! Continue the luring from Step 3, but this time, lure their head completely through the opening. The second it’s through, have a mini-party! Give them 3-5 treats in a row and then immediately and gently slip the harness back off. The sequence is: Head goes in -> Party! -> Harness comes off. This teaches them that having the harness on briefly leads to amazing things and that it will be removed quickly. Keep this part super short, just a second or two at first.
-
Step 5: Adding Duration and Buckles
Goal: Build up the time the harness is on and introduce the buckles.
Once your dog is happily putting their head through the loop, you can start building duration. Leave the harness on for 2 seconds before treating and removing. Then 5 seconds. Then 10. While it’s on, feed them a steady stream of tiny treats to keep the association positive. Next, just touch the buckles without clipping them. Treat. Then, make the clicking sound of the buckle away from your dog. Treat. Finally, bring the straps around and click one buckle. Jackpot! And remove. Work up to getting both buckles clipped, always rewarding generously. Soon, you’ll be able to put the harness on, buckle it, and head right for the door for that well-earned walk!
What If My Dog Is Still Scared? Troubleshooting Tips
What If My Dog Is Still Scared? Troubleshooting Tips
Sometimes, despite our best efforts, we hit a snag. A dog with a deeply ingrained fear of the harness might need a little extra help. Don’t worry, this is normal! The key is to listen to your dog’s body language and adjust your plan. Here are some common problems and how to solve them.
- Problem: My dog runs and hides the moment I pick up the harness.
Solution: You need to go way back to basics and rebuild that initial association. For a few days, don’t even try to train. Just make the harness a part of the scenery. Leave it on a chair near their food bowl. Then, start casually dropping super high-value treats near it whenever you walk by, without making a big deal of it. We’re trying to change the harness from a scary predictor of bad things to a neutral, and eventually, a positive object in the environment. - Problem: My dog will poke their nose through the loop but backs away if I try for more.
Solution: You’re likely asking for too much, too soon. This is a classic sign to break the step down into even smaller pieces. Go back to rewarding just for a nose poke. Do that 10 times until it’s easy and fun for them. Then, reward for their snout going in up to their eyes. Do that 10 times. Patience is your superpower here. Let your dog’s comfort level guide your pace. - Problem: My dog freezes or shows stress signals (like lip licking or yawning) once the harness is on.
Solution: Freezing is a common stress response. It means the dog is tolerating the situation but is not comfortable. If this happens, you’ve stayed at that step for too long. Go back to putting the harness on for just a single second, delivering a super high-value treat (like a lick of peanut butter from a spoon), and immediately taking it off. The removal of the harness becomes part of the reward. The goal is for your dog to think, “This is on for a second, I get something amazing, and then it’s off. I can handle that.” - Problem: The sound or feel of the buckles freaks my dog out.
Solution: Desensitize the buckle separately from the harness. Sit with your dog and hold just the buckle part. Click it closed and open, and give a treat for each click. Start with the buckle a foot away from them and gradually, over many sessions, work on clicking it closer to their body. You can also put a piece of felt or tape inside the buckle to muffle the sound initially, making it less startling.
Don’t Make These Harnessing Mistakes!
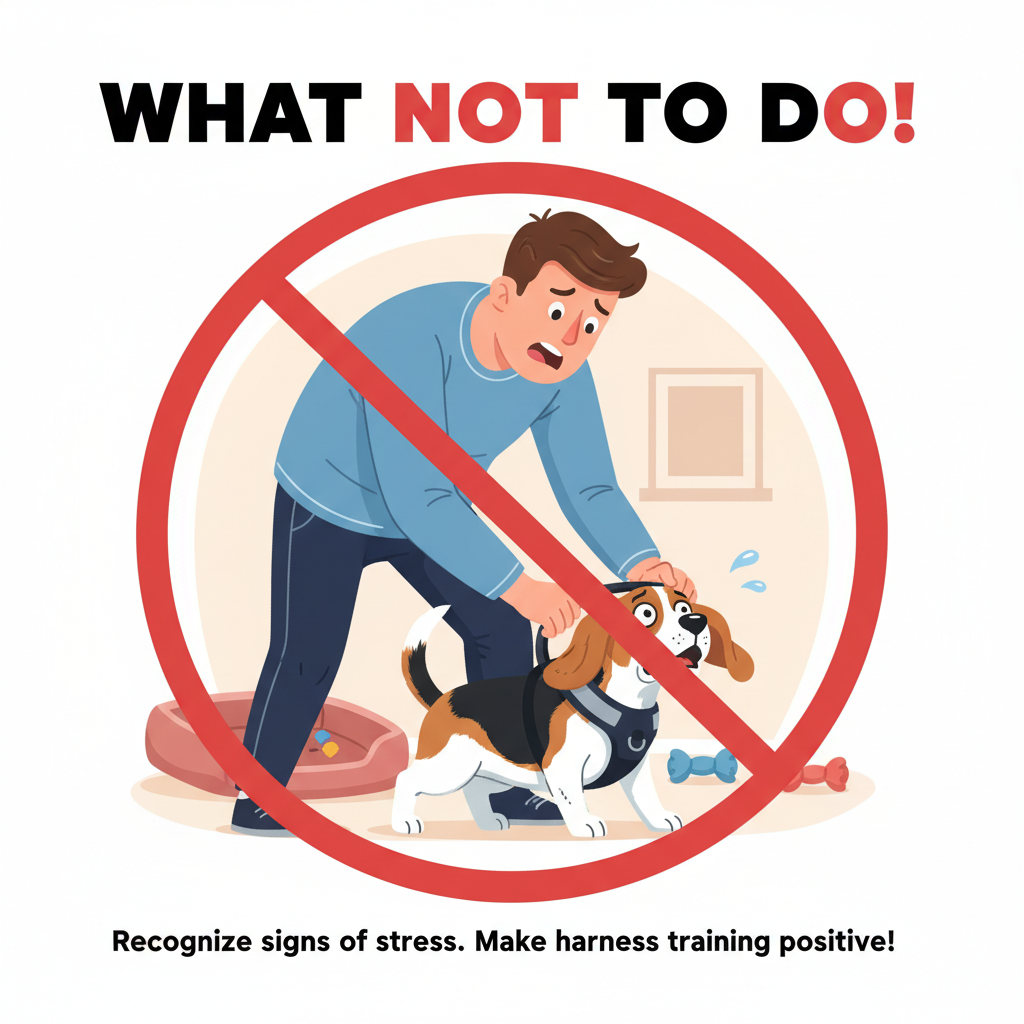
Don’t Make These Harnessing Mistakes!
Knowing what not to do is just as important as knowing what to do. Avoiding these common pitfalls will keep your training on track and ensure your relationship with your dog stays positive and trust-based.
- Forcing the Issue: This is the number one mistake. Never hold your dog down, corner them, or force a harness over their head while they are struggling. This will only confirm their fears that the harness is a scary thing to be fought against. It erodes trust and makes future training ten times harder. If you’re in a hurry and have to get the harness on, try to make it as positive as possible by scattering treats on the floor to distract them, but make a plan to start this training protocol as soon as possible.
- Training When You or Your Dog is Stressed: Training should be fun. If you’ve had a long, stressful day at work, you’re not in the right headspace to be a patient, positive teacher. Likewise, if your dog is overly tired, hyper, or anxious about a thunderstorm, they’re not in a state to learn effectively. It’s better to skip a session than to have a bad one.
- Using a Poorly-Fitting or Painful Harness: Before you even start, double-check that the harness is a good fit. A harness that is too tight can pinch and chafe, while one that’s too loose can shift and cause friction burns. Sometimes, a dog’s reluctance has a very real physical cause. If you’re unsure, take your dog and their harness to a local pet supply store or a professional trainer for a fitting.
- Rushing Through the Steps: It’s easy to get excited when you see progress and want to jump ahead. However, positive reinforcement training is like building a house—each step needs to be solid before you can build on top of it. If you rush, you’ll find cracks in your foundation later on. Spend more time on each step than you think you need to. The goal is a dog that is not just tolerating the harness, but is genuinely happy and comfortable with the process.
Expert Tip: Remember that every single interaction matters. Don’t do fun training sessions for 5 minutes and then go back to forcing the harness on when you’re in a rush for a walk. Consistency is what builds trust and solidifies the new, positive association you’re working so hard to create.
Conclusion
You’ve Got This!
Transforming harness time from a struggle to a seamless part of your routine is entirely possible. By replacing fear and force with patience, understanding, and plenty of delicious treats, you’re not just teaching your dog a new skill—you’re deepening your bond and communication. You’re showing them that you are a trusted partner who will listen to their concerns and help them overcome their fears.
Remember to celebrate the small victories along the way—a sniff, a nose poke, a flicker of a happy tail. These are the building blocks of confidence. Before you know it, the sight of the harness will be a source of shared excitement, the true beginning of your next great adventure together. Happy walking!