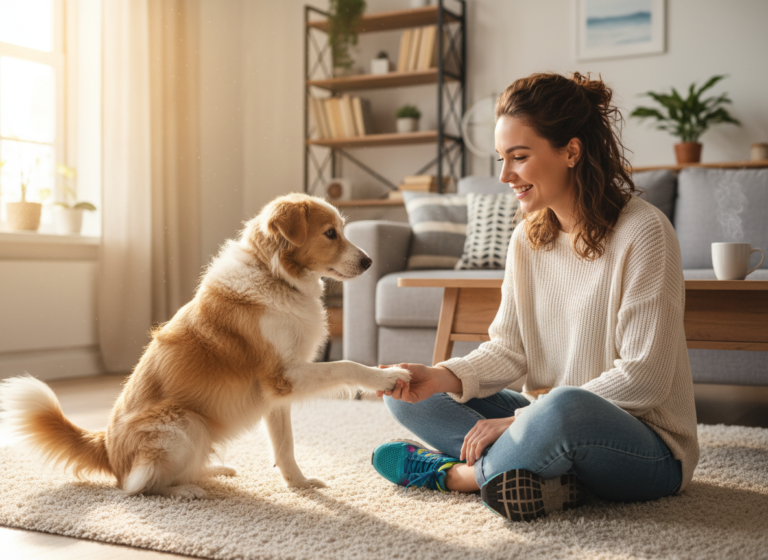
Have you ever seen a dog perform a trick so charming it just melts your heart? From rolling over to playing dead, our canine companions are capable of some amazing feats. But if you’re looking for a trick that’s a little unique and guaranteed to make everyone say ‘aww,’ then teaching your dog to ‘blow a kiss’ is the perfect next step in your training journey.
Don’t worry, it doesn’t involve any actual lipstick! This adorable trick simply teaches your dog to lift their paw towards their mouth, mimicking the human gesture of blowing a kiss. It might look complex, but it’s built on simple, positive training principles that you and your dog can master together. Not only is it a fantastic party trick, but the process of teaching it is an incredible bonding experience. It strengthens your communication, builds your dog’s confidence, and gives their brain a great workout.
So, grab your tastiest treats and get ready to have some fun. In this guide, we’ll walk you through everything you need to know, from the initial setup to troubleshooting common hiccups. Let’s get ready to send a smooch!
Setting the Stage for Success: What You’ll Need
Setting the Stage for Success: What You’ll Need
Before you jump into training, a little preparation goes a long way. Creating the right environment and having the right tools on hand will make the process smoother, more effective, and way more fun for both you and your pup. Think of it as setting up your little training studio for a hit performance!
The Perfect Training Zone
Your dog’s ability to focus is paramount. Choose a training area that is:
- Quiet: Pick a room with minimal background noise. Turn off the TV, silence your phone, and ask family members to give you some space.
- Distraction-Free: A room without windows looking out onto a busy street is ideal. Remove any new or exciting toys that might pull your dog’s attention away from you.
- Comfortable: Make sure the floor isn’t too slippery and the temperature is comfortable for your dog.
Your Training Toolkit
You don’t need a lot of fancy equipment to teach this trick. Here’s a simple checklist of what to gather:
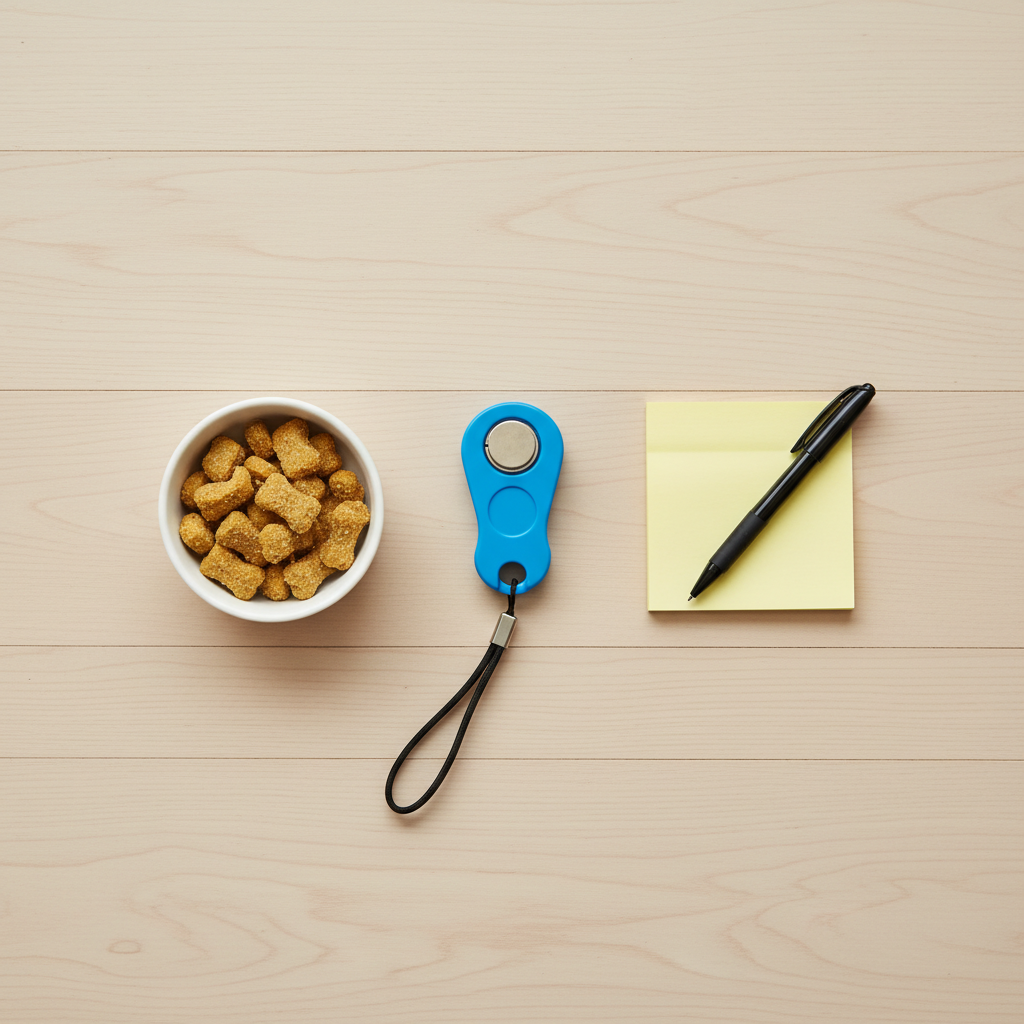
- High-Value Treats: This is the star of the show! Standard kibble might not be exciting enough. Opt for small, soft, and extra-tasty treats that your dog absolutely loves but doesn’t get all the time. Think tiny pieces of cheese, boiled chicken, or commercial training treats. The key is small so you can reward frequently without filling them up too quickly.
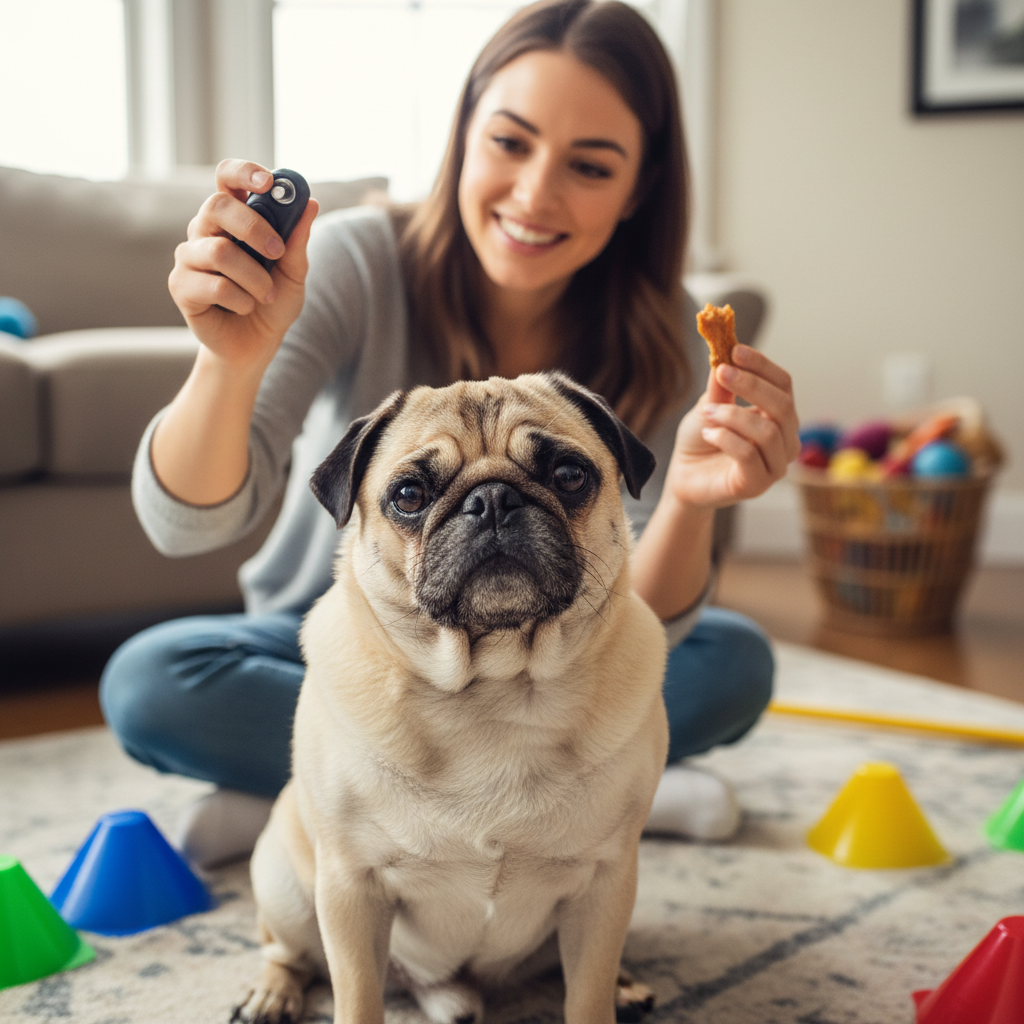
- A Clicker (Optional): A clicker is a fantastic tool for marking the exact moment your dog does the right thing. If you’ve never used one, you’ll first need to ‘charge’ it by clicking and immediately giving a treat, repeated about 10-15 times. If you prefer not to use a clicker, a consistent verbal marker like a sharp “Yes!” works just as well.
- A Post-it Note or a small piece of painter’s tape: This might sound strange, but it’s our secret weapon for getting that initial paw lift without any pressure. The light, novel sensation will encourage your dog to investigate by lifting their paw.
- Patience and a Positive Attitude: This is the most important tool you have! Your dog feeds off your energy. Stay upbeat, celebrate small successes, and remember that this is a game. If you get frustrated, your dog will too.
Expert Tip: Keep your training sessions short and sweet! A dog’s attention span, especially when learning something new, is limited. Aim for multiple 5-10 minute sessions throughout the day rather than one long, grueling one. Always end on a high note with a successful repetition or a trick your dog already knows well.
The Paws-itive Steps to a Perfect Smooch
The Paws-itive Steps to a Perfect Smooch
Alright, you’ve got your treats and your enthusiastic pup is ready to learn. Let’s break down the ‘blow a kiss’ trick into simple, manageable steps. Remember to master each step before moving on to the next. Let’s go!
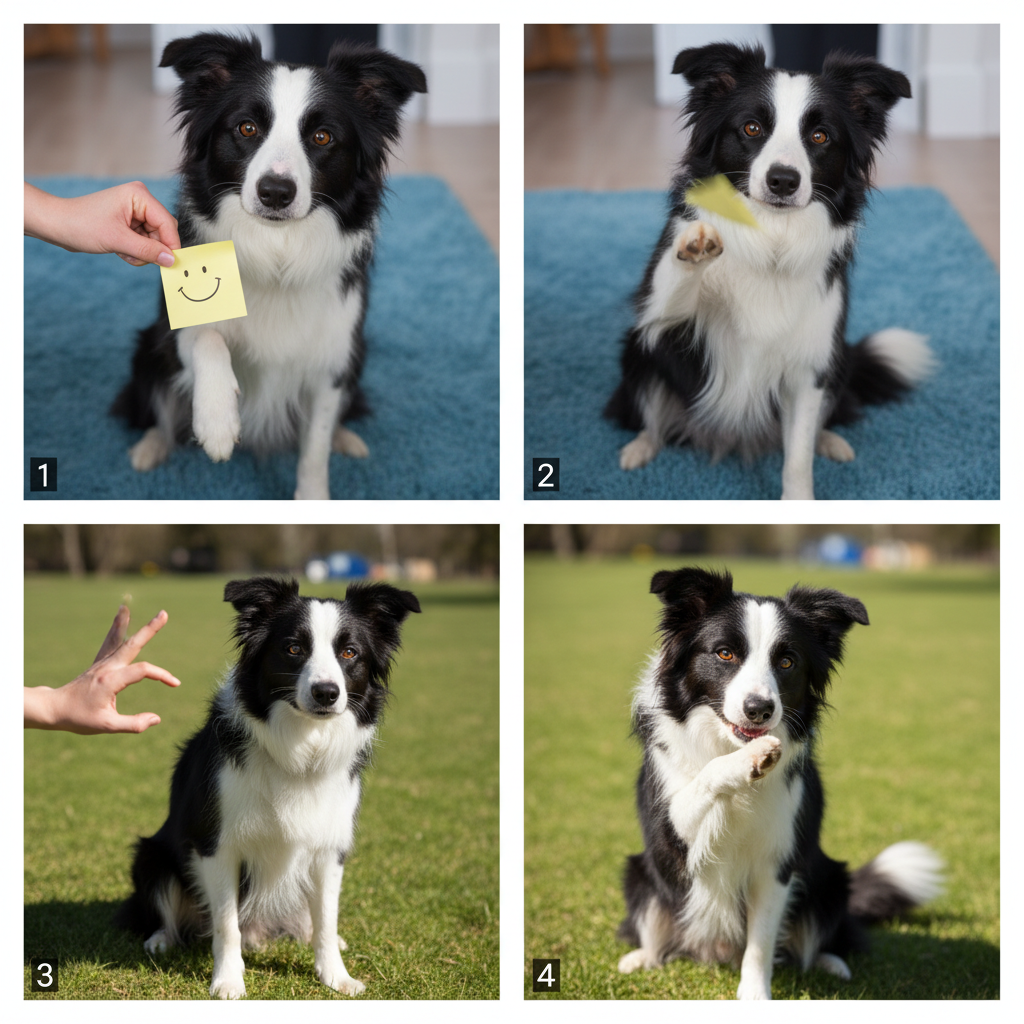
Step 1: Capture the Paw Lift
Our first goal is to get your dog to lift their paw on their own. This is where that sticky note comes in handy. It’s a gentle, non-invasive way to prompt the action.
- Sit in front of your dog in a comfortable position.
- Take a small sticky note and gently press it onto the top of your dog’s paw. Don’t make a big deal out of it.
- The moment your dog moves to lift their paw to investigate the strange object, click your clicker (or say “Yes!”) and immediately give them a treat.
- If they successfully flick the note off, that’s great! Reward them. The goal is the lift, not what happens to the note.
- Repeat this process 5-6 times, then take a short break. You want them to start associating lifting their paw with getting a reward.
Step 2: Fading the Prop
Once your dog is reliably lifting their paw as soon as the sticky note touches it, it’s time to ‘fade the prop.’ We want them to offer the behavior without needing the physical cue.
- Pretend you have a sticky note in your hand.
- Go through the same motion of placing it on their paw, but don’t actually stick it on. Just touch their paw lightly with your fingers.
- When they lift their paw in anticipation, click/mark and treat!
- Gradually make your hand motion smaller and faster, moving from a full touch to just a gesture towards their paw. The goal is for them to lift their paw when you simply motion towards it.
Step 3: Introducing the Verbal Cue
Now that your dog is offering the paw lift on a gesture, we can name the behavior. Choose a cue you’ll remember, like “Send a kiss!”, “Smooch!”, or simply “Kiss!”
- Say your chosen verbal cue clearly, just one time.
- Immediately follow it with the hand gesture you developed in Step 2.
- When your dog lifts their paw, click/mark and reward enthusiastically.
- Repeat this sequence. Over time, your dog will begin to associate the verbal cue with the action and will start to perform it before you even give the hand gesture. This takes time, so be patient!
Step 4: Shaping the ‘Kiss’ Motion
This is where we refine the paw lift into the final ‘kiss’ position. This process is called ‘shaping,’ which means we’ll be rewarding small approximations of the final behavior.
- Ask for the paw lift with your new cue.
- Initially, reward any paw lift. Then, start to be more selective. Only reward the paw lifts that are slightly higher than the others.
- Once they are consistently lifting their paw higher, wait for a lift that also moves slightly inward, toward their body or face. Click/mark and treat for that specific movement.
- You can use a treat to lure their head. As they lift their paw, hold a treat near their nose on the same side, encouraging them to bring their head down and their paw up, closing the distance between them.
- Reward any and all movements where the paw gets closer to the snout. This step requires patience and great timing. You’re rewarding their effort to figure out the puzzle!
Pro Tip: If your dog is struggling to connect the paw lift to their face, try putting a tiny dab of peanut butter (xylitol-free!) or cream cheese on their wrist. When they lift their paw, they’ll naturally bring it to their mouth to lick it off. Click and treat the moment paw and mouth connect!
Oops! Common Training Hurdles and How to Clear Them
Oops! Common Training Hurdles and How to Clear Them
Even with the best plan, you might hit a snag or two. That’s a completely normal part of dog training! The key is not to get discouraged. Think of these moments as puzzles to solve together. Here are some common issues and how to navigate them.
‘My Dog Just Stares at the Sticky Note.’
Some dogs are less bothered by new sensations than others. If your dog isn’t lifting their paw to investigate the note, don’t worry. You can try a few things:
- Try a Different Spot: Place the tape or note slightly more towards their ‘wrist’ or ankle.
- Use Something Else: A dab of a dog-safe, lickable substance like peanut butter can work wonders.
- Capture a Natural Behavior: Forget the props altogether! Simply sit with your dog and wait. The moment they naturally lift a paw for any reason (to reposition, to scratch, etc.), click/mark and treat. This requires more patience but is a powerful training method.
‘My Dog Keeps Offering ‘Shake’ Instead!’
If your dog already knows how to ‘shake a paw,’ they might get confused and offer that behavior instead. It’s a classic case of them trying to give you what they think you want.
- Use the Other Paw: Train the ‘kiss’ trick using the paw you don’t typically use for ‘shake.’
- Reward Position, Not Contact: With ‘shake,’ you reward when their paw touches your hand. For ‘kiss,’ make sure you only reward when their paw is in the air and moving towards their face. Don’t take their paw in your hand at all.
- Go Back a Step: If they keep offering a shake, you may have progressed too quickly. Go back to rewarding any simple paw lift without contact and slowly build from there.
‘My Dog Seems Bored or Frustrated.’
A whining, barking, or disengaged dog is a clear sign that it’s time to stop. Training should never be a chore.
- Check Your Treat Value: Is the reward exciting enough? Maybe it’s time to bring out the big guns (like tiny bits of freeze-dried liver!).
- Shorten Your Sessions: You might be training for too long. Cut your session time in half. End with an easy win, like a ‘sit’ or ‘down,’ to boost their confidence.
- Review Your Timing: Frustration can arise if the dog doesn’t understand what you’re asking. Ensure your click/mark is happening at the exact moment of the desired action, not a second later.
Remember the Golden Rule: Always end on a positive note. If you’re hitting a wall, ask for a simple command your dog knows and loves, reward them lavishly, and end the session with some play or cuddles. This ensures they always associate training time with fun and success.
From Practice to Performance: Perfecting the Kiss
From Practice to Performance: Perfecting the Kiss
Congratulations! Your dog is now lifting their paw to their snout on command. You’ve taught the core behavior, and now it’s time to polish it up and make it a reliable, show-stopping trick. This phase is all about proofing the behavior and making it performance-ready.
Generalization: Taking the Show on the Road
Dogs aren’t great at generalizing, which means just because they can do a trick perfectly in the living room doesn’t mean they’ll remember how in the backyard. We need to teach them that ‘Send a kiss!’ means the same thing everywhere.
- Change the Location: Start practicing in different rooms of the house. Once they are successful, move to a quiet spot in the backyard. The key is to increase the distraction level gradually.
- Add an Audience: First, practice with just one other family member in the room. Then, try it with a calm friend over. Build up to more distracting environments slowly so your dog can succeed.
- Vary Your Position: So far, you’ve likely been sitting directly in front of your dog. Now, practice asking for the trick while you’re standing up, sitting in a different chair, or even a few feet away.
Building Fluency and Distance
Once your dog understands the cue in different places, you can start making the trick sharper. You can work on ‘latency,’ which is the time it takes for your dog to respond to the cue. Simply start rewarding the quicker responses more enthusiastically. You can also slowly add distance, asking for the trick from a few feet away and gradually increasing the space between you.
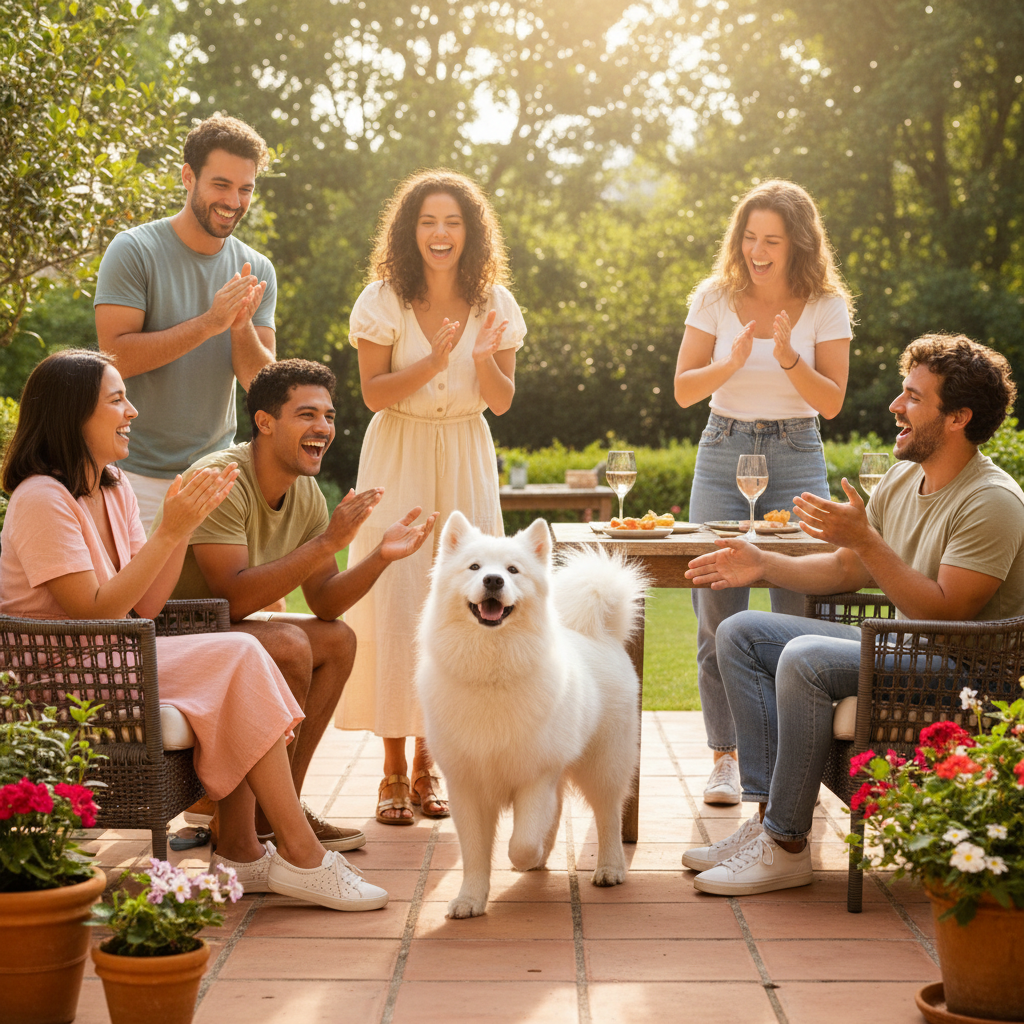
When to Show Off
Now for the fun part! You’ve both worked hard, and it’s time to share your dog’s new talent. When you ask your dog to perform for friends or family, set them up for success. Do a quick warm-up with an easy trick first, make sure the environment isn’t too overwhelming, and have their favorite high-value reward ready. The positive reactions from your ‘audience’ will be a great secondary reward for your clever pup!
Keeping the trick fresh is as simple as incorporating it into your daily routine. Ask for a ‘kiss’ before you put their food bowl down or before you head out for a walk. A few fun repetitions a week will keep the behavior sharp and a reliable part of your dog’s impressive repertoire.
Conclusion
And there you have it! You’ve successfully navigated the steps to teach one of the most endearing tricks around. By breaking it down into small, achievable pieces and focusing on positive reinforcement, you’ve done more than just teach a new command. You’ve spent quality time with your best friend, strengthened your bond, and given their clever mind a fun puzzle to solve.
Remember that every dog learns at a different pace. Whether it took your pup two days or two weeks, the journey itself is what matters most. The patience, communication, and teamwork you practiced are the real rewards. So give your dog a big hug (and maybe ask for a smooch!), and be proud of what you’ve accomplished together. Now, go show off that amazing new trick!