That sound. The moment you pull out the nail grinder, your dog’s ears flatten, their eyes go wide, and they’re suddenly hiding under the nearest piece of furniture. Sound familiar? If the high-pitched whir of a Dremel sends your furry friend into a panic, you’re in the right place. It’s a common struggle for pet parents, turning a necessary grooming task into a stressful event for everyone involved.
But why are so many dogs terrified of this little tool? It’s a triple threat of sensory overload: the loud, unfamiliar noise, the strange vibration on a sensitive part of their body, and the feeling of being restrained. It’s completely understandable why they’d rather be anywhere else!
The good news is, you can change this narrative. With a little patience and the right techniques—specifically desensitization and counter-conditioning—you can transform your dog’s fear into tolerance, and maybe even acceptance. This isn’t about forcing your dog to comply; it’s about building trust and teaching them that the nail grinder isn’t a monster. Ready to trade the wrestling matches for peaceful paw-dicures? Let’s dive into the step-by-step plan to make the Dremel your dog’s new, non-scary acquaintance.
Setting Up for Success: Your Desensitization Toolkit
Before you even think about turning the grinder on, the first step is to prepare your environment and gather your tools. Think of it as setting the stage for a great performance. A calm, prepared owner leads to a calm, receptive dog. Here’s what you’ll need to create a positive training bubble:
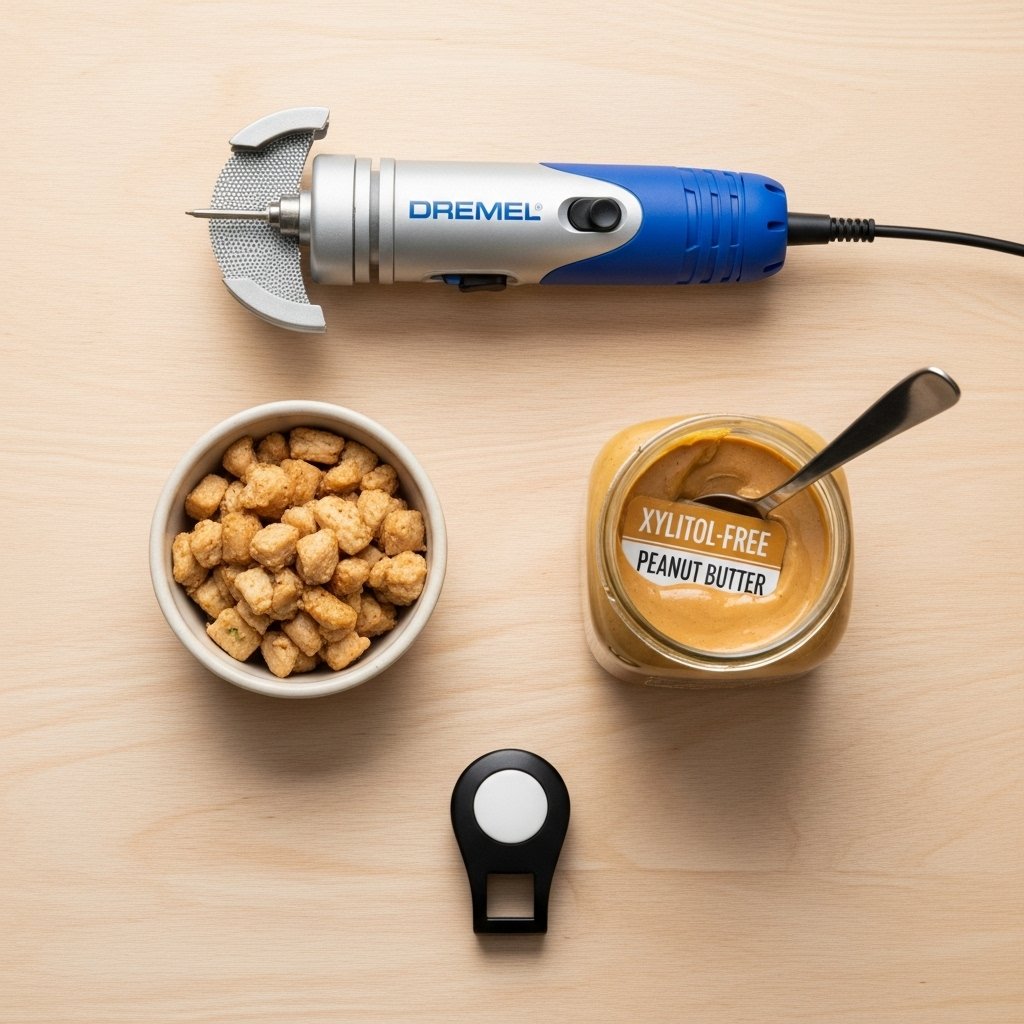
- The Nail Grinder: Of course, you’ll need the tool itself. Make sure it’s fully charged or has fresh batteries. For now, we just want it present, not active.
- High-Value Treats: This is non-negotiable! We’re not talking about their regular kibble. You need the good stuff—tiny pieces of cooked chicken, small cubes of cheese, dabs of peanut butter (xylitol-free!), or smelly liver treats. The goal is to find a reward so irresistible that it outweighs their anxiety.
- A Comfortable Space: Choose a location where your dog already feels safe and relaxed, like their favorite bed, a comfy rug, or a quiet spot on the couch. Avoid slick floors or areas where they feel cornered.
- A Positive Mindset: This is your most important tool. Your dog is an expert at reading your energy. If you’re stressed and anxious, they will be too. Take a deep breath, put on some calming music, and approach this as a fun training game, not a dreaded chore.
Expert Tip: Prepare your treats in advance. Have them in a small, easily accessible bowl or pouch so you can deliver a reward the instant your dog shows the behavior you want. Timing is everything in positive reinforcement!
Once you have your toolkit ready, just spend a few short sessions with the Dremel simply lying on the floor near your dog’s comfy spot. Let them investigate it on their own terms. If they sniff it, say “Yes!” and give them a treat. If they ignore it, that’s okay too. The first goal is simply to teach them that the presence of this object predicts wonderful things (aka, super tasty snacks).
The Step-by-Step Guide: From Terrified to Tolerant

This is where the magic happens. The key to this process is to go at your dog’s pace. We’re breaking down the scary experience of a nail grind into tiny, manageable pieces and pairing each piece with something wonderful. Each step might take one session or several—never rush! Keep sessions short (1-5 minutes) and always end on a positive note.
-
Step 1: Meet the (Silent) Machine
Place the Dremel (turned off) on the floor. The second your dog looks at it or sniffs it, mark the moment with a happy “Yes!” and give them a high-value treat. Do this a few times. Then, pick up the Dremel and hold it in your hand. Reward your dog for staying calm. The goal is simple: Dremel in sight = delicious food.
-
Step 2: The Sound Game
This is often the biggest hurdle. Start with distance. With your dog several feet away, turn the Dremel on for just one second, then immediately turn it off and toss them a treat. The sequence is: Noise -> Noise Stops -> Treat. Gradually, over many repetitions and sessions, decrease the distance between you and your dog. If they get nervous, you’ve moved too fast. Increase the distance again until they are comfortable.
-
Step 3: The Vibration Introduction
With the Dremel turned off, gently touch the handle or the smooth plastic casing (not the grinding bit) to your dog’s shoulder or back. Reward them for holding still. Work your way slowly down their leg to their paw. We want them to get used to the physical contact of the tool without the noise or grinding sensation.
-
Step 4: Combining Sound and Touch (Gently!)
Now, let’s put two pieces together. Turn the Dremel on and let it run in one hand. With your other hand, give your dog a steady stream of tiny treats. While they are eating, gently touch the handle of the running Dremel (the non-vibrating part) to their body. This helps them learn to tolerate the noise while being touched by the object.
-
Step 5: The Real Deal (For One Second)
This is a big step! Ask for your dog’s paw. Turn the Dremel on. Briefly touch the grinder to the very tip of one nail for a single second—literally, a quick tap. Immediately turn it off and give them a “jackpot” reward: a handful of their favorite treats all at once. Lavish them with praise. You’re done for the day! You want the lasting memory to be overwhelmingly positive.
-
Step 6: Building Duration and Trust
Once your dog is comfortable with the one-second touch, you can slowly build from there. In the next session, maybe you do two nails, for one second each. In a future session, you might do one nail for two seconds. The key is to progress incrementally, always watching your dog’s body language. If they pull back, you’ve pushed too far. Go back to the last successful step and end the session there with a big reward.
Troubleshooting & Pro Tips: What to Do When You’re Stuck
Even with the best plan, you might hit a snag. That’s completely normal! Dog training is never a straight line. Here are some common challenges and expert tips to help you navigate them.
What if my dog is too scared to even approach the Dremel?
If the mere sight of the tool sends your dog running, you need to start from an even greater distance. Place the Dremel across the room and reward your dog for just being calm in the same room. You can also try covering it with a blanket initially, so it’s less visually intimidating. The value of your treats is also critical here—this is the time to break out the really good stuff they rarely get.
Reading Your Dog’s Body Language
Your dog is constantly communicating with you. Learning to read their subtle stress signals will tell you when you need to slow down or stop. Look for:
- Yawning when not tired
- Lip licking or flicking their tongue out
- Whale eye (showing the whites of their eyes)
- Tense body and facial muscles
- A lowered head or tail
- Panting when not hot or thirsty
If you see these signs, it’s a message that your dog is reaching their limit. End the session on a positive note with an easy win (like just looking at the Dremel) and try again another day, taking a step back in the process.
Expert Tip: Never, ever force your dog. Holding them down or forcing them to endure the grinder will only confirm their fears that it’s a scary, awful experience. This will destroy trust and make future attempts a hundred times harder. The goal is a willing participant, not a terrified victim.
Common Mistakes to Avoid
- Going Too Fast: This is the #1 mistake. It’s exciting when you see progress, but pushing for too much too soon will set you back. Slower is faster in the long run.
- Making Sessions Too Long: Keep it short and sweet! A few minutes of positive, successful training is far better than a 20-minute struggle.
- Getting Frustrated: Your dog can sense your frustration. If you feel yourself getting tense, just stop. End the session with a simple command they know, like ‘sit’, reward them, and take a break.
Grinders vs. Clippers: Choosing the Right Tool for Your Pup
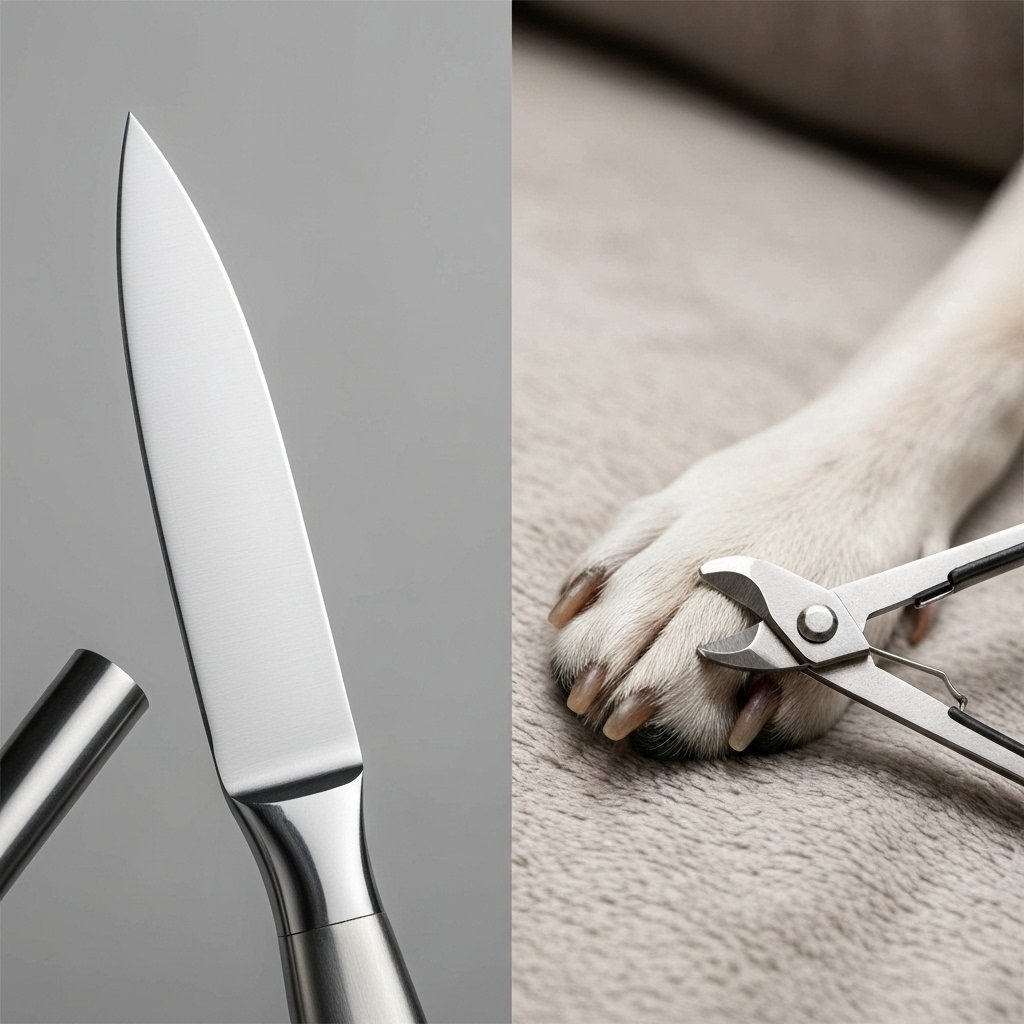
While this guide focuses on the Dremel, it’s worth asking: is a grinder always the best choice? Both grinders and traditional clippers have their place in a grooming kit. The ‘best’ tool often depends on the dog, the owner’s comfort level, and the type of nails.
Clippers are fast and quiet, which is a huge plus for sound-sensitive dogs. However, they carry a higher risk of accidentally cutting the ‘quick’—the sensitive blood vessel inside the nail—which is painful and causes bleeding. This is especially a concern with dark or black nails where the quick isn’t visible. Clippers can also crush brittle nails.
Grinders, on the other hand, offer more control. You can slowly file the nail down, rounding it for a smooth finish and greatly reducing the risk of hitting the quick. The trade-off is the noise and vibration that we’ve been working to overcome. Let’s compare them side-by-side:
| Feature | Nail Grinders (Dremel) | Nail Clippers |
|---|---|---|
| Finish | Smooth, rounded edges | Can leave sharp or split edges |
| Risk of Cutting Quick | Low; you can see the nail getting shorter | Higher, especially on dark nails |
| Best for… | Thick/dark nails, owners nervous about cutting the quick | Dogs terrified of noise, quick trims |
| Noise & Vibration | High; the main source of fear for most dogs | Low; just a quick ‘snip’ sound |
| Speed | Slower; takes more time per nail | Very fast; can do a whole paw quickly |
Ultimately, some dogs will always prefer clippers over the grinder, and that’s okay! The goal is safe and low-stress nail care, regardless of the tool. The desensitization principles you learned here can also be applied to clippers if your dog is fearful of those, too.
Conclusion
Congratulations on taking the first step towards stress-free nail trims! Remember, desensitizing your dog to a nail grinder is a marathon, not a sprint. It’s a process built on layers of trust, patience, and countless tiny, delicious treats. There will be good days and days where you feel like you’ve taken a step back—and that’s perfectly okay.
The most important thing is to listen to your dog. By watching their body language and always ending on a positive note, you are rebuilding their confidence and reshaping their opinion of the Dremel from a scary monster into, at worst, a slightly annoying machine that brings amazing snacks. You’re not just working towards shorter nails; you’re strengthening the bond you share with your best friend.
So take a deep breath, grab your tastiest treats, and celebrate every small victory along the way. You’ve got this, and soon enough, nail care will just be another easy part of your routine together.