Do you ever hold your breath for a split second when your dog leaps from the back of the car, landing with a thud on the pavement? Or maybe you wince internally as your little Dachshund launches themselves off the couch like a furry missile. While their enthusiasm is adorable, these daily jumps add up, putting significant and cumulative stress on their spine and joints. For many dogs, this can lead to painful and costly health problems down the road.
This is especially true for certain breeds and life stages. Senior dogs with arthritis, long-backed breeds like Corgis and Dachshunds who are prone to Intervertebral Disc Disease (IVDD), giant breeds susceptible to hip dysplasia, and any dog recovering from surgery can all suffer from the impact of jumping. But there’s a simple, brilliant solution: a dog ramp.
Think of a ramp not as an accessory for an old or infirm dog, but as a crucial piece of preventative healthcare equipment, just like a healthy diet or regular vet check-ups. It’s an investment in your dog’s long-term comfort and mobility. The only catch? Your dog needs to actually use it. That’s where we come in. This guide will walk you through a simple, positive, and fear-free method to turn that strange new object into your dog’s favorite new bridge to adventure.
Why a Ramp is a Game-Changer for Your Dog’s Health
Before we dive into the ‘how,’ let’s solidify the ‘why.’ Understanding the real risks of jumping can be a powerful motivator for both you and your pup during the training process. It’s not just about making life easier; it’s about actively preventing injury.
The Science of the Spine
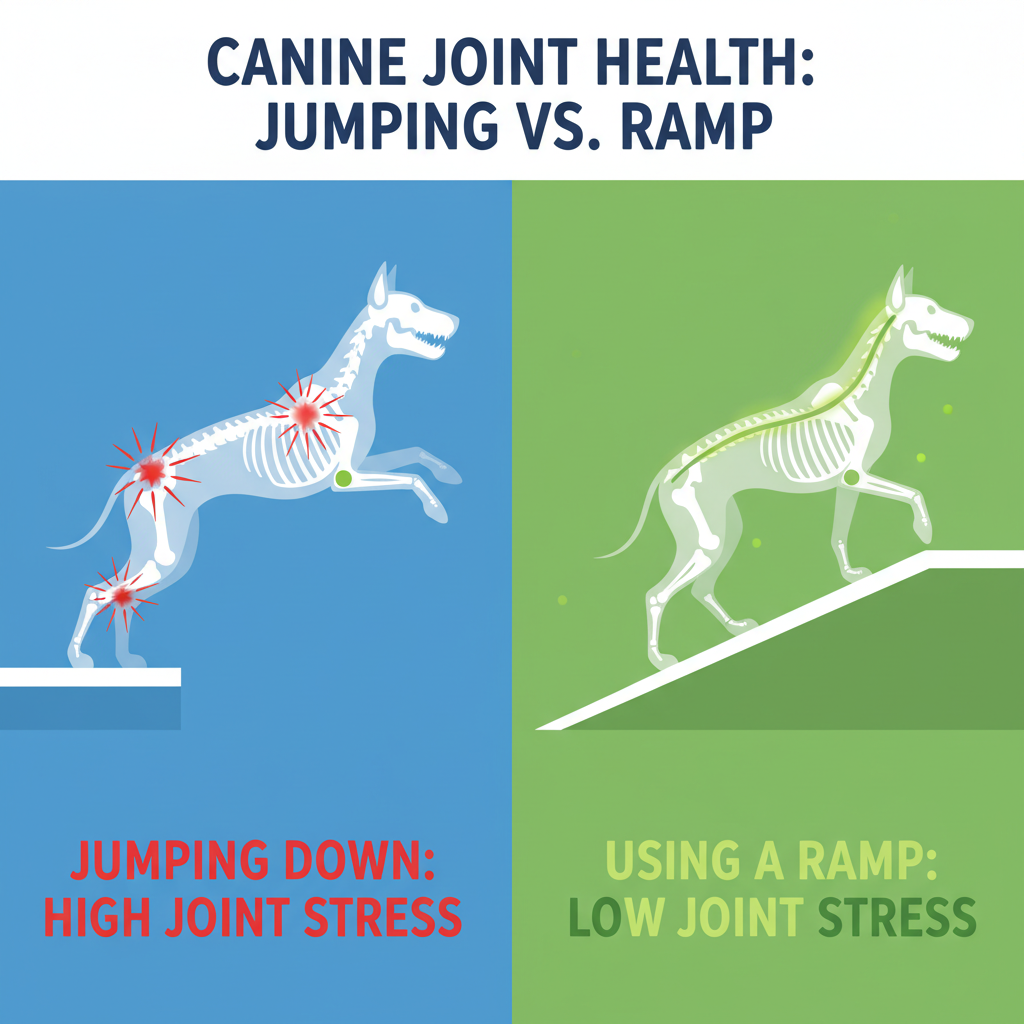
For breeds with long bodies and short legs, like Dachshunds, Basset Hounds, and Corgis, their unique anatomy makes them particularly vulnerable to IVDD. This condition occurs when the cushioning discs between the vertebrae either bulge or burst, pressing on the spinal cord. The impact from a single jump can be the catalyst for this painful, and sometimes paralyzing, condition. Using a ramp eliminates that jarring impact, allowing them to move between levels with a smooth, natural gait that keeps their spine in a neutral alignment.
Protecting Precious Joints
For our beloved senior dogs, arthritis is an all-too-common reality. Jumping down from a height puts immense force on the joints in their wrists (carpus), elbows, and shoulders. Over time, this aggravates existing inflammation and accelerates cartilage deterioration. A ramp provides a low-impact pathway that minimizes pain and helps preserve their remaining joint function. The same principle applies to large and giant breeds like Labradors, German Shepherds, and Great Danes, who are genetically predisposed to conditions like hip and elbow dysplasia. Starting them on a ramp from a young age is a proactive way to protect their joints for a lifetime.
Using a ramp is one of the single best things you can do to preserve your dog’s musculoskeletal health. It’s a preventative measure that can save them from pain and you from thousands in vet bills.
Ultimately, a ramp empowers your dog. It gives them the freedom to access their favorite spots—the cozy bed, the sunny spot on the couch, or their seat in the car—without pain or risk. It’s a tool for independence that supports their body as they age.
Gathering Your Gear: Setting Up for Success
Great training starts with great preparation. Before you even show the ramp to your dog, let’s make sure you have everything you need to make the process smooth, positive, and effective. Think of this as your ramp-training toolkit!
The Perfect Ramp
Not all ramps are created equal. Choosing the right one is the first step to success. Look for these key features:
- High-Traction Surface: The surface should be non-slip. Look for materials like rubber, artificial turf, or carpet. A slippery plastic surface is a recipe for fear and failure.
- Appropriate Incline: A ramp that is too short for the height will be too steep. A gentler slope is always better and less intimidating. For cars, measure from the ground to your trunk floor and check the ramp’s recommended height.
- Sturdy and Stable: The ramp must not wobble or bounce when your dog is on it. It should feel secure to them. Check the weight capacity to ensure it can easily support your dog.
- Portability and Storage: If you’re using it for a car, consider how easily it folds and how much it weighs. A telescoping or tri-fold ramp can be easier to manage.
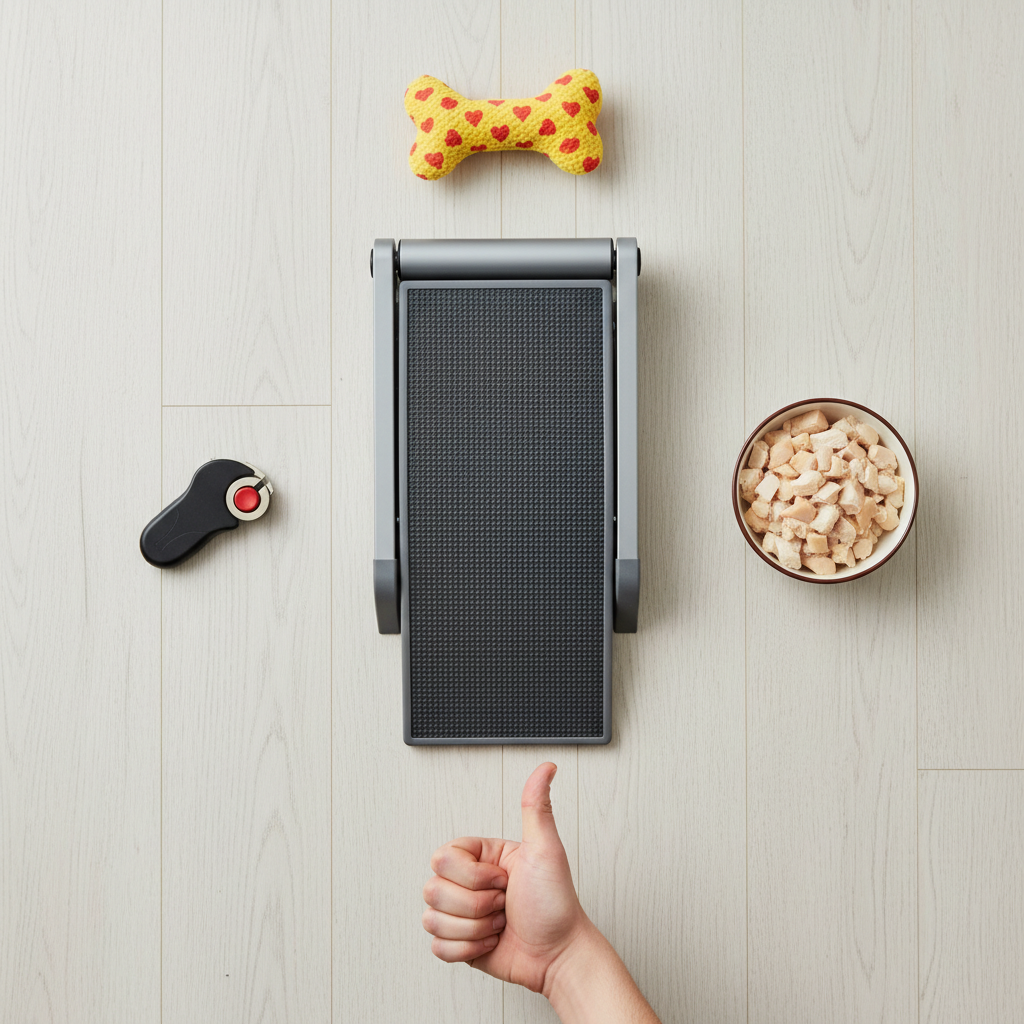
High-Value Reinforcements
This is not the time for dry kibble. You need to bring out the good stuff! High-value treats are extra-special goodies that your dog absolutely loves and doesn’t get all the time. The goal is to make the ramp more appealing than anything else in the room. Some great options include:
- Tiny pieces of boiled chicken or turkey
- Small cubes of cheese (like string cheese)
- Hot dog slices
- Soft, smelly commercial training treats
- A lickable treat in a tube for continuous reinforcement
Remember to cut them into pea-sized pieces so you can reward your dog frequently without filling them up too quickly.
The Right Environment
Start your training indoors in a quiet, familiar room with minimal distractions. The living room is often a great choice. Trying to teach this new skill for the first time in a busy parking lot is setting your dog up to be overwhelmed. You want their focus to be on you, the treats, and the fun new ramp game.
The Step-by-Step Guide to Ramp Mastery
Patience and positivity are your superpowers here. The goal is to shape your dog’s behavior one tiny, successful step at a time, making them think this whole ramp thing was their brilliant idea. Keep your training sessions short—just 3-5 minutes once or twice a day is perfect. Let’s begin!
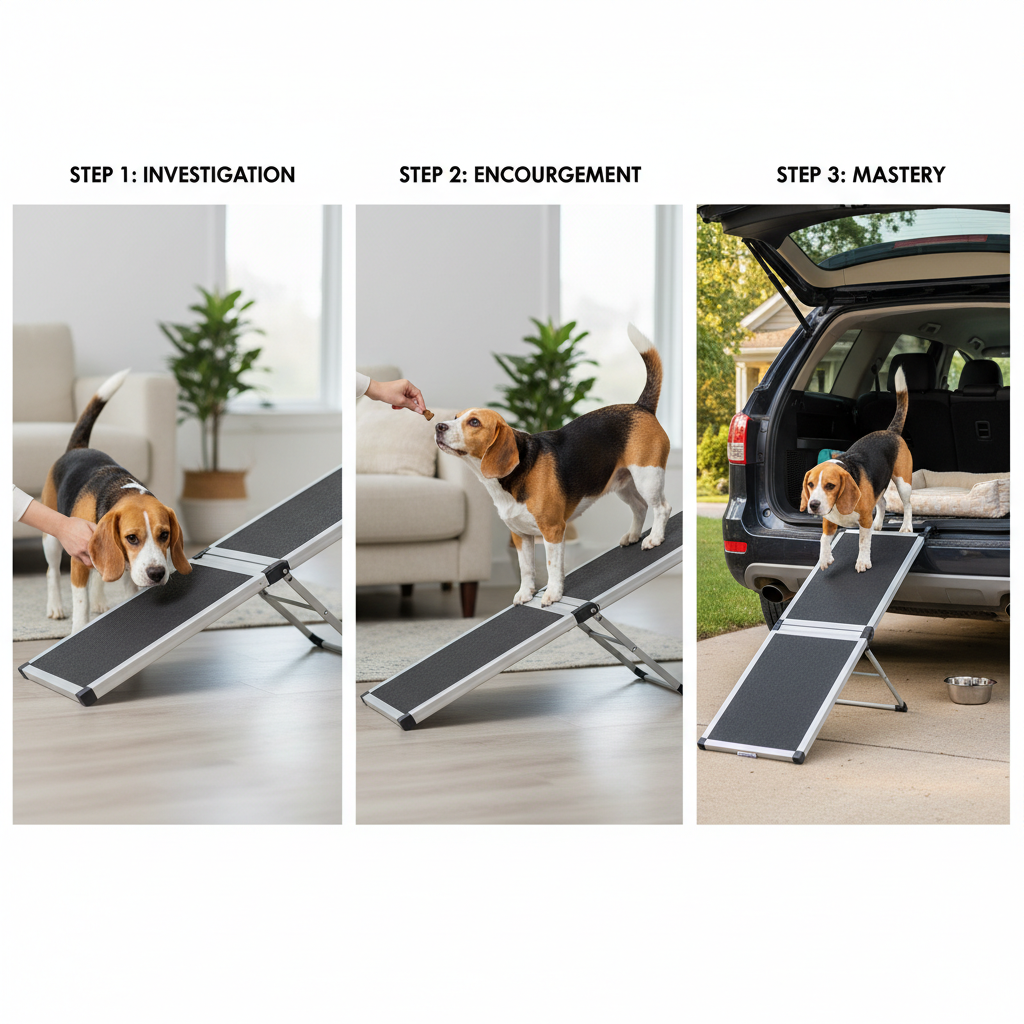
- Step 1: The Ramp is Just Furniture.
Lay the ramp completely flat on the floor in your quiet training space. Don’t ask your dog to do anything. Just let it exist. Casually toss high-value treats on and around the ramp. If your dog sniffs it, steps on it, or even looks at it, say “Yes!” (or click your clicker) and give them a treat. We are building a positive association: Ramp = Awesome Things Happen. Do this for a few short sessions. - Step 2: Walking the Plank.
With the ramp still flat, use a treat to lure your dog to walk across its length. Hold the treat at their nose and lead them from one end to the other. As soon as they make it across, give them the treat and lots of praise. Repeat this until they are walking across confidently. No incline yet! - Step 3: The Tiny Hill.
Now, create a very small incline. Prop the top end of the ramp on a single, thick book or a low, stable step stool. The incline should be barely noticeable. Repeat the luring process from Step 2. Most dogs won’t even notice the change. If they hesitate, go back to just rewarding them for putting their front paws on the ramp. - Step 4: The ‘Real World’ Low Target.
It’s time to graduate to a low, safe piece of furniture. Place the ramp against the side of your couch or an ottoman. Make sure it’s stable. Lure your dog up the ramp onto the couch. Give them a jackpot of treats and praise once they’re up! Then, lure them back down. Going down can be scarier, so be extra encouraging and use your best treats for the descent. - Step 5: Fading the Lure.
Once your dog is reliably going up and down with a treat at their nose, it’s time to fade the lure. Pretend to have a treat in your hand and use the same motion to guide them up the ramp. When they get to the top, reward them with a treat from your other hand. This teaches them to follow your hand signal, not just the treat itself. - Step 6: Adding a Verbal Cue.
When your dog is confidently using the ramp with just your hand signal, you can add a verbal cue. Just before you give the hand signal, say your chosen cue in a happy, upbeat voice. Good options are “Ramp!”, “Up you go!”, or “Hup!” With a few repetitions, your dog will associate the word with the action of using the ramp. - Step 7: Conquering the Car.
Finally, move the training to the car. The car introduces new sights, sounds, and smells, so be patient. You may need to go back a step and re-lure them for the first few attempts. End on a super positive note—a successful trip up the ramp into the car should lead to a jackpot of treats or a fun trip to the park!
Troubleshooting Common Ramp Roadblocks
Sometimes, despite our best efforts, our dogs get stuck. They might be nervous, confused, or just plain stubborn. Don’t worry! This is totally normal. Here’s how to handle some of the most common issues.
“My dog is terrified of the wobbly ramp!”
Stability is everything. A wobbly ramp feels unsafe, and your dog’s hesitation is valid. First, ensure the ramp is on even ground and securely placed against the car or furniture. If it still has some give, have a second person help stabilize it. You may also need to go back to Step 1 and spend more time building a positive association with the ramp while it’s flat on the ground. You can even feed your dog their entire dinner on the flat ramp for a few days to build a powerful positive connection.
“My dog keeps jumping off the side.”
This is common, especially with wider ramps. The easiest solution is to practice in a way that prevents this option. Set up the ramp in a narrow hallway with the ramp leading to a chair, so the walls act as natural barriers. You can also place objects (like laundry baskets) along the sides. This physically guides them to stay on the path to success. Some ramps are also sold with built-in side rails, which can be a great feature for nervous dogs.
“They’ll go up, but they absolutely will not go down.”
Walking down an incline can feel precarious for a dog, as their weight shifts forward. This fear is legitimate. Address it by making the ‘down’ ridiculously easy and rewarding. Set the ramp on the lowest possible incline (propped on a book again) and use an extra-special treat—something they almost never get—to lure them down just that tiny distance. Praise them like they just won the lottery. Slowly increase the incline as their confidence grows. Never, ever push them down.
Expert Tip: If your dog is stuck, you’re likely moving too fast. Take a deep breath and go back to the last step where they were 100% successful and happy. Rebuild their confidence there before trying to move forward again.
“We’ve been at this for weeks and aren’t getting anywhere!”
Every dog learns at a different pace. It’s not a race! It’s possible your training sessions are too long. A tired, frustrated dog won’t learn effectively. Keep sessions to just a few minutes. End on a successful repetition, even if it’s a ‘small’ one, like just putting two paws on the ramp. This ensures they finish feeling confident and eager for the next session. Your patience and positive energy are the most important tools you have.
Conclusion
Training your dog to use a ramp is so much more than a convenient trick—it’s a profound act of love and a commitment to their lifelong health. By investing a little time and patience now, you are actively protecting their spine, preserving their joints, and empowering them with safe, pain-free mobility for years to come. You’re giving them the gift of being able to stay by your side, whether that’s on the couch for cuddles or in the car on the way to a new adventure.
Remember the key takeaways: stay positive, use high-value rewards, and break the process down into tiny, achievable steps. Every paw on the ramp is a victory worth celebrating. So be patient with your best friend, be proud of their progress, and enjoy the peace of mind that comes from knowing you’re doing the very best for their well-being.