Have you ever seen those adorable videos of a dog peeking its head through its owner’s legs, wagging its tail with pure delight? That, my friend, is the ‘Middle’ trick, and it’s so much more than just a cute photo opportunity. It’s a fantastic, functional, and surprisingly easy trick that can boost your dog’s confidence and strengthen your bond. Whether you call it ‘Middle,’ ‘Center,’ ‘Home,’ or ‘Peek-a-Boo,’ this command teaches your dog to position itself between your legs.
Why should you teach it? For starters, it’s an incredible management tool. Imagine being on a crowded trail or at a busy farmer’s market; ‘Middle’ becomes a safe, secure spot for your dog, away from foot traffic and overwhelming stimuli. It’s also a brilliant recall alternative and a wonderful way to regain your dog’s focus when they’re distracted. Best of all, it’s a game! It taps into your dog’s natural desire to play and work with you. In this guide, we’re going to break down the process into simple, beginner-friendly steps. No fancy equipment or professional experience needed—just you, your furry best friend, and a pocketful of tasty treats. Let’s get started!
Gathering Your Training Toolkit
Before we jump into the fun part, let’s make sure we have everything we need for a successful training session. The right tools can make all the difference, turning a potentially frustrating experience into a joyful one for both you and your pup. Think of it as setting the stage for a great performance!
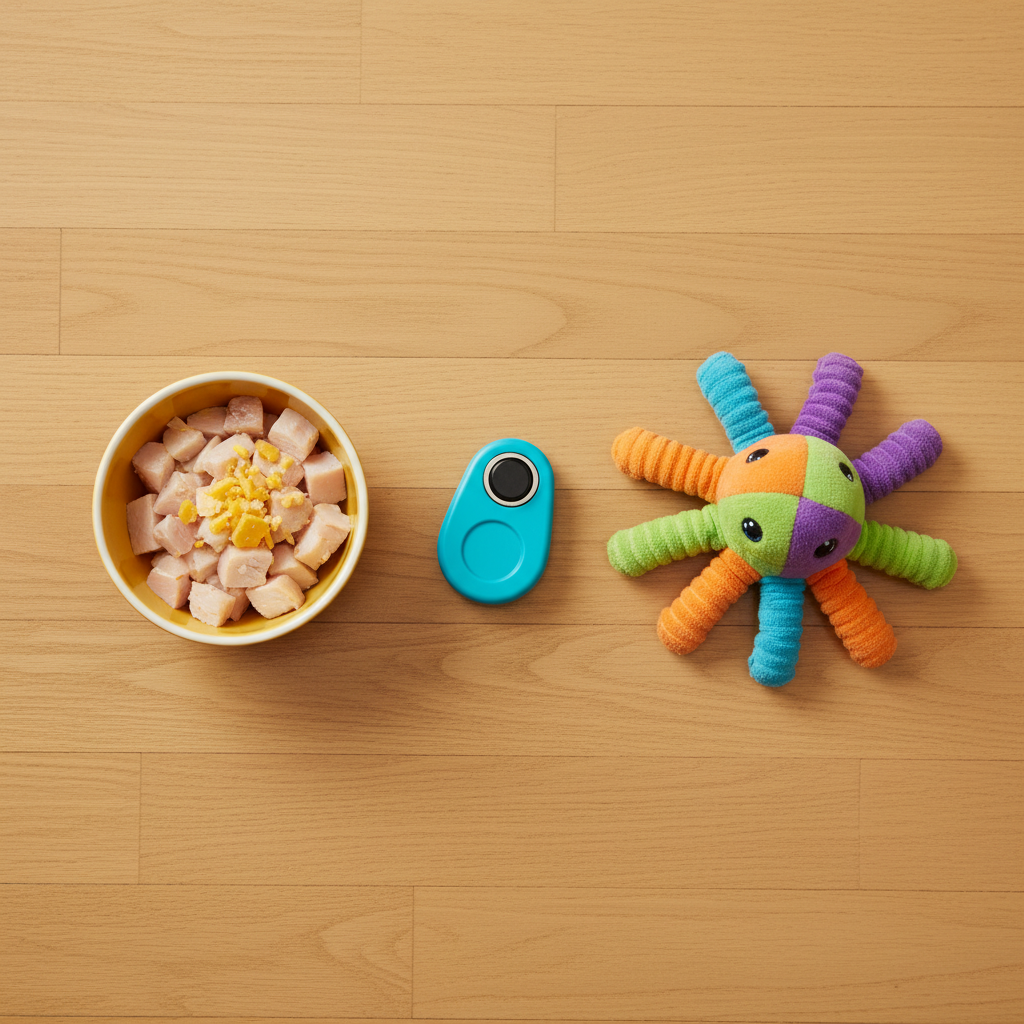
What You’ll Need:
- High-Value Treats: We’re not talking about their everyday kibble here. We need the good stuff! Think small, soft, smelly treats that your dog absolutely loves. Pieces of cooked chicken, cheese, or commercial training treats work wonders. The goal is to make the reward so irresistible that your dog is super motivated to figure out what you’re asking. Remember to keep them pea-sized so you can reward frequently without filling your dog up too quickly.
- A Positive and Patient Attitude: This is, without a doubt, the most crucial tool in your kit. Dogs are incredibly attuned to our emotions. If you’re relaxed, happy, and patient, your dog will be too. Training should always be a fun game, not a chore. Celebrate the small wins, laugh at the silly mistakes, and always end on a positive note.
- A Clicker (Optional but Recommended): A clicker is a small handheld device that makes a distinct ‘click’ sound. In training, it’s used to mark the exact moment your dog does the right thing. The ‘click’ is followed immediately by a treat. This creates a clear and precise signal for your dog, helping them learn faster. If you don’t have a clicker, no worries! You can use a verbal marker word like ‘Yes!’ or ‘Good!’ said in a sharp, happy tone. The key is consistency.
- A Distraction-Free Environment: For your first few sessions, choose a quiet space where your dog feels comfortable and can focus. A living room, a quiet backyard, or even a hallway is perfect. By minimizing distractions, you set your dog up for success and help them concentrate on the new game you’re about to play.
Expert Tip: Keep your training sessions short and sweet! Dogs, especially puppies, have short attention spans. Aim for several 5-10 minute sessions throughout the day rather than one long, grueling one. This keeps them engaged, excited, and eager to learn more.
Your Step-by-Step Guide to Teaching ‘Middle’
Alright, team, it’s go-time! With your treats ready and your positive attitude on full display, let’s teach your dog this amazing trick. We’re going to use a technique called ‘luring,’ which means using a treat to guide your dog into the desired position. It’s intuitive for dogs and easy for beginners. Follow these steps, and remember to be patient and have fun!
-
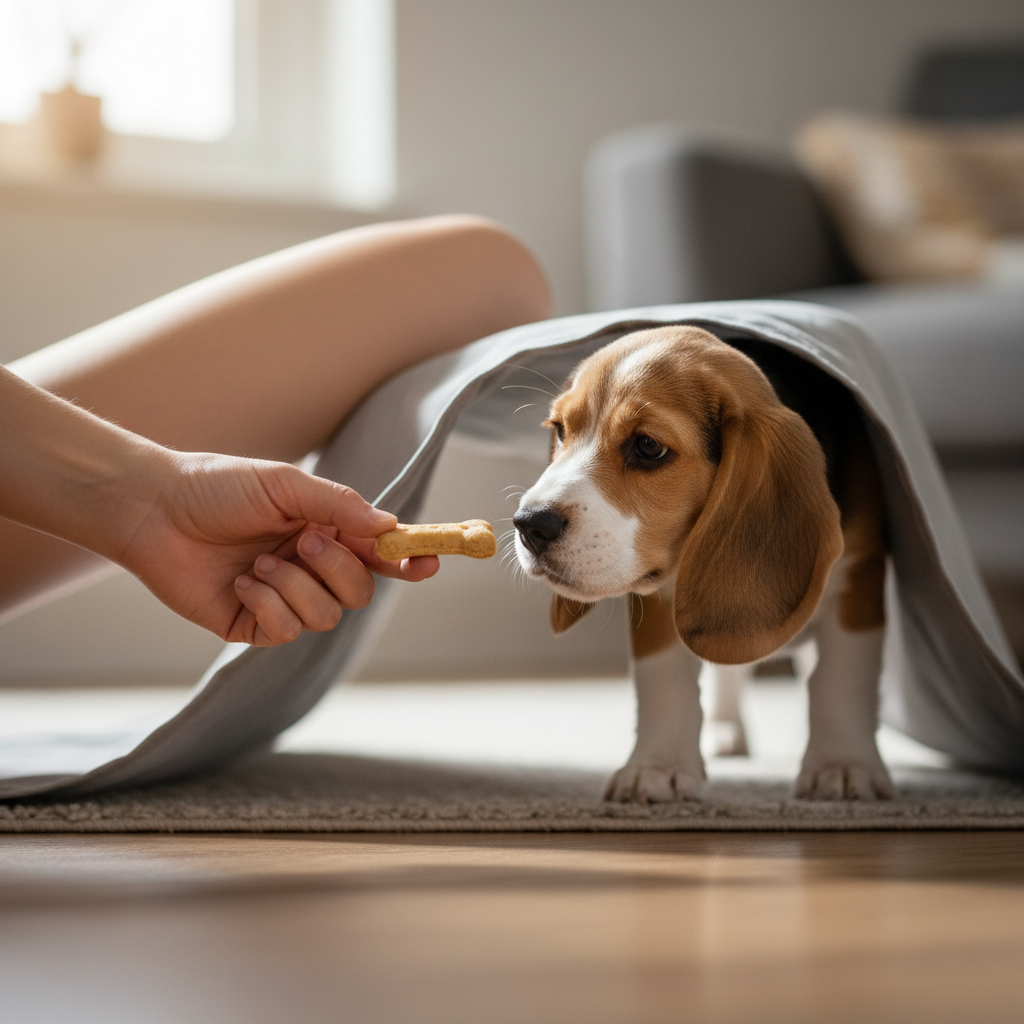
Step 1: The Treat Lure
Start by standing with your feet about shoulder-width apart, creating an inviting ‘tunnel.’ Take a tasty treat in your hand and show it to your dog to get their attention. Lower the treat to their nose level and slowly lure them from the front, through your legs, to the back. As soon as their head and shoulders pass through your legs, say ‘Yes!’ (or click) and give them the treat behind you. This encourages a full follow-through. Repeat this several times, luring them from front to back. Then, practice luring them from behind you, so they come through your legs to the front. The goal is just to get them comfortable with the motion of moving through your legs.
-
Step 2: Refining the Position
Once your dog is happily following the lure through your legs, we’ll start to shape the final position. This time, as you lure them through from the front, stop the treat right between your legs. When your dog stops in the middle to nibble the treat, say ‘Yes!’ and reward them. You want them to start associating the space between your legs as the ‘jackpot’ zone. Practice this from both the front and the back until they are confidently moving into the middle space and pausing for their reward.
-
Step 3: Introducing the Verbal Cue
Now that your dog understands the physical action, it’s time to give it a name! Just as your dog is about to move into the middle position, say your chosen cue clearly and cheerfully—’Middle!’, ‘Peek-a-boo!’, or whatever you’ve picked. As they arrive in position, mark with ‘Yes!’ and reward. Timing is key here. You want to say the cue right before the action, so your dog starts to connect the word with the behavior. Repeat this many times until the association is strong.
-
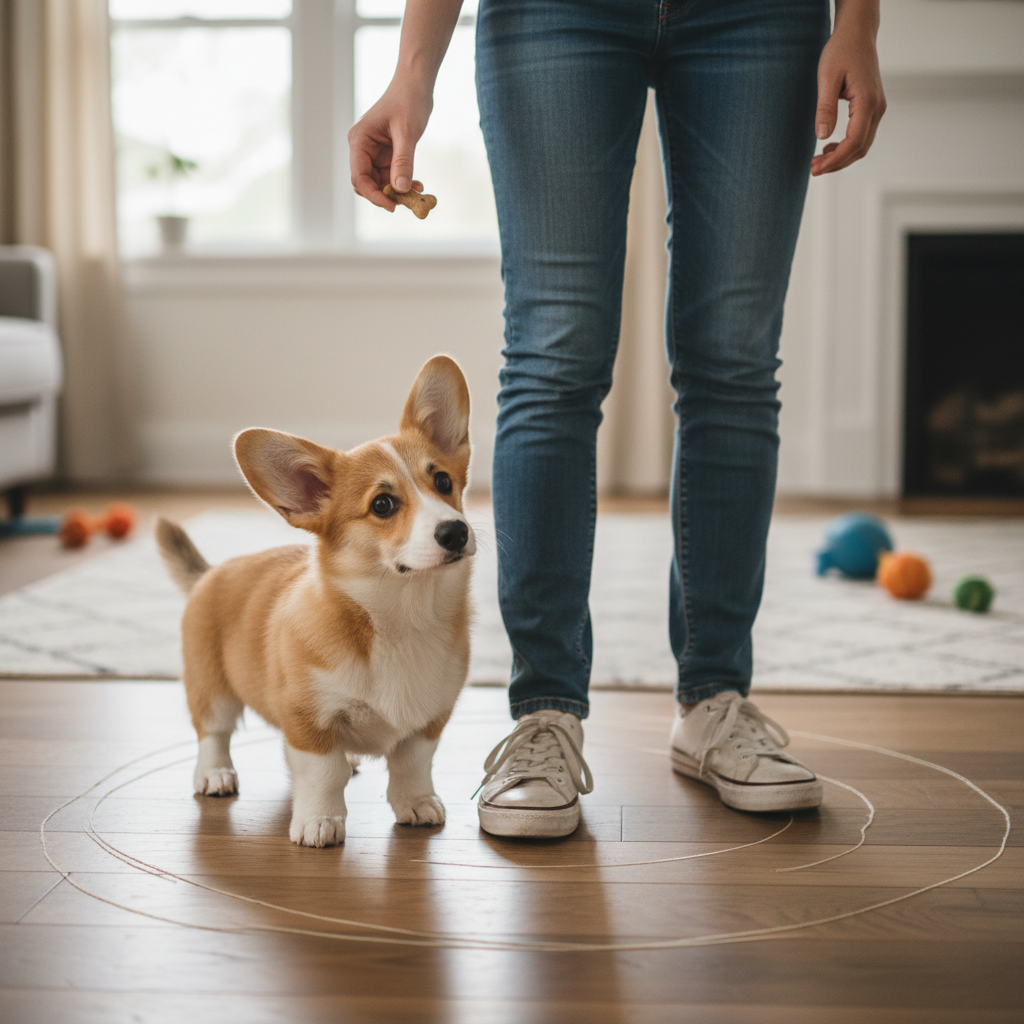
Step 4: Fading the Lure
Our goal is for the dog to respond to the verbal cue alone, without needing to see a treat. Start by making your hand lure less obvious. Instead of a treat in your hand, use an empty hand with the same motion to guide them. When they get into position, say ‘Yes!’ and then reward them with a treat from your other hand. Gradually, make your hand signal smaller and smaller—perhaps just a point towards the ground between your feet. Eventually, you should be able to stand still, say ‘Middle!’, and have your dog move into position without any hand signal at all. This step takes time, so be patient!
-
Step 5: Building Duration and Distance
Your dog is now running to ‘Middle’ on cue! That’s amazing! The next step is to teach them to stay there for a little while. Ask for the ‘Middle’ position, and once they arrive, wait just one second before you ‘Yes!’ and treat. Gradually increase the time they have to wait—two seconds, five seconds, and so on. This is called building duration. You can also start adding distance. Take one step away from your dog and ask for ‘Middle.’ When they come to you, give them lots of praise and a big reward. Slowly increase the distance until you can call them into their ‘safe spot’ from across the room!
Troubleshooting Common ‘Middle’ Mishaps
Even with the best plan, sometimes our canine students get a little confused. Don’t worry, it’s a normal part of the learning process! If you hit a snag, take a deep breath, and remember to keep it positive. Here are some common challenges and how to work through them.
‘My dog just walks around my legs, not through them.’
This is a classic! It usually means the ‘tunnel’ isn’t obvious enough or the lure isn’t clear. Try widening your stance to make the path more inviting. Also, make sure you are luring them straight through, not in an arc. You can even practice in a hallway with your legs blocking the entire path, giving them no other option but to go through. Make it a super fun party with lots of treats when they do!
‘My dog is scared or hesitant to go between my legs.’
Some dogs, especially timid ones or very large ones, might feel uncomfortable with the enclosed space at first. Never force them. We need to build a positive association. Start by simply tossing a treat on the ground between your feet and letting them get it without any pressure. Do this a few times. Then, try luring them just a little bit, so only their head goes between your legs. ‘Yes!’ and reward for that small effort. Gradually ask for more until they are comfortable coming all the way through. Keep your body language relaxed and your voice happy and encouraging.
‘My dog gets the position but won’t stay there.’
This is a duration issue. It’s likely we’ve asked for too much, too soon. Go back a step. Reward your dog the instant they get into the middle position. Don’t ask for any ‘stay’ yet. After several successful reps of this, start adding just a single second of waiting time before the ‘Yes!’ and treat. If they pop out, that’s okay! Don’t scold them. Just reset and try again with a shorter duration. You can also deliver multiple small treats in a row while they are holding the position to teach them that staying put is highly rewarding.
Remember the Golden Rule: If your dog is failing more than they are succeeding, the step is too hard. Break it down into an even smaller, easier piece. Training is all about building a chain of successes!
Beyond the Trick: Practical Perks of the ‘Middle’ Position
You’ve taught your dog an adorable trick, and you should be proud! But the ‘Middle’ command is like a secret superpower disguised as a party trick. Its real value shines in everyday situations, providing safety, security, and a unique way to communicate with your dog. Let’s explore how this simple position can be a game-changer.
A Portable Safe Space
For anxious or fearful dogs, the world can be a scary place. Crowds, new environments, or even an overly enthusiastic dog approaching at the park can be overwhelming. The ‘Middle’ position acts as a physical ‘home base.’ By tucking in between your legs, your dog is protected on all sides by the person they trust most—you. It gives them a secure spot to observe the world without feeling exposed. When you see your dog getting nervous, you can cue ‘Middle,’ and they know exactly where to go to feel safe. It’s a powerful way to help them manage their anxiety.
A Super-Powered Recall
Does your dog sometimes ignore your ‘Come!’ command, especially when there are exciting smells to investigate? Try using ‘Middle’ as your recall cue instead! It’s often more effective because it’s a specific, fun game with a clear endpoint, rather than a more vague ‘come to me.’ The novelty and positive association can cut through distractions. It’s also fantastic for management when a visitor comes to the door or you need to leash them up at the end of a hike. Calling them into ‘Middle’ brings them right to you, making leashing up a breeze.
The Ultimate Focus-Builder
In a world full of squirrels, other dogs, and interesting sounds, getting your dog to focus on you can be a challenge. ‘Middle’ requires your dog to disengage from the environment and re-engage with you. It’s a physical reset button. When your dog is in position and looking up at you, you have their undivided attention. You can use this moment of focus to give them another command, calm them down, or simply reward them for checking in with you. It strengthens your connection and reinforces that you are the most interesting thing in their world.
A Helping Hand for Vet Visits and Grooming
While not its primary purpose, a solid ‘Middle’ can be helpful in cooperative care. It can keep your dog in a calm, stationary position while you towel them off after a rainy walk or while a vet tech prepares for an exam. It gives them a familiar, comforting behavior to perform in a potentially stressful environment, making the entire experience easier for everyone involved.
Conclusion
Congratulations! You now have all the tools and knowledge to teach your dog the wonderfully charming and incredibly useful ‘Middle’ trick. More than just a crowd-pleaser, you’ve unlocked a new way to communicate, protect, and connect with your furry companion. Remember that every dog learns at a different pace. Be patient, stay positive, and celebrate every little bit of progress along the way. The real magic isn’t just in the finished trick, but in the moments of laughter, learning, and teamwork you share together. So grab those treats, find a happy space, and get ready to play some peek-a-boo. You and your dog are going to have a blast!