Let’s be honest, the moment the nail clippers come out, does your dog suddenly develop superpowers of invisibility or morph into a furry octopus? You’re not alone. For many pet owners, trimming a dog’s nails is a dreaded task, filled with anxiety for both human and canine. The fear of accidentally cutting the quick, the stressful restraint, and the general drama can make it an ordeal. But what if there was a better way? What if you could ditch the clippers and turn nail care into a fun, engaging game your dog actually wants to play?
Welcome to the world of scratch boards! This simple, DIY tool empowers your dog to file their own nails through a fun, reward-based activity. It’s a brilliant method rooted in positive reinforcement that builds confidence, strengthens your bond, and keeps those claws at a healthy, comfortable length without a single stressful ‘snip.’ In this guide, we’ll walk you through everything you need to know, from building your own board to teaching your pup how to become their very own ‘paw-dicurist.’ Get ready to say goodbye to the nail trim nightmare and hello to happy, healthy paws!
Gather Your Supplies: Building Your DIY Scratch Board
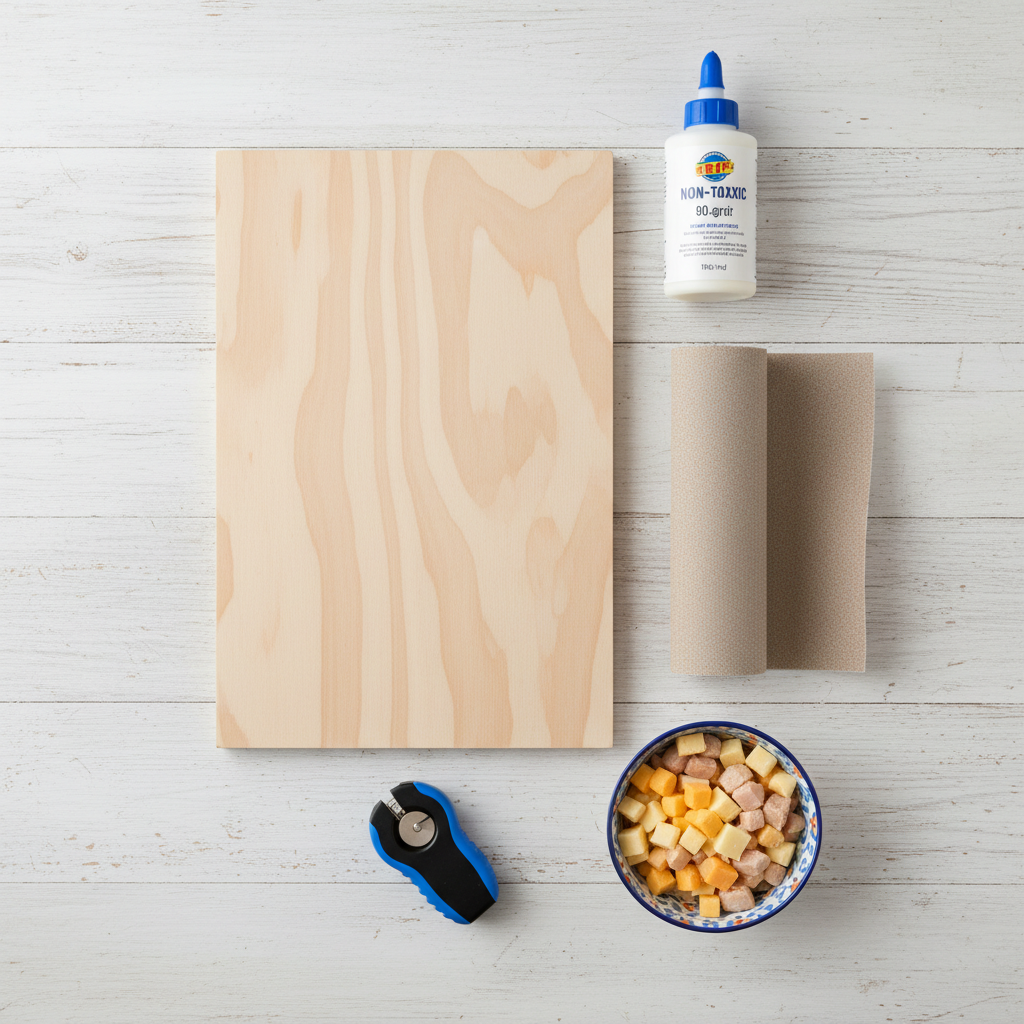
Before we jump into the training, let’s get our materials ready. Creating a scratch board is incredibly simple and inexpensive. You might even have most of what you need lying around the house! The goal is to create a sturdy, abrasive surface that your dog can comfortably scratch. Think of it as a giant nail file, but way more fun.
What You’ll Need for Your Board:
- A Sturdy Base: This is the foundation of your scratch board. You want something that won’t slide around or flex too much when your dog gets excited. Great options include:
- A piece of scrap plywood or a 2×4 (about 10 inches wide and 24 inches long is a good starting size).
- An old, sturdy cutting board.
- The flat side of a wooden box or crate.
- The Abrasive Surface: This is what does the filing. Sandpaper is the go-to choice.
- Grit Matters: Start with a medium grit, like 80-100. This is coarse enough to file effectively without being too rough on your dog’s paw pads. You can always adjust later if needed. You can find large sheets or rolls at any hardware store.
- A Safe Adhesive: You’ll need to attach the sandpaper to the board securely. Make sure whatever you use is non-toxic once cured.
- Non-toxic wood glue or a strong, non-toxic craft glue works perfectly.
- Some people opt for industrial-strength, self-adhesive sandpaper for an even easier build.
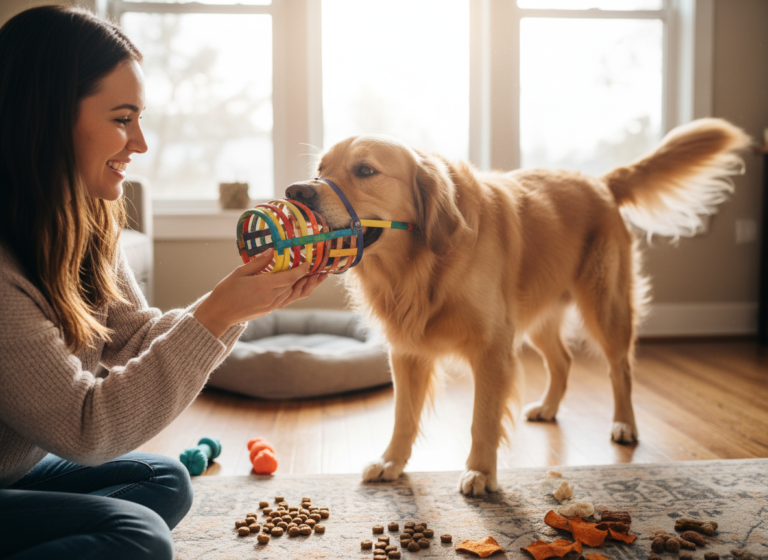
- The Ultimate Motivator: High-Value Treats! This is the most important part of the training process. Standard kibble probably won’t cut it. You need rewards that your dog finds absolutely irresistible. Think small, pea-sized pieces of:
- Cooked chicken or turkey
- Cheese
- Hot dogs
- Peanut butter (xylitol-free, of course!) on a spoon
- Their favorite commercial training treats
- Optional but Helpful: A Clicker. If you’re familiar with clicker training, a clicker can be a powerful tool to precisely mark the moment your dog does the right thing (scratching the board). If not, a consistent verbal marker like a happy “Yes!” works just as well.
Once you have your supplies, assembly is a breeze. Simply cut the sandpaper to fit your board and glue it on. Let it dry completely according to the glue’s instructions before you introduce it to your dog. Your goal is a solid, one-piece tool that’s ready for action. Now, let’s get to the fun part: the training!
From Curious Sniffs to Perfect Paws: The 5-Step Training Guide
This is where the magic happens! Remember, the key to success is patience, positivity, and lots of praise. We’re going to break this down into tiny, achievable steps for your dog. Keep your training sessions short and sweet—just 2-5 minutes at a time is perfect to keep your dog engaged and eager for more.
-
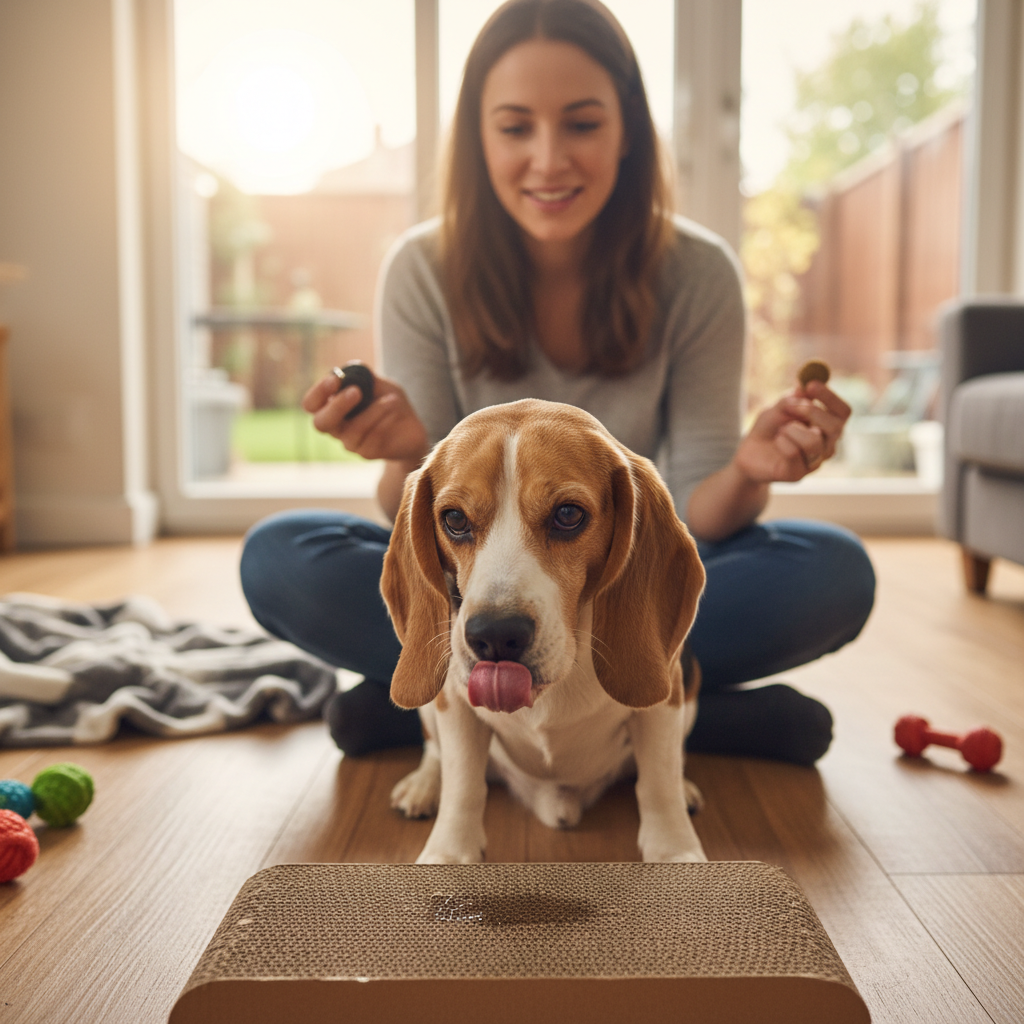
Step 1: The Introduction – ‘This Board is Awesome!’
First, we just want your dog to think the board is the best new toy ever. Don’t ask for any scratching yet. Simply place the board flat on the floor. The second your dog shows any interest in it—sniffing it, looking at it, stepping on it—click (or say “Yes!”) and give them a treat. Drop the treat right on the board to build a stronger positive association. Do this for a minute or two, then put the board away. The goal is to leave them wanting more.
-
Step 2: Shaping the Scratch – Rewarding Paw Action
Now we’ll start to ‘shape’ the behavior we want. With the board flat on the floor, wait for your dog to interact with it. At first, they might just sniff it. But eventually, they’ll likely touch it with their paw out of curiosity. The instant their paw touches the board, click/”Yes!” and reward. Repeat this several times. Once they are reliably touching the board with their paw, you can raise the criteria slightly. Wait for a small digging or scratching motion. Even the tiniest scrape of a nail deserves a click and a treat! This is where you can introduce a verbal cue like “File!” or “Scratch!” right as they perform the action.
Expert Tip: If your dog is hesitant to offer their paw, you can hold a treat under your thumb on the surface of the board. As they try to paw at your hand to get the treat, they’ll make contact with the sandpaper. Click and reward for that contact!
-
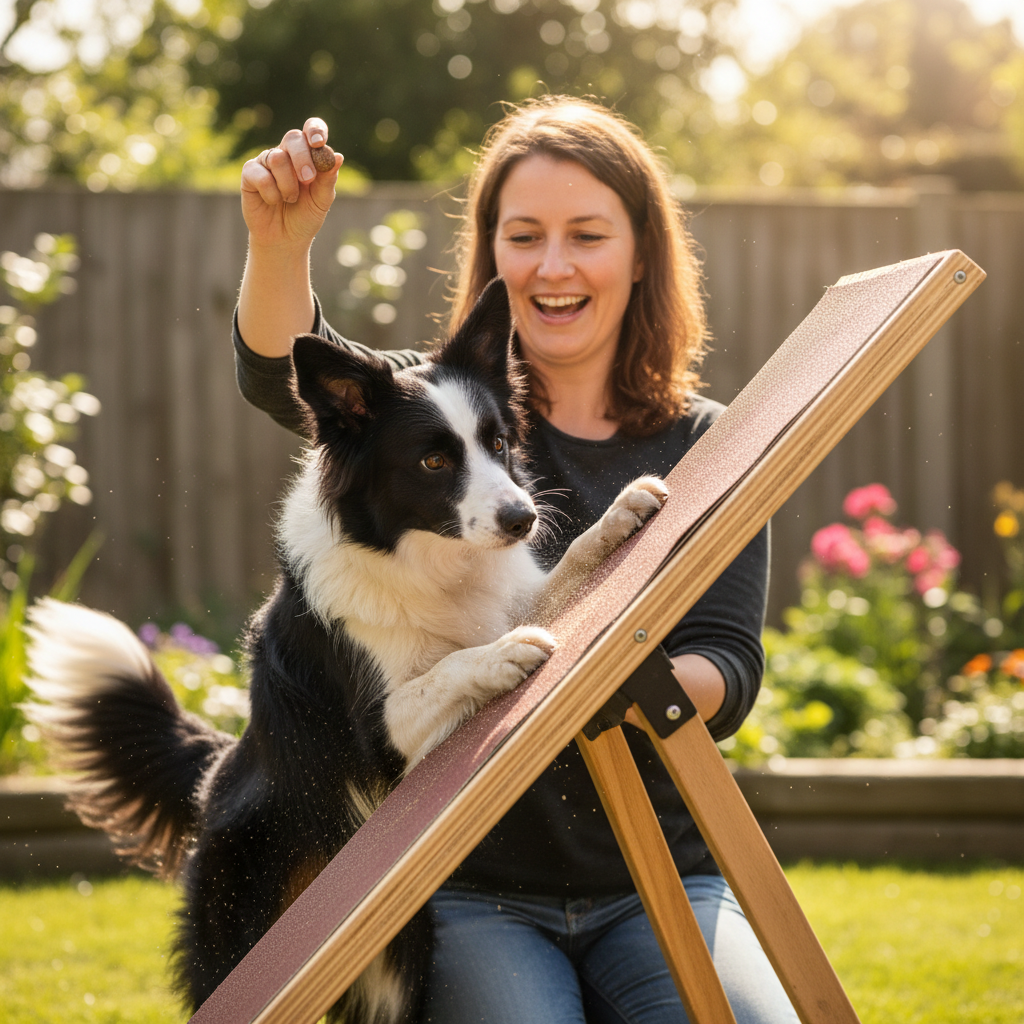
Step 3: Building Power and Duration
Once your dog understands that paw-on-board action gets them a reward, it’s time to encourage more effective filing. Now, you’ll start holding the board at a slight angle (around 45 degrees). This naturally encourages a more downward scratching motion, which is perfect for filing the nails. When they scratch, give them a ‘jackpot’—a quick succession of 3-4 treats—to let them know they did something extra great. This will encourage more powerful and deliberate scratches.
-
Step 4: Targeting All the Nails
Dogs tend to favor one paw or scratch in the same spot. To ensure an even file, you’ll need to guide their scratching. You can do this by holding the treat in different positions over the board. If you want them to scratch the left side, hold the treat there. If you want them to use their right paw, position yourself and the board to make it easier for them to do so. This turns it into a fun targeting game.
-
Step 5: Tackling the Back Paws (The Next Level)
The back paws can be trickier, as dogs don’t naturally dig with them in the same way. The technique is a bit different. You’ll need a larger board or a custom-built box with sandpaper on the top. The goal is to teach them to ‘back up’ onto the board, dragging their hind feet. You can lure them into position with a treat. Reward any backward step onto the board. This takes time and patience, and honestly, many people find that the front paws are the biggest battle, so mastering that first is a huge win!
Oops! Common Sticking Points and How to Fix Them
Training is never a straight line; there will be bumps along the way! Don’t get discouraged. If you hit a snag, it’s usually a sign to take a step back and make it easier for your dog. Here are some common issues and how to navigate them.
My dog is scared of the board or won’t go near it.
This is common with cautious dogs. It means the initial introduction was too fast. Take it all the way back to square one. Put the board on the other side of the room and reward your dog just for looking at it. Gradually decrease the distance over several short sessions. Place super high-value treats on and around it without asking for any interaction. Let your dog discover on their own that the board makes amazing things happen.
My dog just licks the board or tries to bite it.
This usually happens when a dog is trying to figure out the ‘puzzle’ but hasn’t landed on the right answer yet. If they lick or bite, simply ignore the behavior (don’t say “No”). The moment they stop and offer a different behavior, especially a paw touch, reward it enthusiastically! You can also try smearing a tiny bit of peanut butter or cream cheese on the board, which can sometimes prompt them to paw at it after they’re done licking.
My dog isn’t scratching hard enough to actually file their nails.
This is a motivation issue! It’s time to up the value of your rewards. If you’ve been using regular treats, switch to tiny pieces of steak or cheese. Also, make your reaction more exciting! When they give you a good, strong scratch, give them a jackpot of several treats in a row and lots of verbal praise. You can also try making the ‘game’ faster-paced to build excitement and momentum.
They only ever use one paw!
Dogs have preferences, just like us! To encourage the use of their non-dominant paw, simply shift your body and the board to the other side. By making it physically awkward to use their favorite paw, you encourage them to try the other one. When they do, reward them generously to build their confidence with that paw.
Safety First: Protecting Your Pup’s Paws
While this method is significantly safer and less stressful than clippers, there are still a few important safety considerations to keep in mind. Our goal is healthy nails, and that includes healthy paws!
Check Those Paws and Pads
After each session, especially in the beginning, do a quick check of your dog’s paw pads and the skin around their nails. The sandpaper is abrasive, and we want to ensure there’s no irritation, redness, or scrapes. If you notice any sensitivity, take a break for a day or two and consider using a finer grit sandpaper (like 120-grit) when you resume.
Important Takeaway: Never, ever force your dog’s paw onto the board. This method is built on trust and positive reinforcement. Forcing them will create fear and undo all your hard work.
Know When to Stop
How do you know when the nails are short enough? The goal is for the nails to be just off the ground when your dog is standing squarely on a flat surface. You shouldn’t hear a ‘click-clack’ sound when they walk on hard floors. Be very careful not to over-file. Filing down to the quick (the live part of the nail) is painful and will create a negative association with the board. Short, frequent sessions are much safer than one long session.
Don’t Forget the Dewclaws!
This is a critical point: the scratch board will not file your dog’s dewclaws. These are the small claws on the side of their front legs (and sometimes back legs) that don’t touch the ground. You will still need to trim these manually with clippers or a grinder. Since it’s just one nail per leg, it’s a much quicker and less stressful task than a full-four-paw trim.
By keeping these safety tips in mind, you can ensure that your new nail care routine is a positive, safe, and effective experience for your furry best friend.
Conclusion
Congratulations! You now have the tools and knowledge to transform one of the most stressful parts of dog ownership into a joyful and productive bonding activity. By teaching your dog to file their own nails, you’re not just maintaining their physical health; you’re also building their confidence, enriching their mind, and strengthening your relationship through positive training.
Remember that every dog learns at a different pace. Be patient with your pup and with yourself. Celebrate the small victories, keep it fun, and before you know it, the dreaded nail clippers will be gathering dust in a drawer. Here’s to happy, healthy paws and a happier, more confident dog!