There’s nothing quite like exploring the great outdoors with your best furry friend trotting happily by your side. The rustle of leaves, the fresh mountain air, and the shared experience create memories that last a lifetime. But as responsible pet owners, we know that adventure and preparedness go hand-in-hand. What if your hiking buddy could become an even more active partner in your adventures? We’re not just talking about companionship; we’re talking about them carrying their own essential gear, specifically their first aid kit. Teaching your dog to wear a backpack isn’t just a neat trick—it’s a practical skill that enhances safety, builds their confidence, and lightens your load. In this guide, we’ll walk you through everything you need to know, from picking the perfect pack to making the training process a fun and positive experience for you both. Let’s get started!
Step 1: Choosing the Perfect Pack for Your Pup
Choosing the Perfect Pack for Your Pup
Before you can teach your dog to carry their gear, you need to find the right backpack. This is a critical first step because a poorly fitting or uncomfortable pack can make the entire experience negative for your dog. Think of it like buying your own hiking boots—comfort and fit are everything!
Key Features to Look For
Not all dog backpacks are created equal. Here’s a checklist of what to prioritize:
- Ergonomic Design: Look for a pack that distributes weight evenly across your dog’s shoulders and back, not their spine. A ‘saddlebag’ style is most common and effective.
- Proper Fit & Adjustability: The pack should be snug but not tight. You should be able to fit two fingers comfortably under the straps. Multiple adjustment points (usually around the chest and girth) are essential for a custom fit.
- Durable, Lightweight Material: You want something that can withstand branches and scrapes but isn’t heavy on its own. Ripstop nylon is a popular and excellent choice.
- Padding and Breathability: Padded straps and a breathable mesh lining will prevent chafing and help keep your dog cool and comfortable on the trail.
- Safety Features: A sturdy D-ring for leash attachment and reflective trim for visibility are fantastic safety additions. A handle on top is also incredibly useful for helping your dog over obstacles.
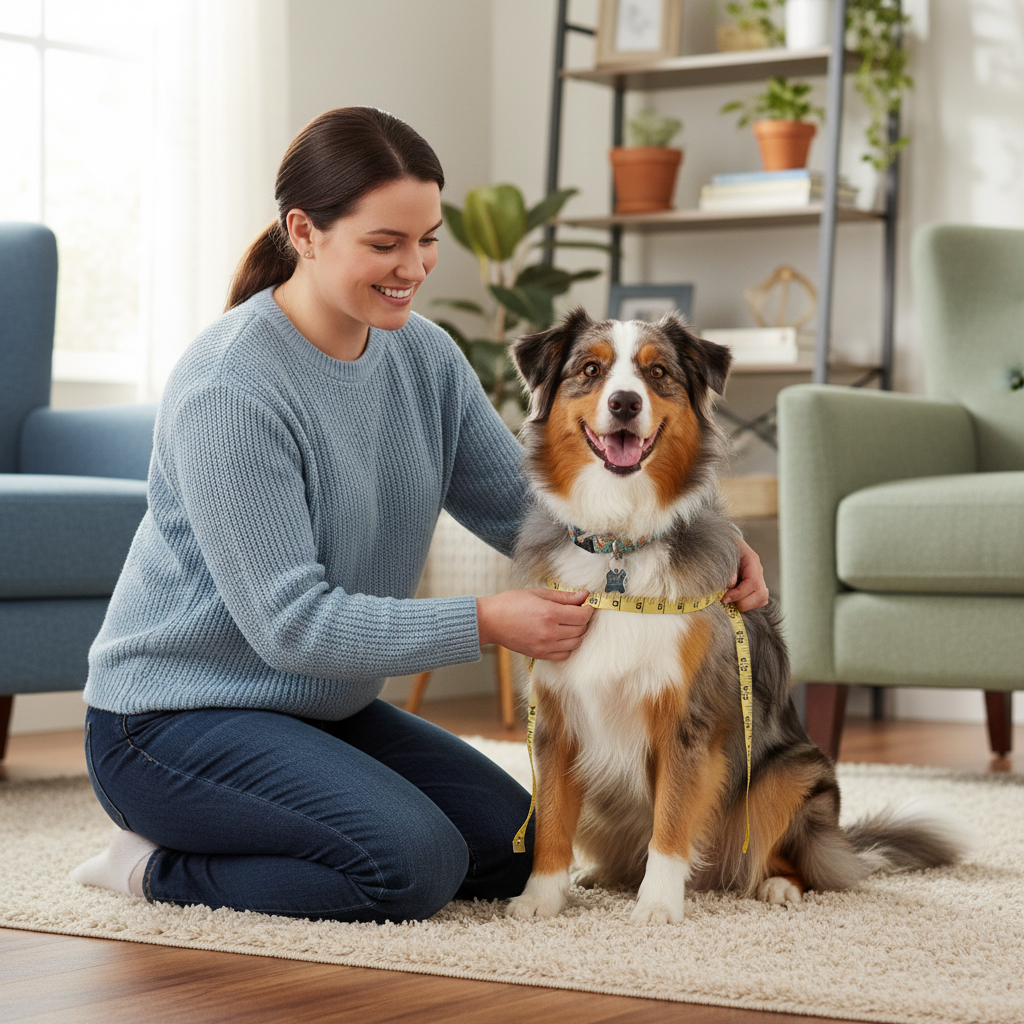
How to Measure Your Dog for a Backpack
Getting the right size is non-negotiable. Don’t just guess based on your dog’s weight or breed. Grab a soft measuring tape and follow these steps:
- Measure the Girth: This is the most important measurement. Wrap the tape measure around the widest part of your dog’s chest, right behind their front legs.
- Check the Manufacturer’s Sizing Chart: Each brand has its own sizing guide. Compare your dog’s girth measurement to the chart to find the perfect size. If your dog is between sizes, it’s often better to size down to prevent the pack from shifting too much.
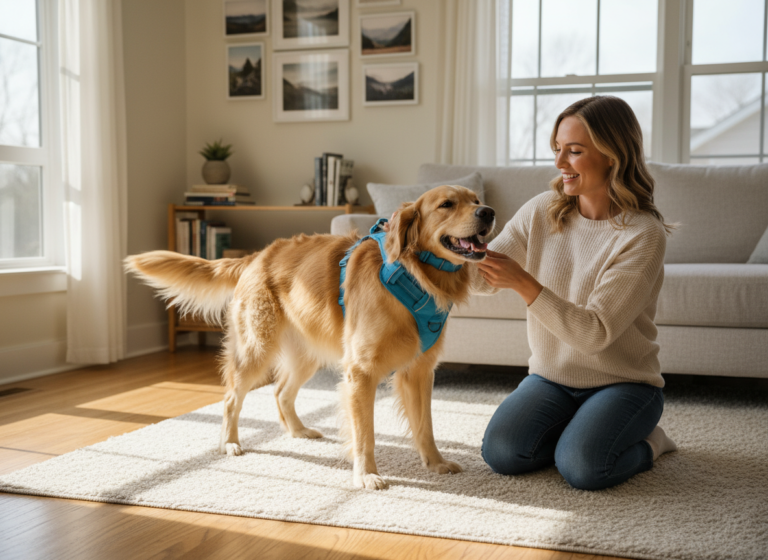
Expert Tip: When you first try the pack on your dog, do it in a calm, happy environment. Have plenty of treats ready! Let them sniff it and associate it with positive things before you even try to buckle it up.
Step 2: What to Pack in Your Dog’s First Aid Kit
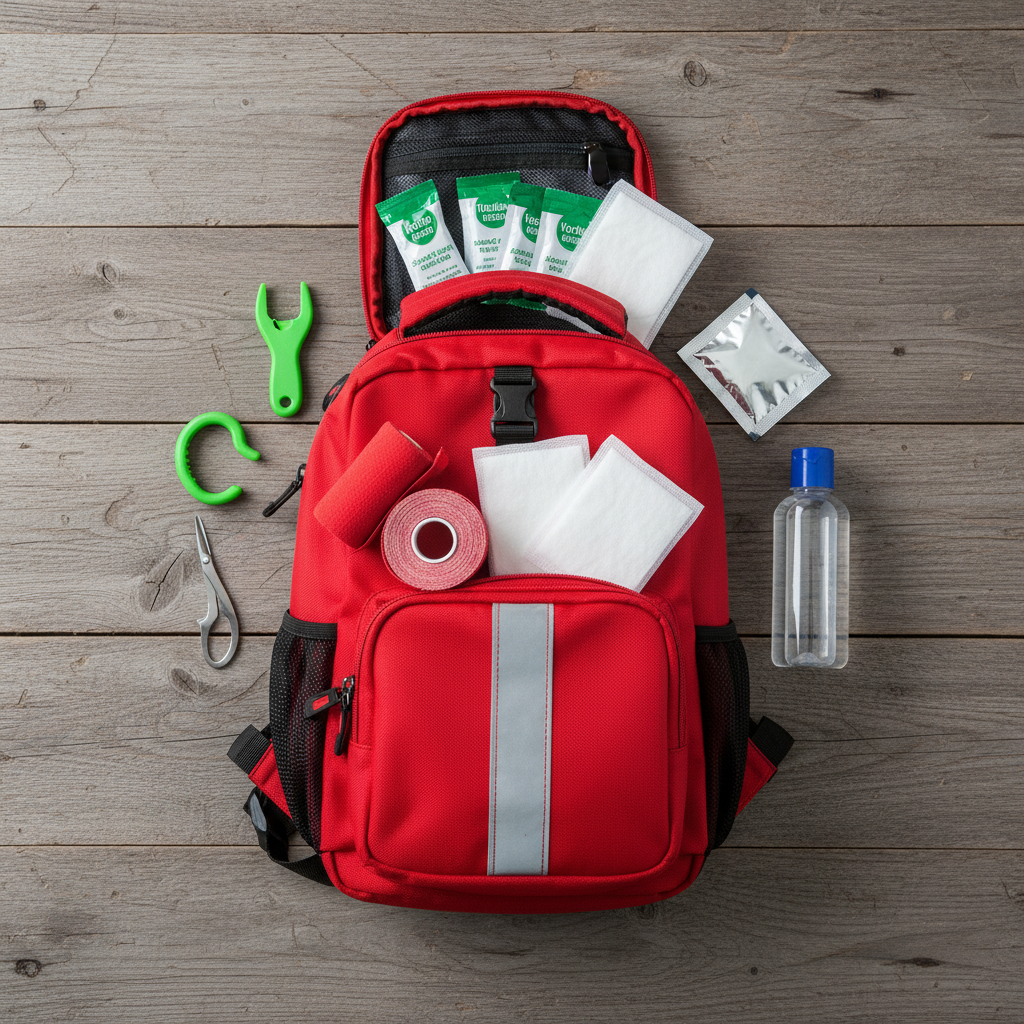
Step 2: What to Pack in Your Dog’s First Aid Kit
Now that you have the pack, let’s talk about what goes inside it. The goal is to be prepared for common trail mishaps without overloading your dog. The cardinal rule of dog packing is that a dog should never carry more than 25% of their body weight, and for beginners, it’s best to start with 10-15%.
Essential First-Aid Supplies
You can buy a pre-made canine first-aid kit or assemble your own. Here are the must-haves for the trail:
- Wound Care: Antiseptic wipes, saline solution (for flushing wounds), and a dog-safe antiseptic spray or ointment.
- Bandaging Materials: Gauze pads, adhesive tape (the kind that doesn’t stick to fur), and self-adhering bandages (like Vetrap). A non-stick pad is great for larger scrapes.
- Tools: Blunt-nosed scissors, tweezers (for splinters or ticks), and a tick removal tool.
- Medications: Any personal medications your dog needs, plus styptic powder to stop bleeding from a broken nail. It’s also wise to carry Benadryl for allergic reactions, but always consult your vet for the correct dosage for your specific dog beforehand.
- Other Essentials: A pair of disposable gloves, a small towel, paw balm or booties for rough terrain, and an emergency blanket. Don’t forget to include a card with your vet’s contact information.
The Weight Rule: Don’t Overload Your Buddy
This is extremely important for your dog’s safety and comfort. A heavy pack can cause muscle strain, joint pain, and fatigue. Always weigh the packed bag before you put it on your dog.
| Dog’s Weight | Maximum Pack Weight (25%) | Recommended Beginner Weight (10-15%) |
|---|---|---|
| 30 lbs | 7.5 lbs | 3 – 4.5 lbs |
| 50 lbs | 12.5 lbs | 5 – 7.5 lbs |
| 70 lbs | 17.5 lbs | 7 – 10.5 lbs |
| 90 lbs | 22.5 lbs | 9 – 13.5 lbs |
Remember to distribute the weight evenly between the two sides of the pack. This prevents it from shifting and keeps your dog balanced and comfortable on uneven terrain.
Step 3: The Acclimation Phase: Making Friends with the Backpack
Step 3: The Acclimation Phase: Making Friends with the Backpack
You wouldn’t want someone to just throw a heavy bag on you and expect you to walk for miles, and neither does your dog! This phase is all about creating a positive association with the backpack. Patience is key. The goal is for your dog to see the pack and think, “Oh boy, something fun is about to happen!”
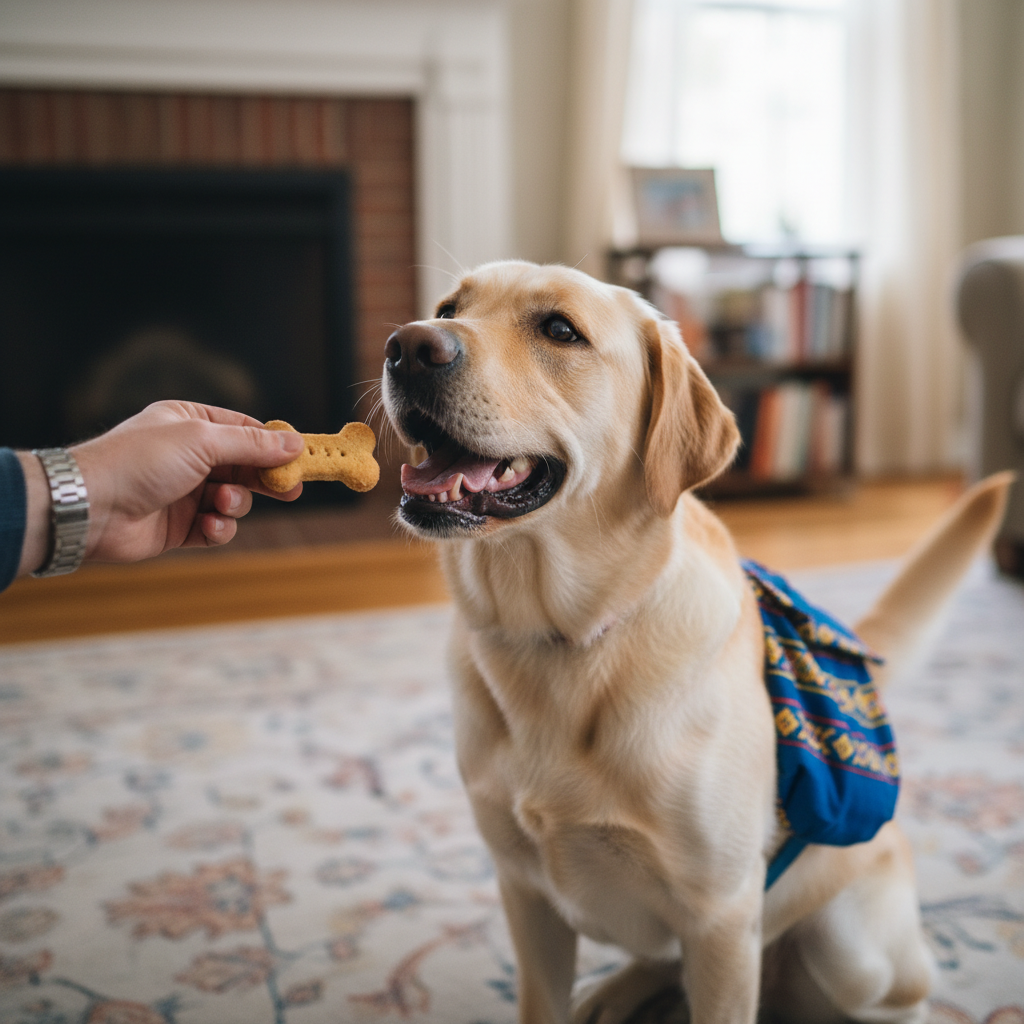
- Introduction: Start by simply placing the empty backpack on the floor. Let your dog sniff it, walk around it, and get used to its presence. Whenever they show calm curiosity, praise them and give them a high-value treat. Do this for a few short sessions over a day or two.
- First Fitting (Empty): Once they are comfortable with the pack on the floor, it’s time to put it on. Make it a happy occasion! Hold the pack up, get them excited, and then gently place it on their back. Don’t buckle it yet. Give them lots of praise and treats, then take it off. Keep this session short and sweet—no more than a minute.
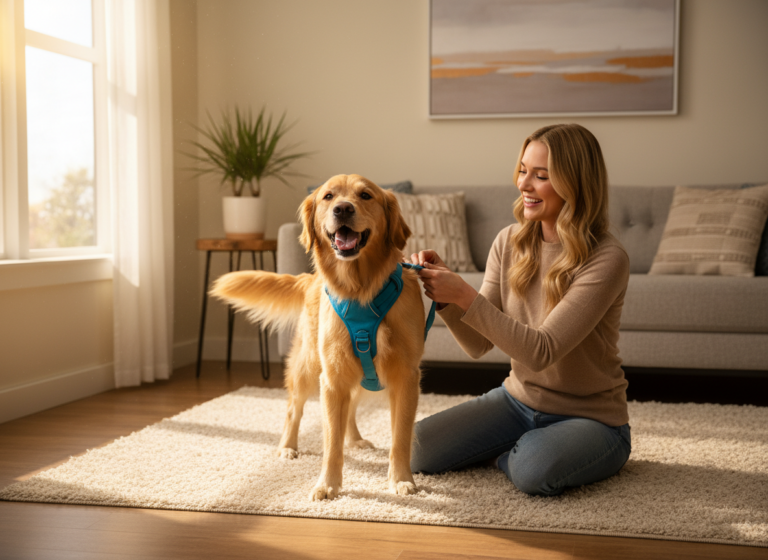
- Buckle Up: After a few sessions of just placing it on their back, proceed to loosely fasten the buckles. Again, shower them with praise and treats. Let them wear the empty pack around the house for 2-5 minutes at a time. Distract them with a favorite toy or some simple obedience cues like ‘sit’ or ‘shake’.
- Increase Duration: Gradually increase the amount of time they wear the empty pack around the house. The goal is to get them to the point where they forget they even have it on. If they seem bothered, try to distract them. If they start scratching at it or trying to rub it off, shorten the session and end on a positive note with a treat.
Remember: Every interaction with the pack should be positive. If your dog seems stressed or anxious, you’re moving too fast. Go back a step and work at their pace. This initial investment of time will pay off immensely on the trail.
Step 4: The Step-by-Step Training Guide for the Trail
Step 4: The Step-by-Step Training Guide for the Trail
Your dog is now comfortable with their pack! It’s time to add a little weight and hit the road (or the sidewalk, to start). This is where we transition from acclimation to active training.
Phase 1: Adding Weight
Start light. Very light. Use items like water bottles (you can control the weight easily by adding or removing water), or bags of dry beans. Add just a little bit of weight, maybe 1-2 lbs total, ensuring it’s balanced on both sides. Let your dog wear the lightly weighted pack around the house, just like they did when it was empty. Watch their body language. Are they still moving freely and comfortably? If so, you’re ready for the next step.
Phase 2: The First Walks
Your first walks should be short and on familiar territory, like a walk around the block. Keep the leash loose and the mood upbeat. This allows your dog to get used to the sensation of the pack’s movement while they walk. After a few successful short walks, you can begin to gradually increase two things: the weight in the pack and the duration of the walk.
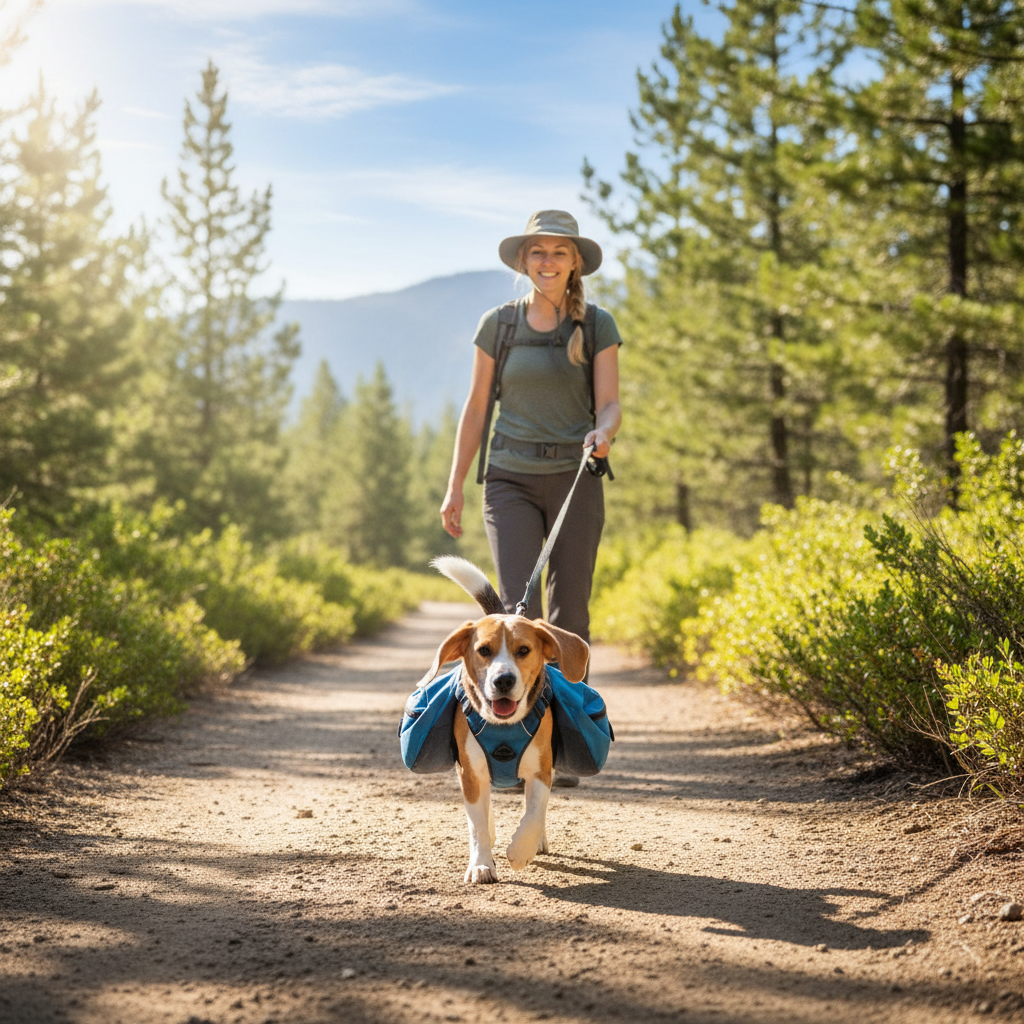
Phase 3: Hitting the Trails
Once your dog is confidently walking with a lightly weighted pack in your neighborhood, it’s time for a real hike! Choose an easy, relatively flat trail for your first outing. Keep the duration shorter than your usual hikes. During the hike, be sure to:
- Check the Straps: Stop after the first 15-20 minutes to check the pack’s fit. Straps can loosen as your dog moves, so you may need to readjust for a snug fit. Also, check for any signs of chafing or rubbing under the straps.
- Offer Plenty of Water: Your dog is working harder than usual, so they’ll need more water. Be sure to take frequent water breaks.
- Read Their Body Language: Pay close attention to your dog. Are they lagging behind, panting excessively, or showing any signs of discomfort? If so, it might be time to call it a day or at least lighten their load.
Slowly work your way up to longer, more challenging hikes and the target weight for their first aid kit. Soon, your dog will be a seasoned pro, carrying their own gear with a happy trot and a wagging tail.
Troubleshooting: Common Challenges and How to Solve Them

Troubleshooting: Common Challenges and How to Solve Them
Training doesn’t always go perfectly, and that’s okay! It’s normal to hit a few bumps in the road. The key is to address them with patience and positive reinforcement. Here are some common challenges you might face and how to work through them.
| The Problem | The Reason | The Solution |
|---|---|---|
| The Dog Freezes or Won’t Move | This is a common reaction to a new, strange sensation. Your dog might be unsure or uncomfortable. | Go back to basics. Make the pack lighter or take it off completely. Use high-value treats and happy encouragement to coax them forward one step at a time. Keep the session extremely short and end on a positive note as soon as they move. |
| Trying to Rub or Bite the Pack Off | The pack is likely irritating them. It could be an improper fit, a strap that’s too tight, or it might be shifting and unbalanced. | Immediately stop and check the fit. Ensure straps aren’t twisted and there are no pressure points. Check for signs of chafing. Rebalance the weight in the saddlebags. If the fit is correct, distract them with a fun game of fetch or a quick training session. |
| The Pack is Lopsided or Shifting | This is almost always due to unbalanced weight. Even a small difference can cause the pack to shift as the dog moves. | Take the pack off and repack it. Use a small kitchen scale if you have to, to ensure both sides are as close to the same weight as possible. Placing denser, heavier items at the bottom and closer to the dog’s body can also help with stability. |
| Showing Signs of Fatigue Quickly | The pack might be too heavy for their current fitness level, or they may be getting dehydrated more quickly. | Lighten the load immediately. Remember to build up weight and distance gradually. Offer more frequent water breaks than you normally would. Like human athletes, dogs need to build up their stamina for carrying extra weight. |
The golden rule of troubleshooting is to never punish your dog for being uncomfortable. Always approach the situation with empathy. Your goal is to make this a good experience, and that means listening to what your dog’s behavior is telling you and adjusting your training plan accordingly.
Conclusion
Congratulations! You now have all the tools and knowledge to turn your hiking companion into a prepared, pack-carrying partner. By choosing the right gear, packing smart, and approaching the training with patience and positivity, you’re not just lightening your own load—you’re enriching your dog’s life. Carrying a pack can give many dogs a sense of purpose and confidence, strengthening the incredible bond you already share. So, take your time, celebrate the small victories, and get ready to hit the trails with a new level of teamwork and safety. Happy hiking to you and your wonderfully prepared pup!