Have you ever watched your dog navigate a tricky path or leap for a toy and marveled at their agility? That seemingly effortless movement is all thanks to something called proprioception, or body awareness. It’s your dog’s internal GPS, telling them where their limbs are in space without having to look. Just like with people, this sense can be improved with practice, and one of the best, simplest, and most effective exercises is teaching them to lift a rear leg on cue.
You might be thinking, ‘Isn’t that just a cute party trick?’ Far from it! This simple exercise is a powerhouse for your dog’s physical and mental wellbeing. It strengthens their core, improves balance, helps prevent injuries, and builds incredible focus. It’s a fantastic tool for canine athletes, a crucial stability exercise for senior dogs, and a wonderful confidence-booster for clumsy puppies. In this guide, we’ll walk you through everything you need to know to teach this amazing skill, turning a simple leg lift into a fun and rewarding part of your daily routine. Let’s get started!
The Surprising Benefits of a Simple Leg Lift

Before we dive into the ‘how-to,’ let’s talk about the ‘why.’ Understanding the incredible benefits of this exercise will keep you motivated and help you appreciate every little bit of progress your dog makes. This isn’t just about physical strength; it’s about building a smarter, more resilient dog from the inside out.
What is Proprioception, Anyway?
Imagine closing your eyes and touching your nose with your finger. You can do it easily because your brain knows where your finger and your nose are. That’s proprioception in action! For dogs, it’s what allows them to run through a forest without constantly tripping over their own paws or to land a jump gracefully. By teaching them to consciously lift a rear leg and hold it, we are fine-tuning this internal sense.
Key Benefits for Your Canine Companion:
- Enhanced Core Strength: To balance on three legs, your dog has to engage their abdominal and lower back muscles. A strong core is the foundation for almost every movement they make, protecting their spine from injury.
- Improved Balance and Stability: This is especially crucial for aging dogs who may be losing muscle mass, or for dogs who participate in sports like agility or flyball. Better balance means fewer slips, tumbles, and potential injuries.
- Injury Prevention and Rehabilitation: Vets and canine physical therapists often use exercises like this to help dogs recover from injuries. By strengthening the muscles around the joints in the standing legs and improving overall stability, you’re making your dog’s body more resilient.
- Increased Body Awareness: A dog with good body awareness is less likely to be clumsy. They’ll have a better understanding of their rear end (an area many dogs are less conscious of), which can help them navigate tight spaces and avoid knocking things over.
- Boosted Confidence and Focus: Learning a new skill through positive reinforcement is a huge confidence-builder. The focus required for this exercise also helps strengthen your dog’s ability to concentrate, which translates to all other areas of training.
Expert Tip: Think of this exercise as doggy yoga! It combines balance, strength, and focus into one simple, low-impact movement that benefits dogs of all shapes, sizes, and ages.
Setting the Stage: What You’ll Need for Success

Great training sessions are born from great preparation. You don’t need a lot of fancy equipment to teach the rear leg lift, but having the right tools and environment will make the process smoother, faster, and more enjoyable for both you and your furry student.
Your Training Toolkit:
- High-Value Treats: We’re not talking about their regular kibble. You need something special that your dog absolutely loves. Think tiny pieces of cooked chicken, cheese, or soft, smelly training treats. The treats should be small so you can reward frequently without filling your dog up too quickly.
- A Clicker (Optional but Recommended): A clicker is a fantastic tool for marking the exact moment your dog does the right thing. This precise communication can speed up the learning process significantly. If you’re not using a clicker, you can use a consistent, cheerful verbal marker like ‘Yes!’.
- A Non-Slip Surface: This is non-negotiable! Never practice this exercise on a slippery floor like hardwood, tile, or laminate. Your dog needs to feel secure to balance. A yoga mat, a rubber-backed rug, or a patch of grass are all excellent choices.
- A Quiet, Distraction-Free Environment: Choose a time and place where you won’t be interrupted. Turn off the TV, put your phone on silent, and find a space where other pets or family members won’t be a distraction.
The Golden Rules of a Training Session:
Before you start, get in the right mindset. Remember these two golden rules:
- Keep it Short and Sweet: Dogs, especially when learning something new, have short attention spans. Aim for several short sessions of 2-5 minutes throughout the day rather than one long, frustrating session. Always end on a high note when your dog has succeeded!
- Stay Positive and Patient: This is a game, not a test. If your dog gets confused or frustrated, that’s your cue to make it easier or take a break. Your cheerful attitude is the most important tool you have.
Your Step-by-Step Guide to a Perfect Rear Leg Lift
Alright, let’s get to the fun part! This process is all about shaping. We’re going to reward small, successive approximations until we get to the final behavior. Be patient, watch your dog’s body language closely, and get ready to celebrate the tiniest of tries. We’ll focus on teaching one rear leg first (let’s say, the left rear leg).
-
Step 1: Get a Solid ‘Stand’
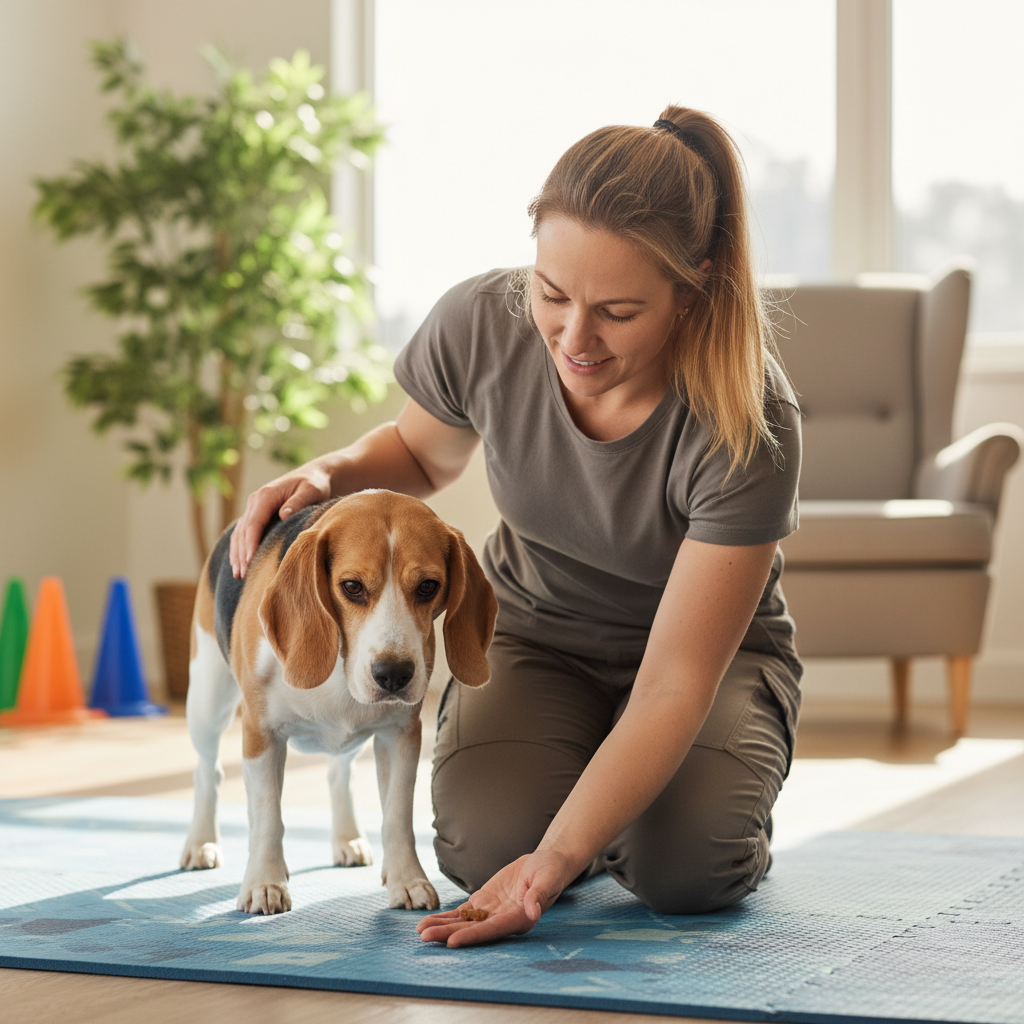
Start with your dog standing squarely in front of you on your non-slip surface. They should have their weight evenly distributed on all four paws. If your dog tends to sit or lie down, you can practice rewarding them for just standing still for a few seconds to begin.
-
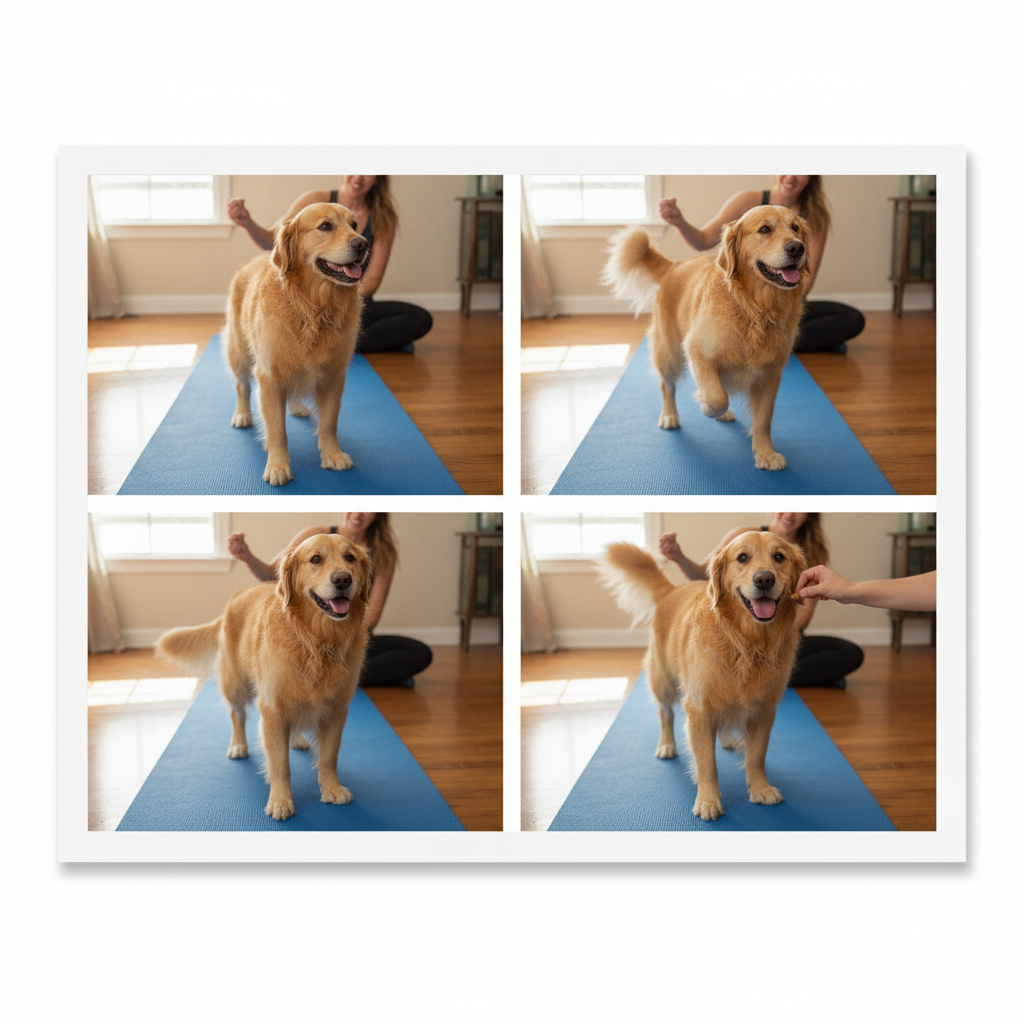
Step 2: Lure the Weight Shift
With a treat in your hand, lure your dog’s head slightly to their right side. As their head moves to the right, their body weight will naturally shift onto their right-side legs to counterbalance. This will make their left rear leg lighter. The moment you see that subtle shift in weight, click (or say ‘Yes!’) and give them the treat. Repeat this 5-10 times. We are rewarding just the weight shift for now.
-
Step 3: Capture the Paw Lift
As you continue luring their head to the right, watch that left rear paw like a hawk. At some point, as their weight shifts off it, the paw will get so light that it might lift off the ground for a split second. The instant you see any air between that paw and the floor—even if it’s just a millimeter—CLICK and reward with a jackpot (a few treats at once)! This is the breakthrough moment.
-
Step 4: Build on the Lift
Once your dog is reliably lifting the paw when you lure their head, you can start asking for a little more. Delay your click by half a second to see if they will hold the paw up a fraction longer. Only reward the lifts that are slightly longer or higher than the last one. You’re gradually shaping the behavior from a quick twitch to a deliberate lift.
-
Step 5: Introduce a Verbal Cue
When your dog is confidently lifting their leg as you lure them, it’s time to add a cue. Just before you lure their head, say your chosen cue word (e.g., ‘Lift,’ ‘Hike,’ or ‘Leg’). Then, perform the lure as usual. After several repetitions, your dog will start to associate the word with the action.
-
Step 6: Fade the Lure
The final step is to remove the physical lure. Say your cue, but this time, make your hand motion smaller. Gradually make the lure less and less obvious until your dog is lifting their leg in response to just the verbal cue. Congratulations, you’ve done it! Now you can repeat the whole process for the other rear leg, using a different cue word (e.g., ‘Other,’ or ‘Righty’).
Oops! Common Sticking Points and How to Fix Them
Training is never a straight line, and it’s perfectly normal to hit a few bumps in the road. Don’t get discouraged! Most problems have simple solutions. Here are some of the most common challenges and how to troubleshoot them like a pro.
‘My dog just won’t shift their weight!’
This usually means the lure isn’t compelling enough or the movement is too big. Try using a higher-value treat—something extra smelly and delicious. Also, make your luring motion smaller and slower. You only need to move their head a few inches to initiate the weight shift. Reward even the tiniest lean in the beginning.
‘My dog just sits or lies down immediately.’
This is a classic sign that the session might be too long, the dog is confused, or they are offering a behavior that has been rewarded in the past (like ‘sit’). Keep your sessions super short (1-2 minutes max) and try to click/reward before they have a chance to sit. You can also try starting the session from a ‘play bow’ or right after they’ve gotten up to reset them in a standing position.
‘They lift their paw, but put it down immediately.’
Perfectly normal! In the beginning, we are just capturing that split-second lift. To build duration, you need to be strategic with your clicker. Start delaying the click by a fraction of a second. If they hold it, click and reward. If they put it down, no reward, just try again. This teaches them that holding the position is what earns the reward. It’s a gradual process.
‘My dog seems wobbly or uncomfortable.’
Stop immediately and assess the situation. First, double-check your surface. Is it truly non-slip? Second, consider your dog’s physical condition. If they are a senior, have arthritis, or a previous injury, this exercise might be difficult. It’s always a good idea to check with your veterinarian before starting any new fitness program. You may need to provide physical support by placing a hand under their belly initially to help them feel more secure.
Remember: Frustration is the enemy of learning. If you or your dog are feeling stuck, the best thing you can do is end the session with an easy win (like a simple ‘sit’ or ‘touch’), give them some praise, and try again later. Training should always be a positive experience.
Level Up! Taking Body Awareness to the Next Level
Once your dog has mastered lifting each rear leg on cue, you can start incorporating this skill into a broader fitness routine to continue challenging their mind and body. These variations will keep things interesting and further enhance their strength and coordination.
Advanced Challenges:
- Build Duration: The most straightforward way to level up is to gradually increase the length of the hold. Use a stopwatch and see if you can build up to a 5, 10, or even 15-second hold. Remember to work up to this slowly!
- Add Distractions: Can your dog hold their leg lift while you walk a circle around them? Or while another person enters the room? Adding mild distractions is a great way to proof the behavior and improve your dog’s focus.
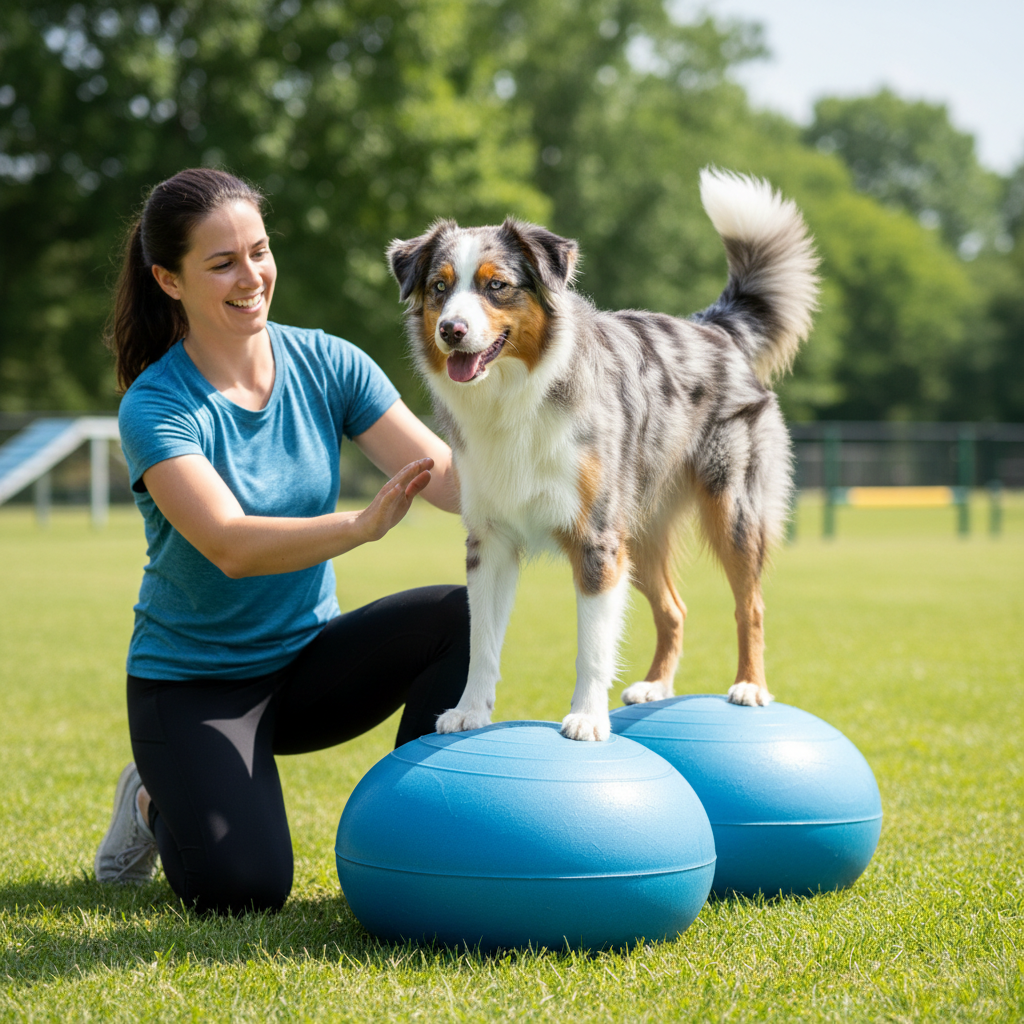
- Vary the Surface: Once your dog is rock-solid on a flat mat, try practicing on slightly unstable surfaces. A couch cushion on the floor, a foam balance pad, or even a grassy hill can provide a new challenge. Always prioritize safety and supervise closely.
- Combine with Other Tricks: Ask for a rear leg lift, and then ask your dog to do something else simultaneously. For example, can they lift their rear left leg while targeting your hand with their nose? Or lift their rear right leg while lifting their front left paw for a ‘shake’? This is an advanced drill that requires immense coordination.
Integrating it into a Routine:
Think of the rear leg lift as a foundational canine fitness move. You can use it as:
- A warm-up before a walk, run, or dog sports session.
- A cool-down exercise to promote calm focus.
- A quick ‘brain break’ during the day to burn off some mental energy.
By making this simple exercise a regular part of your dog’s life, you’re not just teaching a trick—you’re investing in their long-term health, mobility, and confidence. The bond you build while working together is just the icing on the cake.
Conclusion
Congratulations! You now have all the tools and knowledge to teach your dog the amazing rear leg lift. What starts as a fun little training challenge can blossom into a cornerstone of your dog’s fitness routine, providing benefits that last a lifetime. From building a rock-solid core to fine-tuning their balance and boosting their confidence, this simple exercise packs a powerful punch.
Remember to be patient, keep your sessions positive, and celebrate every small victory along the way. Your dog’s progress is a testament to your teamwork and communication. More than just a physical exercise, training like this is a wonderful way to deepen your bond and spend quality, focused time together. So grab those treats, find a comfy spot, and start your journey to better canine body awareness today. Your dog will thank you for it!