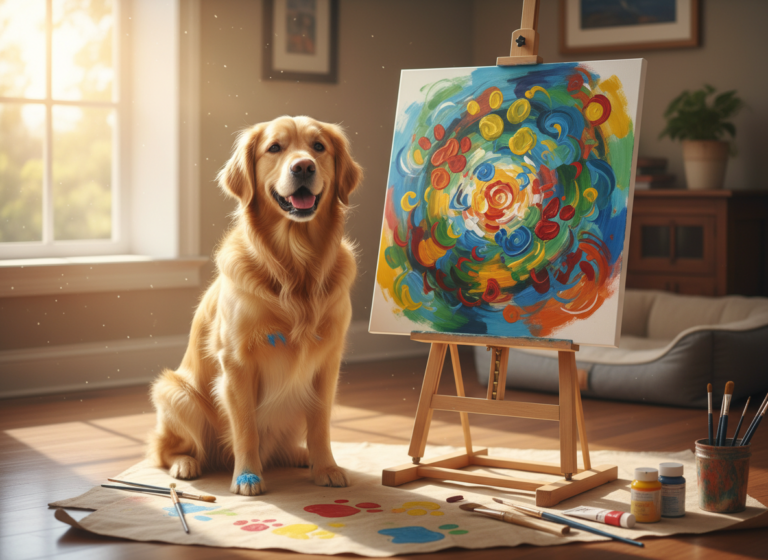
Hey there, fellow pet parents! Have you ever looked at your dog and thought, “You know, Fido has the soul of an artist”? Well, what if I told you that you could actually help them express it? Welcome to the wonderful, whimsical world of Paw-casso training! Teaching your dog to hold a paintbrush and create their own art is so much more than just a cool party trick. It’s an incredible bonding activity, a fantastic source of mental stimulation, and a way to create a truly one-of-a-kind keepsake that you’ll cherish forever.
This guide is all about fun, patience, and positive reinforcement. We’re not aiming for the Louvre here; we’re aiming for happy wags, engaged minds, and a whole lot of laughter. So, grab some pet-safe paints and your favorite furry friend, and let’s get ready to unleash their inner Paw-casso!
Gathering Your Canine Art Supplies: What You’ll Need
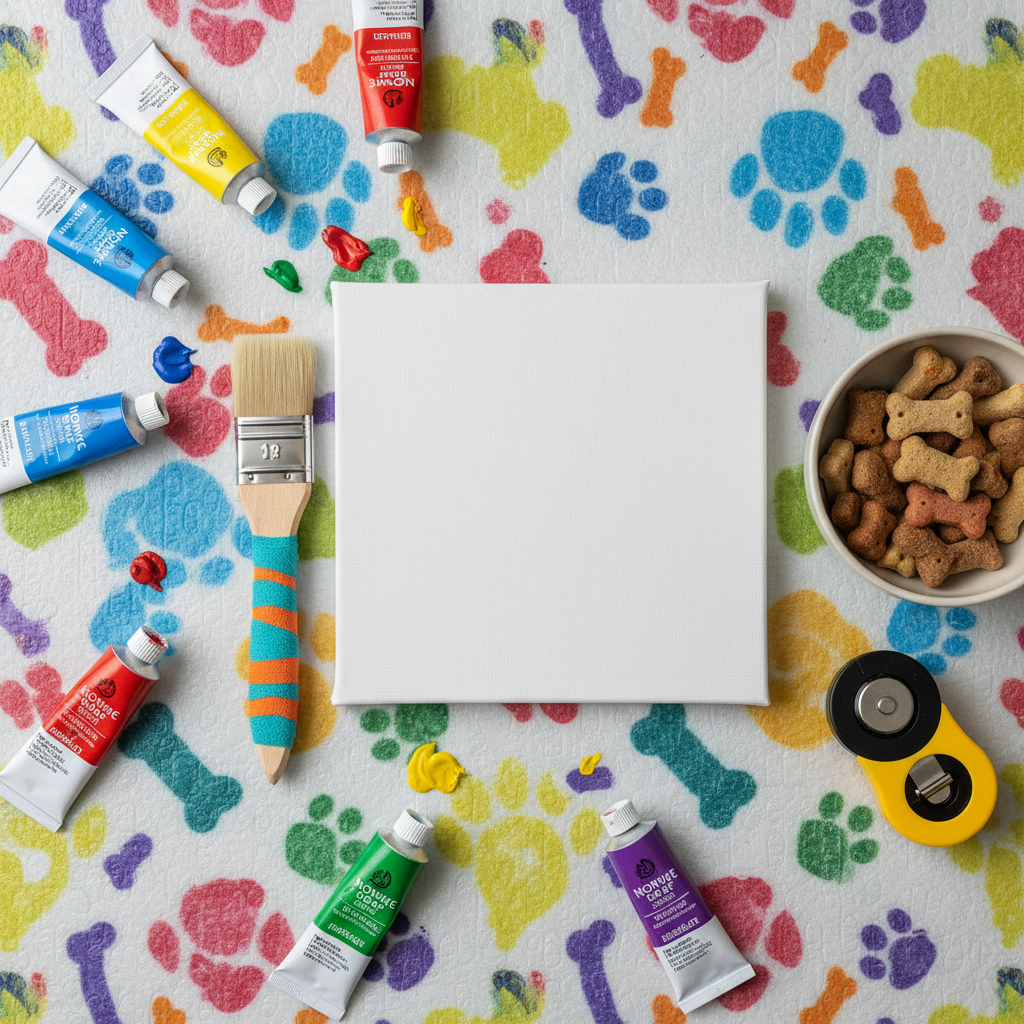
Before you and your pup can dive into the world of abstract expressionism, you’ll need to gather a few supplies. Safety is our number one priority, so we’ll be focusing on materials that are completely safe for your four-legged friend. Think of this as setting up your artist’s studio for success!
Safety First: Choosing Pet-Safe Materials
This is the most critical part of the setup. Your dog will be holding the paintbrush in their mouth, so everything they come into contact with must be non-toxic. Always supervise your dog closely during your art sessions and never leave them alone with the supplies.
- Non-Toxic, Water-Based Paints: Look for paints specifically labeled as non-toxic and kid-safe, like tempera or finger paints. These are water-based and easy to clean up. Avoid acrylics, oils, or any paints with heavy metal warnings.
- A Sturdy Canvas or Thick Paper: A small, pre-stretched canvas works great, but thick watercolor paper or cardstock taped securely to a board will also do the trick.
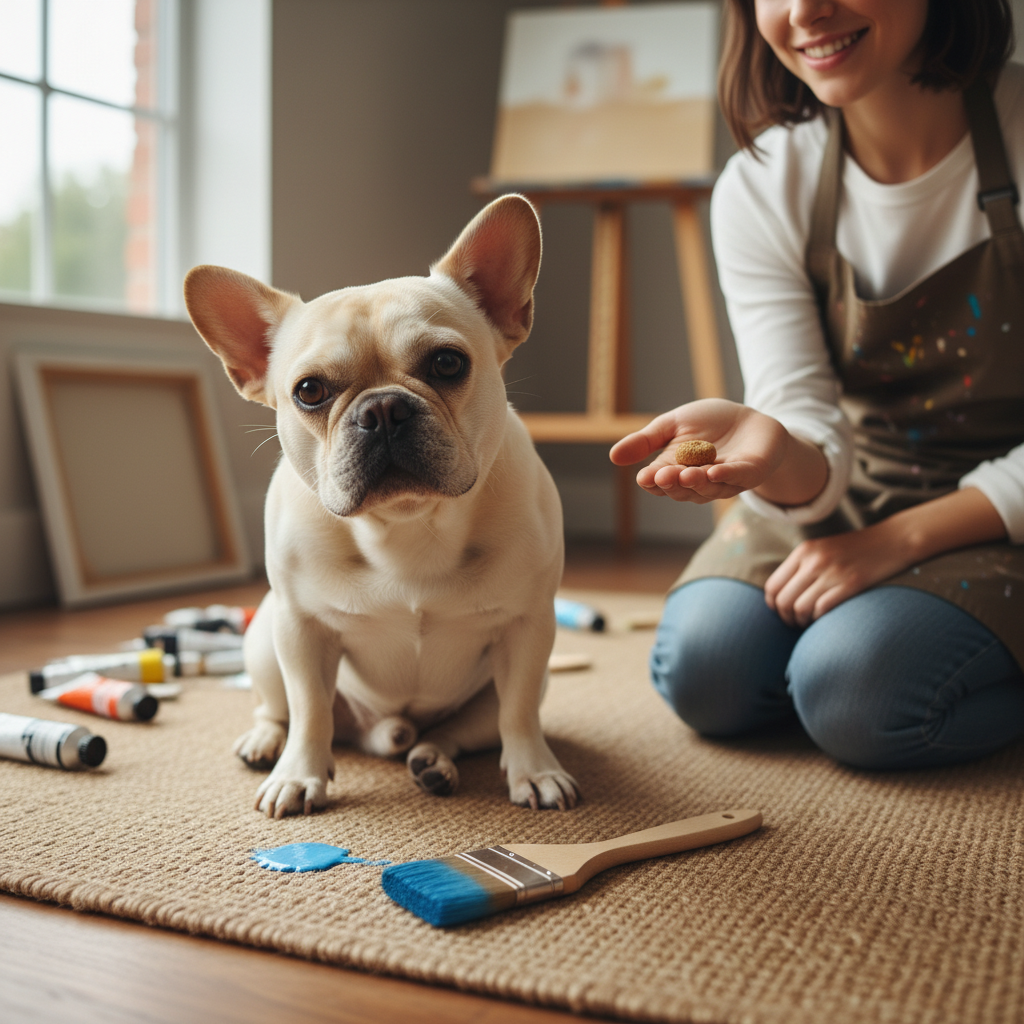
- A Modified Paintbrush: A standard paintbrush might be uncomfortable or splinter. It’s best to adapt one! You can wrap the handle in vet wrap or soft tape to make it more comfortable to hold. Alternatively, you can use a new, clean rubber dog toy (like a small Kong or a similar shape) and securely attach the brush part to the end. This gives them a familiar and safe object to hold.
- High-Value Treats: This is your currency! Use small, delicious treats that your dog absolutely loves. Think tiny pieces of chicken, cheese, or their favorite soft training treats.
- A Clicker (Optional): If your dog is already clicker-trained, this is a fantastic tool for precisely marking the behaviors you want to encourage. If not, a consistent verbal marker like a happy “Yes!” works just as well.
- An Easy-to-Clean Area: Lay down an old sheet, a tarp, or a washable mat. This will be your dog’s art studio. Trust us, things might get a little messy, and that’s part of the fun!
- Wipes and Towels: Keep pet-safe wipes and a damp towel handy for quick clean-ups of your dog’s mouth and any stray paint splatters.
Expert Tip: Before you even start training, let your dog sniff and investigate all the new supplies (except the paint). Let them get comfortable with the canvas and the modified brush in their space, rewarding their calm curiosity with treats.
From Blank Canvas to Masterpiece: The Step-by-Step Training Guide
Alright, the studio is prepped, and the artist is ready! Remember, this process is a marathon, not a sprint. Keep your training sessions short (5-10 minutes is perfect) and always end on a positive note. Let’s break it down into manageable, fun steps.
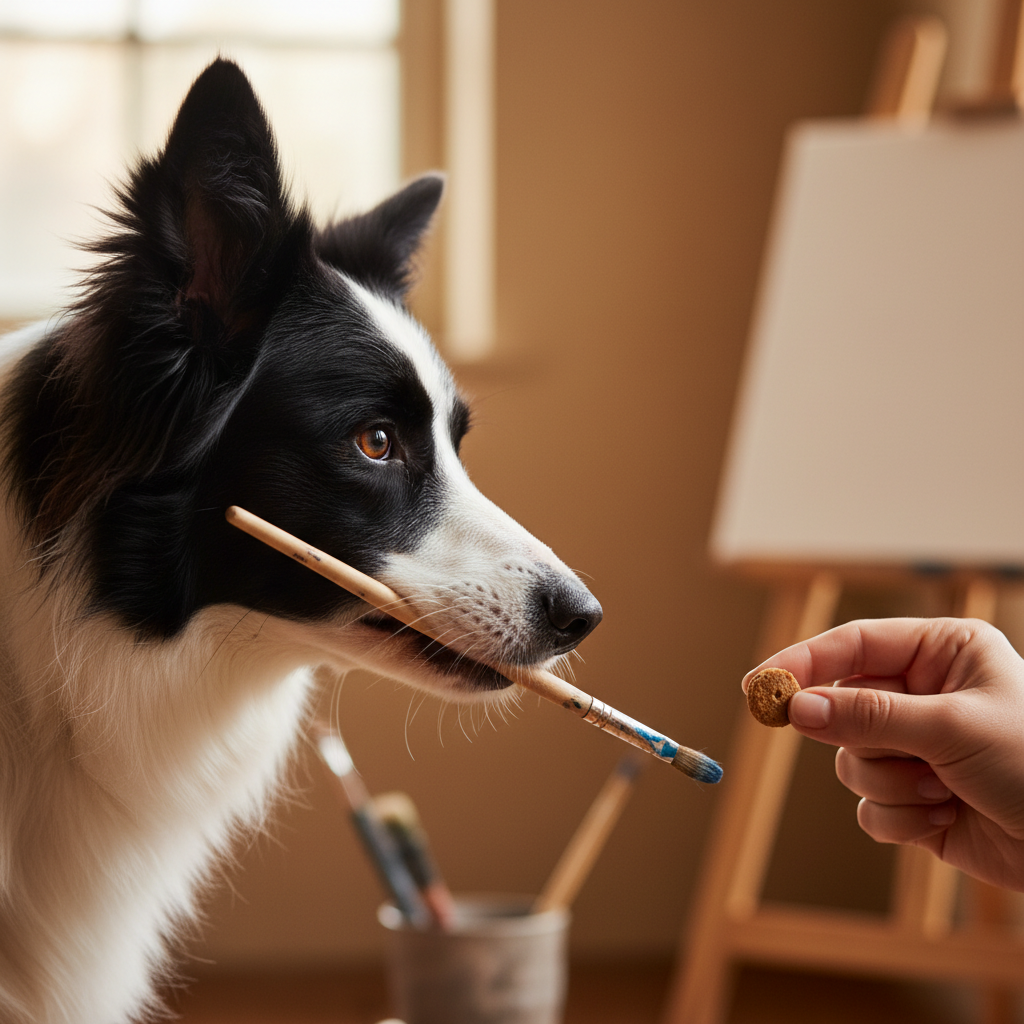
- Step 1: Introduce the Paintbrush (The “Hold” Command)
The first goal is to get your dog comfortable holding the modified paintbrush. Don’t even think about paint or a canvas yet!- Sit on the floor with your dog in a calm environment. Hold the paintbrush out to the side.
- The moment your dog looks at or sniffs the brush, click (or say “Yes!”) and give them a treat. Repeat this a few times.
- Next, reward them only for touching the brush with their nose.
- Now, encourage them to put their mouth on the brush. Hold it so the wrapped handle is near their mouth. The instant their teeth or lips touch it, click/treat.
- Gradually, you’ll only click/treat when they close their mouth around the brush for a split second. We’re shaping the behavior, rewarding small steps toward the final goal. Use a verbal cue like “Hold” as they start to get the hang of it.
- Step 2: Build Duration on the “Hold”
Once your dog is willingly taking the brush in their mouth, we want them to hold it for a little longer.- Ask for the “Hold.” When they do, wait just one second before you click/treat and gently take the brush back.
- Slowly increase the duration. Ask them to hold it for two seconds, then three, and so on. If they drop it, that’s okay! Just go back to a shorter duration they were successful with and build up again.
- Keep it positive! This should be a fun game, not a chore.
- Step 3: Introduce the Canvas (The “Touch” Command)
Separately from the brush holding, we’ll teach a targeting command. This will eventually guide the brush to the canvas.- Place the canvas on the floor. When your dog looks at it or sniffs it, click/treat.
- Encourage them to touch the canvas with their nose. You can put a tiny dab of peanut butter (xylitol-free!) or a sticky treat on the canvas to encourage them at first.
- Once they are reliably touching the canvas with their nose, add a verbal cue like “Touch” or “Target.”
- Step 4: Putting It All Together
This is where the magic starts to happen!- First, ask your dog to “Hold” the paintbrush while you’re sitting near the canvas. Reward them for just holding it.
- Next, give the “Hold” command, and once they have the brush, give the “Touch” command, gesturing towards the canvas.
- The moment the brush in their mouth touches the canvas, have a jackpot party! Lots of treats and praise! This is the big connection we want them to make. Repeat this many times without any paint.
- Step 5: Add a Splash of Color!
Your dog is now a trained artist, ready for their medium.- Put a tiny, pea-sized amount of a single color of non-toxic paint on a paper plate.
- Ask your dog to “Hold” the brush, then gently dip the very tip into the paint.
- Give the “Touch” command and let them dab the canvas. Jackpot! Reward them enthusiastically.
- Wipe the brush, and if they’re still engaged, try another dab. You can introduce new colors one at a time.
Troubleshooting Common Creative Blocks
Even the most brilliant artists run into creative blocks, and our canine companions are no different. If you hit a snag in the training process, don’t worry! It’s completely normal. Here are some common issues and how to work through them with patience and a positive attitude.
- My dog keeps dropping the paintbrush immediately.
This usually means you’ve tried to increase the duration of the “hold” too quickly. Go back a step! Reward for a split-second hold, then gradually work your way back up to one second, then two. Make sure your treats are super high-value to keep them motivated. - My dog wants to chew the paintbrush instead of just holding it.
This is a natural canine behavior! If they start chewing, say a calm “oops” and gently take the brush away for a few seconds. Then, represent it and reward only for a gentle, still hold. Using a hard rubber toy as the base for your brush can also help, as it’s more durable and less satisfying to shred. Never play tug with the paintbrush; it should be a special tool for a calm activity. - My dog seems scared of the canvas or the paint.
New objects can be spooky. Go back to basics. Place the canvas on the floor and just sprinkle treats all around it and on top of it. Let your dog approach and eat the treats at their own pace. Do this for a few sessions without asking for any interaction. For paint, put a tiny dab on a plate and let them sniff it (from a safe distance). Reward calm curiosity. We want to build positive associations with all the art supplies. - My dog just isn’t interested.
First, check your timing. Are you trying to train after a long walk when they’re tired, or right before dinner when they’re hungry and distracted? Try to find a sweet spot when they are calm but receptive. Second, evaluate your rewards. The kibble they get every day might not be exciting enough for this new skill. Up your treat game! Finally, remember that this activity isn’t for every dog, and that’s okay. If they genuinely seem stressed or unhappy, don’t force it. The goal is to have fun together, and there are plenty of other enriching activities you can do.
Beyond the Brushstrokes: Celebrating Your Dog’s Art
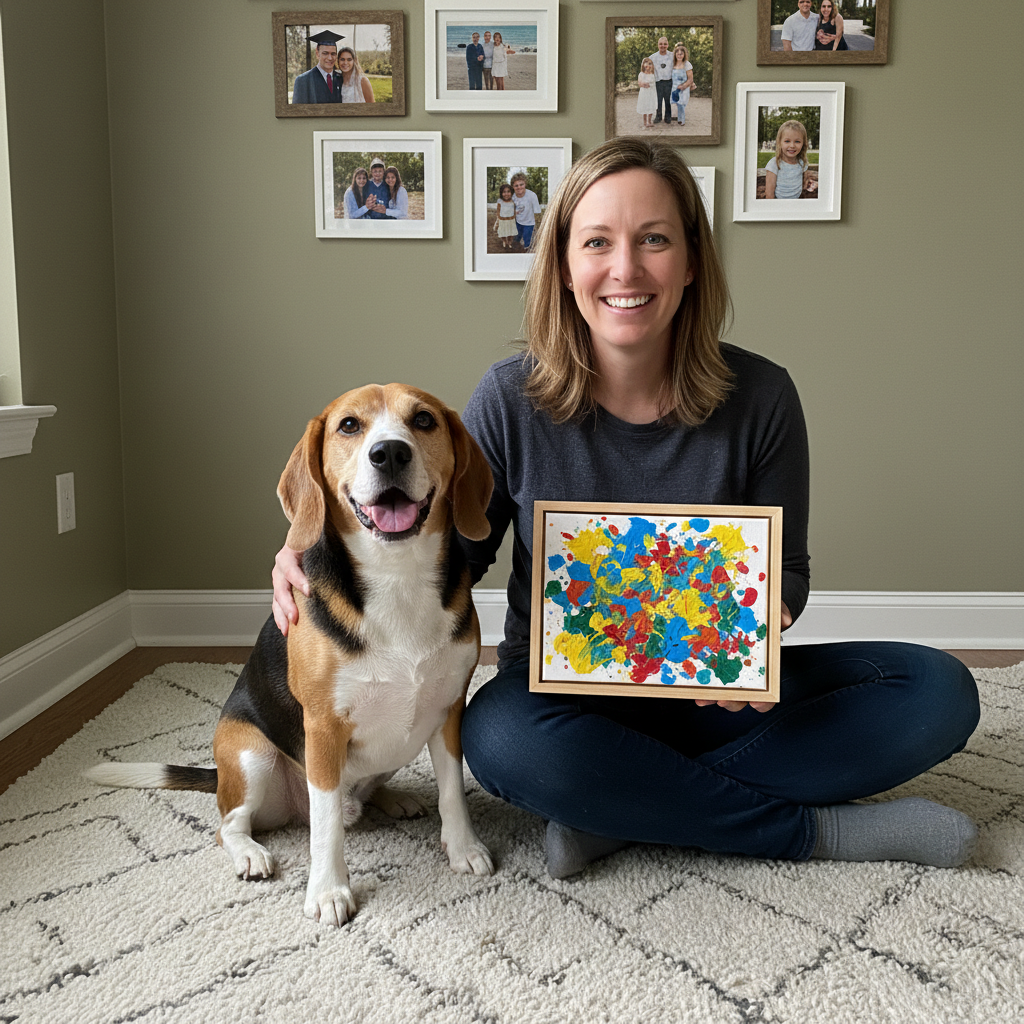
Congratulations, you and your furry artist have created a masterpiece! The final brushstroke isn’t the end of the journey. The celebration and what comes next are just as important for reinforcing this wonderful shared experience.
Clean-Up and Cool-Down
Once your art session is over, the first step is a gentle clean-up. Use a pet-safe wipe or a damp cloth to gently clean any paint from your dog’s muzzle or fur. Since you used non-toxic, water-based paint, this should be quick and easy. Give them lots of praise for their cooperation. After they’re all clean, end the session with a favorite chew toy or a few minutes of relaxed petting. This helps them transition from the focused ‘work’ of training back to just being a dog.
Displaying Their Masterpiece
Let the painting dry completely, and then find a place of honor for it! You can:
- Frame it: A simple frame can turn your dog’s painting into a legitimate piece of home decor. It’s a fantastic conversation starter!
- Sign it: You can ‘sign’ the artwork with your dog’s name and the year, or even use a pet-safe ink pad to add a real paw print signature to the corner (once dry).
- Create Gifts: Scan the painting or take a high-quality photo. You can use this image to create custom greeting cards, mugs, or phone cases. What grandparent wouldn’t love a card painted by their grand-dog?
Remember the Real Goal: The beautiful, chaotic, colorful painting is a wonderful bonus, but the real masterpiece is the time you spent together. The trust, communication, and joy you built during your training sessions are what truly matter.
So hang that painting with pride. Every time you look at it, you’ll be reminded of the fun, the patience, and the incredible bond you share with your amazing, artistic dog.
Conclusion
And there you have it—everything you need to guide your dog on their artistic journey. From choosing the right supplies to troubleshooting those little creative hiccups, you’re now equipped to turn your living room into an art studio and your dog into a Paw-casso. This is so much more than a trick; it’s a testament to your dog’s intelligence and the amazing things you can accomplish together with a little patience and a whole lot of love (and treats, of course!).
Remember to keep sessions short, positive, and tailored to your dog’s pace. Celebrate every little success, from the first hesitant sniff of the brush to the final triumphant dab on the canvas. We would absolutely love to see what your furry friends create! Be sure to share their masterpieces on social media and tag us. Happy painting!