Have you ever watched a movie and marveled at the incredible canine actors? From saving the day to performing seemingly complex stunts, these dogs capture our hearts. But what if I told you that you could teach your own furry friend one of the most classic, attention-grabbing tricks in the Hollywood playbook? I’m talking about the dramatic, sympathy-inducing, and utterly hilarious ‘limp’.
Teaching your dog to limp on cue is more than just a funny party trick; it’s a fantastic way to strengthen your bond, boost your dog’s confidence, and provide some much-needed mental stimulation. It’s a testament to the power of positive reinforcement and clear communication between you and your best friend. Plus, let’s be honest, it’s guaranteed to get a chuckle from friends and family!
Important Note: This trick is all about fun and games. We’ll be using only positive, force-free methods. It’s crucial to ensure your dog doesn’t associate this trick with real pain or distress. We’re building a performance, not faking an injury!
In this guide, we’ll walk you through everything you need, from the initial setup to the step-by-step training process, and even how to troubleshoot common issues. So grab your tastiest treats, put on your director’s hat, and let’s get ready to create some movie magic right in your living room!
Setting the Stage: What You’ll Need Before You Begin
Before you and your canine star begin rehearsals, it’s important to gather your props and set the scene for success. A little preparation goes a long way in making the training process smooth, fun, and effective for both of you. Think of this as your pre-production checklist!
The Essentials for a Successful Training Session:
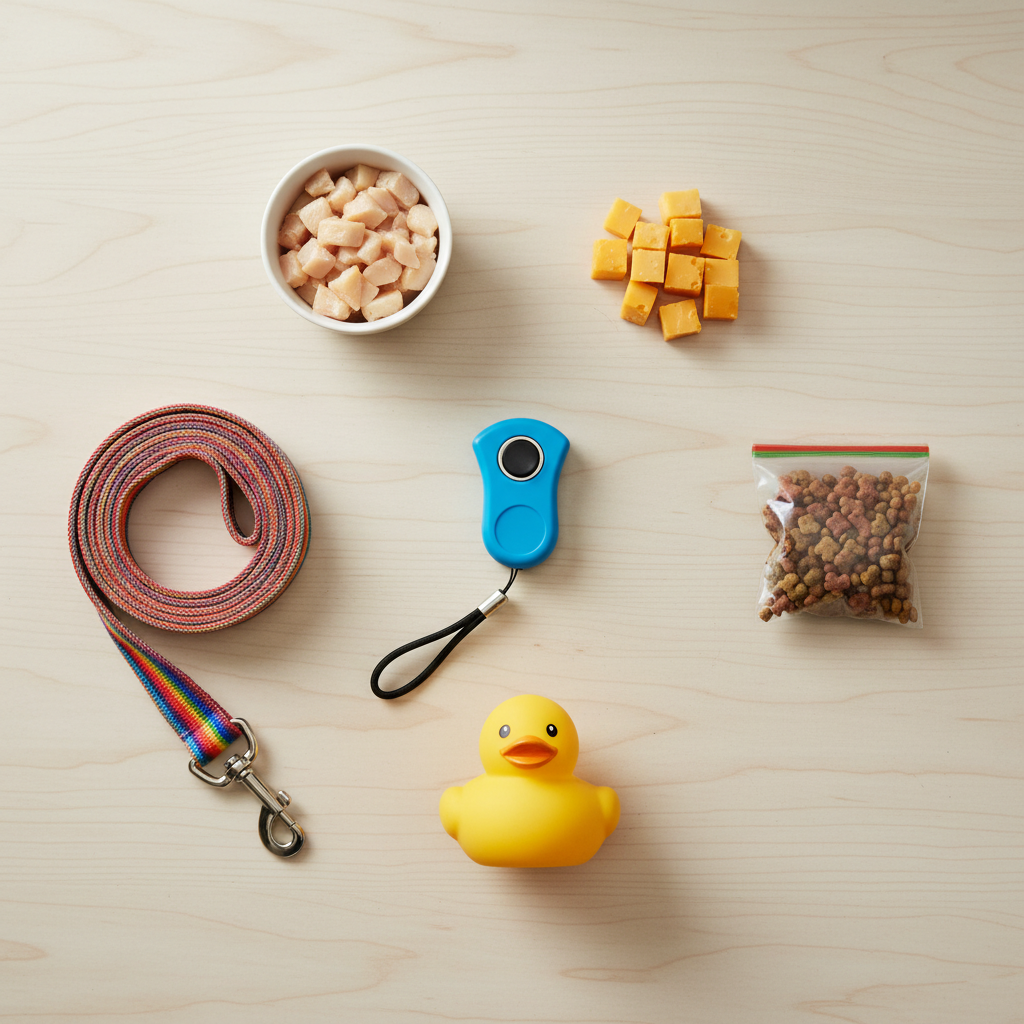
- High-Value Treats: We’re not talking about your dog’s everyday kibble. For a show-stopping performance, you need rave-review-worthy rewards! Think small, soft, and extra-delicious morsels like tiny pieces of boiled chicken, cheese, hot dogs, or commercial training treats that your dog goes absolutely wild for. The goal is to make the reward so good that your dog is eager to figure out what you’re asking.
- A Clicker (Optional, but Recommended): A clicker is a small handheld device that makes a distinct ‘click’ sound. In training, it’s used to ‘mark’ the exact moment your dog does the right thing. The click is instantly followed by a treat. This precision helps your dog understand precisely what behavior earned them the reward, which can speed up the learning process significantly. If you don’t have a clicker, you can use a consistent verbal marker like a sharp “Yes!”.
- A Distraction-Free Environment: Choose a quiet room or a securely fenced area where you won’t be interrupted. Turn off the TV, put your phone on silent, and make sure other pets or family members aren’t walking through. Your dog’s focus is your most valuable asset during training.
- A Positive Attitude: This is the most important tool you have! Dogs are incredibly attuned to our emotions. If you’re patient, upbeat, and encouraging, your dog will be relaxed and excited to learn. If you get frustrated, they’ll get stressed. Remember, this is a game you’re playing together.
Expert Tip: Keep your training sessions short and sweet! A dog’s attention span, especially when learning something new, isn’t very long. Aim for multiple 5-10 minute sessions throughout the day rather than one long, grueling 30-minute session. Always end on a positive note, perhaps after a successful repetition, so your dog is excited for the next ‘rehearsal’.
Step-by-Step Guide: From Paw Lift to Pathetic Limp
Alright, the stage is set, the star is ready, and the rewards are waiting in the wings. It’s time for ‘Action!’. We’re going to build this trick in small, manageable pieces, a process trainers call ‘shaping’. Remember to praise and reward every little bit of progress along the way!
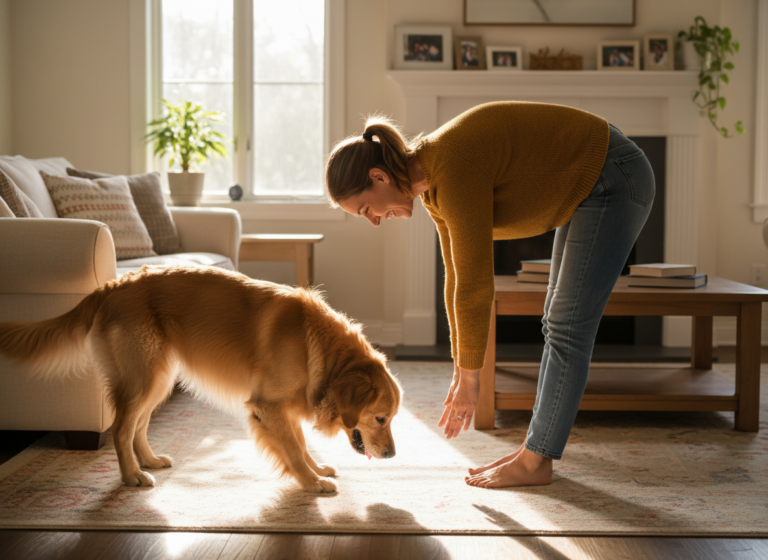
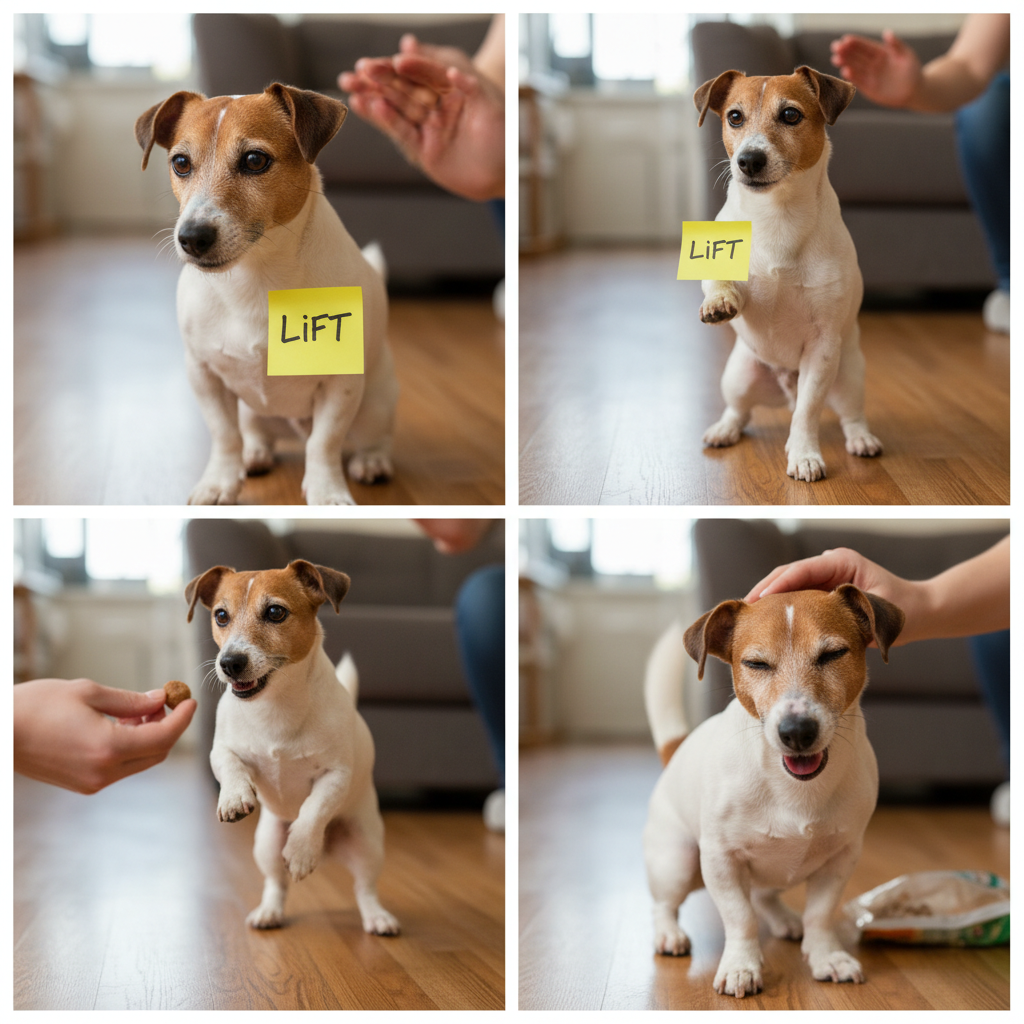
- Step 1: Capture the Paw Lift. The foundation of the limp is simply getting your dog to lift a paw. How do we do that? We get a little creative. Take a small, non-intrusive object like a Post-it note or a piece of masking tape and lightly stick it to the top of your dog’s front paw. Most dogs will find this sensation odd and will instinctively lift their paw to shake it off. The instant they lift that paw, even for a second, click your clicker (or say “Yes!”) and give them a treat. Repeat this several times until your dog starts to offer the paw lift even before you put the tape on. They’re learning that ‘paw lift = treat’.
- Step 2: Introduce the Verbal Cue. Once your dog is reliably lifting their paw in anticipation of a reward, it’s time to name the behavior. Just as they are about to lift their paw, say your chosen cue clearly and cheerfully. You could use “Limp,” “Ouchie,” “Gimpy,” or any short, unique word. Say the cue, wait for the lift, then click and treat. The sequence is: Cue -> Behavior -> Mark -> Reward. Practice this until your dog starts lifting their paw in response to just the verbal cue, without the need for the sticky note.
- Step 3: Encourage Forward Movement. This is where we add the ‘limp’ part of the trick. With your dog in a standing position, give your verbal cue. As they lift their paw, use another treat to lure them forward. Hold the treat in front of their nose and take one small step backward, encouraging them to follow. The goal is for them to take a ‘hop’ on their three other legs to get the treat. If they take even one tiny hop while holding the designated paw up, click and treat like they just won an Oscar! This is the hardest part, so be patient.
- Step 4: Shape the Limp into a Walk. Once your dog understands the hopping-forward concept, you can start asking for more. Lure them for two hops before you click and treat. Then three. Gradually increase the distance, rewarding them for taking more and more ‘limping’ steps in a row. Keep it fun and don’t push for too much, too soon. If they get frustrated, just go back to a single hop for an easy win.
- Step 5: Fade the Lure and Props. As your dog gets more confident, you can start to fade the props. Stop using the sticky note altogether. Then, start fading the treat lure. Instead of holding the treat right at their nose, hold it a little higher or further away. Eventually, you can replace the lure with a simple hand signal, like pointing forward. The ultimate goal is for your dog to perform several limping steps in a row with just the verbal cue.
Practice, patience, and positivity are your script, director’s notes, and motivation all in one. Stick with it, and soon your dog will be ready for their close-up!
Troubleshooting Common Hiccups

Even the most talented actors flub a line or miss a cue now and then. If you hit a snag while training the limp, don’t worry! It’s a normal part of the process. Let’s look at some common issues and how to get your training session back on track.
- Problem: My dog just licks the sticky note off and doesn’t lift their paw.
Solution: The sticky note might not be the right motivator for your pup. Try a different approach. Gently touch the top of their paw with your finger. The moment they react by lifting it, even slightly, mark and reward. You can also try teaching a ‘paw target’ where they learn to touch their paw to your hand, and then you can use that to get the initial lift. - Problem: My dog puts their paw down instantly. I can’t even click in time!
Solution: This is all about improving your timing. Be ready with your clicker! Try to anticipate the lift and click the very microsecond the paw leaves the ground. You’re rewarding the intent to lift as much as the action itself. Also, ensure your treats are tiny and can be delivered quickly so the reward is almost immediate. - Problem: My dog gets confused and offers other tricks like ‘Shake’ or ‘High Five’.
Solution: This is actually a great sign! It means your dog is engaged and trying to figure out the puzzle. If they offer the wrong trick, simply don’t reward it. Don’t say “No,” just wait patiently. Reset by taking a step back, and make the next attempt easier so they can succeed. For example, go back to using the sticky note to clarify that you’re looking for a different paw action than ‘Shake’. - Problem: They lift their paw perfectly but refuse to move forward. They just stand there like a flamingo.
Solution: The lure needs to be more enticing! Make sure you’re using your absolute highest-value treat. You can also try making it a game. Toss the treat a tiny distance away (just an inch or two at first) so they have to hop to get it. Make it exciting! Use an enthusiastic voice and celebrate wildly when they make that first little hop.
Remember, if your dog is truly struggling, it’s often a sign that you’ve tried to progress too quickly. It’s never a bad idea to go back to the last step where they were successful and practice it a few more times to build their confidence before moving forward again.
The ‘Do’s and Don’ts’ of Trick Training
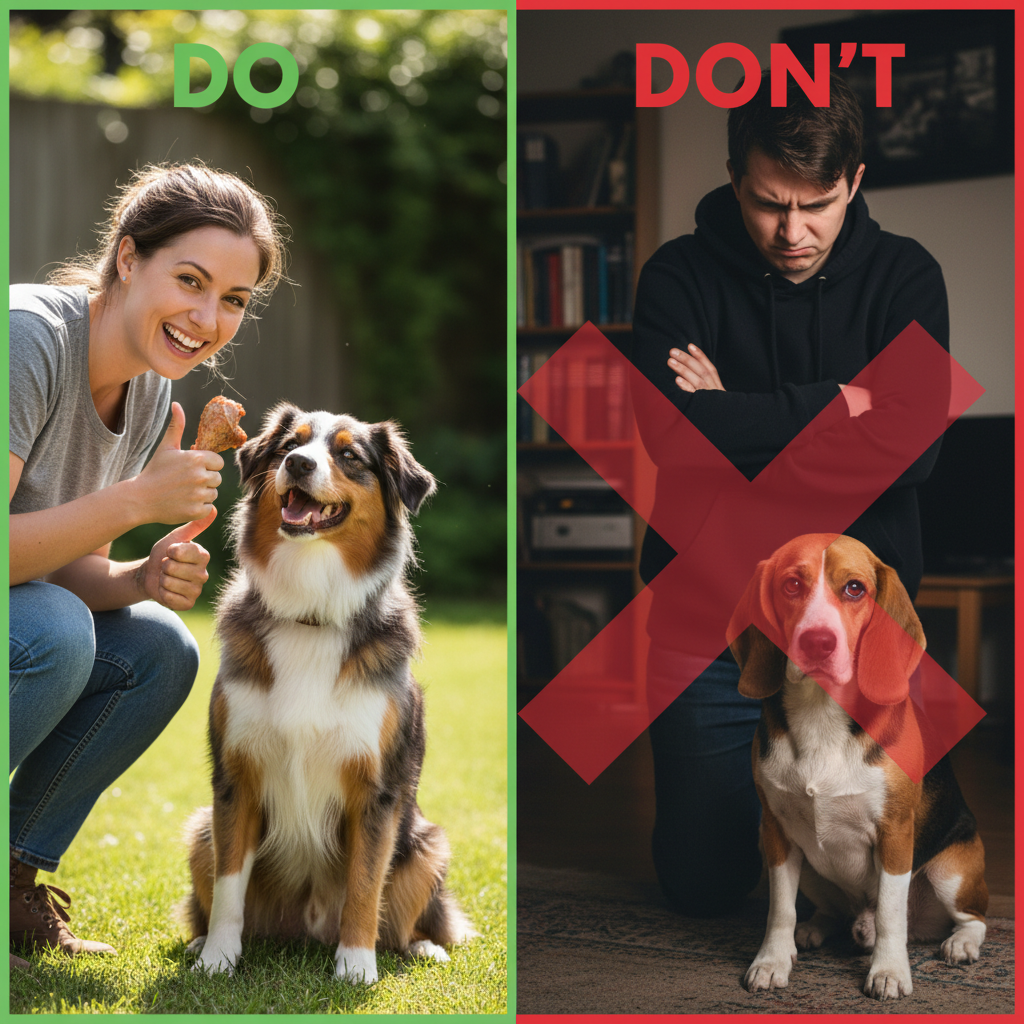
Teaching tricks is a fantastic activity, but to keep it safe, effective, and fun for your canine companion, it’s essential to follow some ground rules. Adhering to these principles will not only help you teach the limp trick faster but will also strengthen your overall relationship with your dog. Here’s a handy chart to keep you on the right path.
The Do’s (Your Path to Success) |
The Don’ts (Pitfalls to Avoid) |
|---|---|
| Do keep sessions short and fun. Aim for 5-10 minutes at a time. This prevents burnout for both you and your dog. | Don’t train for long periods. A tired, bored, or frustrated dog won’t learn effectively and may start to dislike training. |
| Do use high-value, exciting rewards. This keeps your dog motivated and eager to participate. | Don’t use boring or low-value treats. If the reward isn’t worth the effort, your dog will lose interest quickly. |
| Do end every session on a high note. Finish with a trick your dog knows well or a successful attempt at the new trick to build confidence. | Don’t end a session on a moment of failure or frustration. This can create a negative association with training. |
| Do stay positive and patient. Your dog is trying their best. Celebrate small victories and laugh off the mistakes. | Don’t ever use punishment, scolding, or force. This will damage your bond and make your dog fearful and anxious. |
| Do be crystal clear about the trick. Ensure your verbal cue and hand signals are consistent every single time. | Don’t use the ‘limp’ cue if you suspect your dog is in actual pain. This is critically important to avoid confusion and to ensure you’re addressing their health needs properly. |
A Crucial Note on Safety: Never, ever practice this trick if your dog has a real limp or injury. And be mindful of when you ask for the performance. You don’t want to accidentally teach your dog that ‘limping’ is a way to get out of things they don’t like, or to ignore a genuine sign of pain. This trick is for fun, voluntary performances only!
Conclusion
Congratulations, you’re now equipped with all the knowledge you need to teach your dog one of the most charming tricks in the book! By following these steps and keeping a patient, positive attitude, you’re not just teaching a trick; you’re engaging your dog’s mind, strengthening your communication, and building a library of fun memories together. The ‘limp’ is a fantastic party piece that showcases your dog’s intelligence and your incredible teamwork.
Remember that every dog learns at a different pace. Some might pick it up in an afternoon, while others might need a few weeks of short, consistent sessions. The journey is just as important as the destination. Celebrate every paw lift, every hop, and every wagging tail along the way.
So go ahead, give it a try! Unleash your dog’s inner actor and get ready for the applause (and the extra sympathy pets). Happy training!