Have you ever wondered what that hike, beach run, or romp through the park looks like from your dog’s point of view? Imagine seeing the world from their perspective—the blur of grass as they chase a ball, the happy chaos of the dog park, the majestic trail unfolding before them. Thanks to cameras like the GoPro, this is more than just a daydream! Capturing these dog’s-eye-view adventures creates incredible, heartwarming memories you can cherish forever.
But strapping a camera to your furry friend isn’t as simple as just buying a harness and hitting ‘record.’ To make this a fun and safe experience for everyone, it requires a bit of patience, the right gear, and some positive training. The goal is for your dog to be so comfortable they forget they’re even wearing it. This guide will walk you through everything you need to know, from picking the perfect harness to troubleshooting shaky footage. Let’s get ready to turn your canine companion into a confident and happy filmmaker!
Choosing the Right Gear: The Dog-Friendly GoPro Setup
Picking the Perfect Harness
Before you can start filming, you need the right equipment. The harness is the most critical piece of the puzzle. An uncomfortable or unstable harness can ruin the experience for your dog and result in unwatchable footage. The most popular option is the official GoPro Fetch (Dog Harness), but several third-party brands also make quality alternatives.
Key Features to Look For:
- Comfort and Padding: The harness should be well-padded in key areas, like across the chest and back, to prevent chafing and discomfort. Look for breathable materials, especially if you plan on long adventures or live in a warm climate.
- Adjustability: Dogs come in all shapes and sizes. A good harness will have multiple adjustment points to ensure a snug, secure fit without being too tight. It shouldn’t restrict your dog’s natural movement in any way.
- Stability and Mount Points: The whole point is to get stable footage! Look for a harness with a wide base plate where the camera mounts. Many harnesses offer two mounting locations: one on the back for over-the-head shots and one on the chest for a lower, paws-in-the-frame view.
- Durability: Your dog is going to run, jump, swim, and roll around. The harness needs to be made from tough, water-resistant materials that can withstand the elements and your dog’s antics.
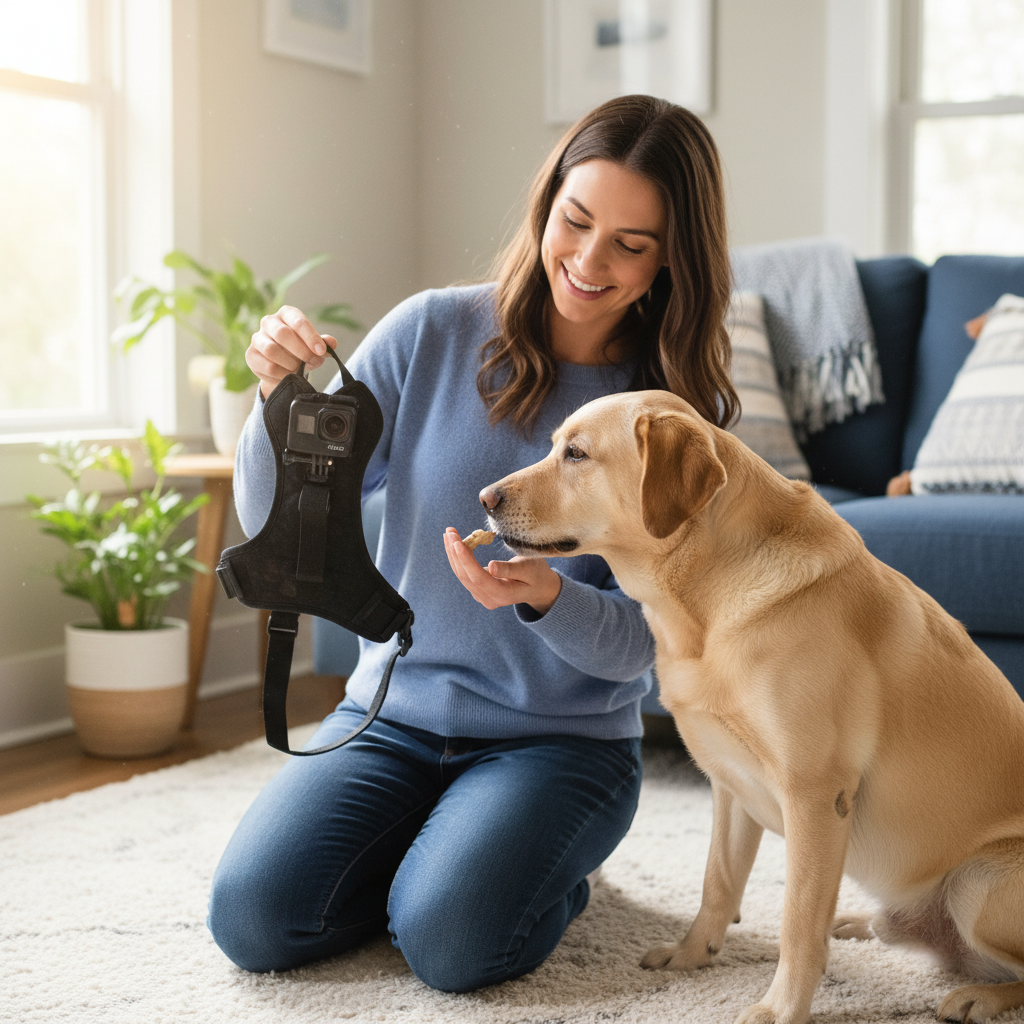
When you first get the harness, let your dog inspect it. Leave it on the floor and reward them with treats for sniffing it or showing positive interest. This builds an initial positive association before you even try to put it on.
The Camera Itself
While any recent GoPro model will work, some are better suited for the job. Newer models with advanced HyperSmooth stabilization technology are fantastic for reducing the chaotic shakiness of a dog on the move. They are also inherently durable and waterproof, which is a must! Don’t forget a protective case for the lens, as it can easily get scratched or smudged by dirt, branches, or a wet nose.
Step 1: Introducing the Harness (Without the Camera)
Making Friends with the Harness
The golden rule of any dog training is to create a positive association. You want your dog to see the harness and think, “Oh boy, something fun is about to happen!” Rushing this step is the fastest way to make your dog dislike the gear. Patience is key.
- Sniff and Treat: Hold the harness in your hand and let your dog sniff it. The moment they do, say “Yes!” in an upbeat tone and give them a high-value treat (like a small piece of chicken or cheese). Do this a few times until they eagerly touch their nose to the harness.
- Touch and Treat: Gently touch the harness to your dog’s back for a split second, then say “Yes!” and reward them. Repeat this, gradually increasing the duration of the touch. You’re desensitizing them to the feel of it on their body.
- Drape and Treat: Drape the harness over your dog’s back without buckling it. Let it sit there for a few seconds while you praise them and give them treats. Then, remove it. Keep these sessions short and happy—just a minute or two at a time.
- Buckle Up (Briefly): Once they are completely comfortable with the harness resting on them, you can try buckling it. Fasten one buckle, treat and praise, then immediately unbuckle it. Work your way up to fastening all the buckles. The first few times the harness is fully on, leave it on for just 10-20 seconds while you feed them a steady stream of tiny treats. Then take it off.
Expert Tip: End every session on a high note! It’s always better to stop while your dog is still happy and engaged rather than pushing them until they show signs of stress, like yawning, licking their lips, or trying to move away.
Gradually increase the time they wear the harness around the house. Put it on right before mealtime or a favorite play session. This solidifies the connection: Harness = Awesome Things! Only move on to the next step when your dog is completely relaxed and ignores the harness while wearing it.
Step 2: Adding the Camera and Getting Used to the Weight
From Harness to Full Setup
Once your dog is a pro at wearing the harness, it’s time to introduce the camera. The added weight and new object on their back can feel strange, so we need to approach this with the same slow, positive method.
Introducing the Camera
First, let your dog investigate the GoPro itself (turned off, of course). Reward them for sniffing it. You can even attach the camera to the harness and place the whole setup on the floor for them to check out, rewarding their curiosity. The goal is to normalize the equipment so it’s not a scary, foreign object.
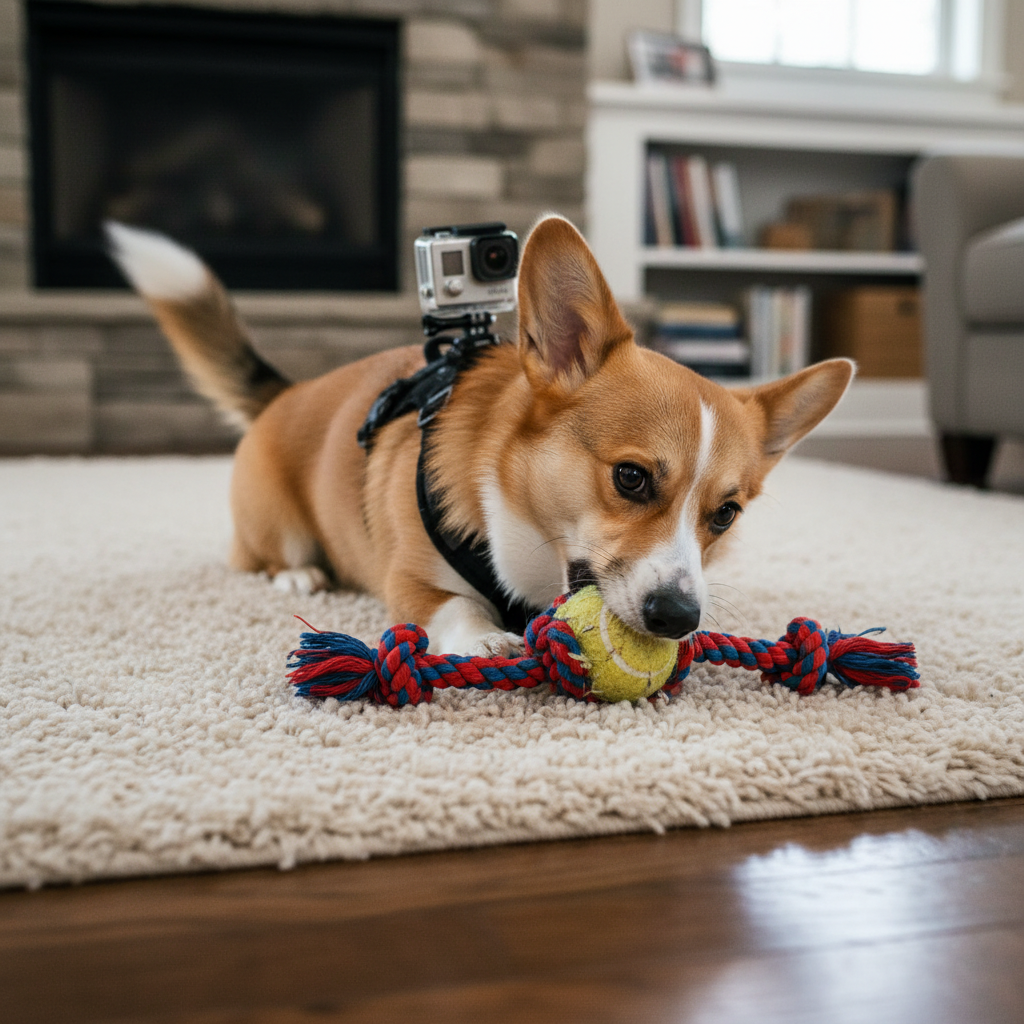
First Time with the Full Rig
- Attach the Camera: With the harness off your dog, securely attach the GoPro to the back mount. Double-check that it’s tightly fastened.
- Short and Sweet Session: Put the harness with the camera on your dog. The moment it’s on, start a fun game of tug or give them a special chew toy. You want to distract them with something highly engaging so they barely notice the new weight.
- Keep it Indoors: Do this inside for the first few sessions. This controlled environment prevents them from getting spooked and trying to run off or scrape the camera off on a tree.
- Watch Their Body Language: Pay close attention to your dog. Are they walking normally? Do they seem bothered? If they freeze, try to bite at the camera, or seem anxious, you’ve moved too fast. Go back a step and spend more time just with the harness. If they seem fine, let them wear it for 5-10 minutes while they play or wander around the house.
Repeat this process over several days. You’re building their confidence and teaching them that wearing the camera is just part of a fun routine. Don’t be tempted to start filming epic adventures just yet—this foundation is crucial for long-term success.
Step 3: The First Filming Sessions – Keeping it Fun
Action! Your Dog’s Directorial Debut
Your dog is comfortable, the gear is ready—it’s time for the first test run! The key to this stage is to make filming an extension of an activity your dog already loves. This ensures the experience remains overwhelmingly positive.
Start in a Familiar Place
Your backyard or a quiet, familiar park is the perfect location for the first filming session. A new, overwhelming environment could add unnecessary stress. You want your dog focused on the fun, not on strange sights and sounds.
- Gear Check: Before you start, do a final check. Is the harness snug but not too tight? Is the camera angle correct? Is the battery charged and the memory card empty?
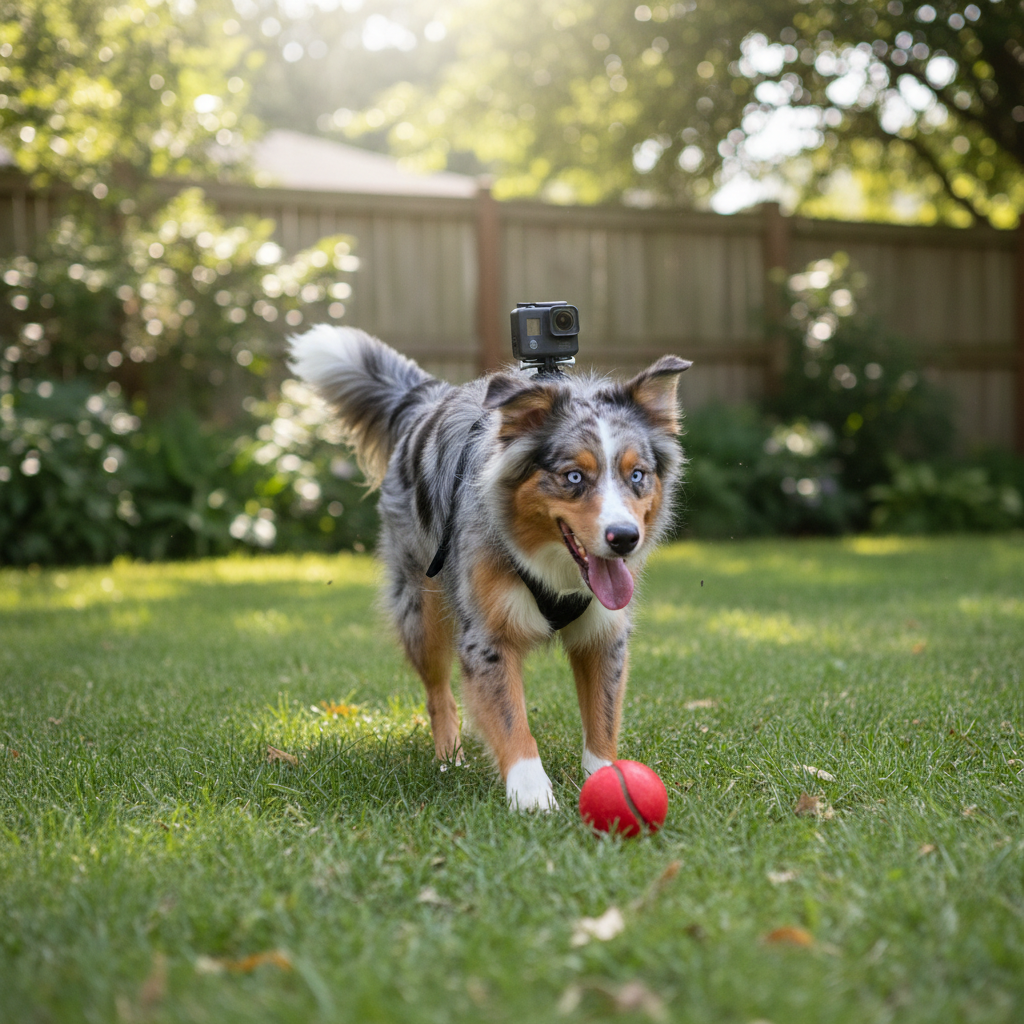
- Press Record and Play: Turn on the camera and immediately initiate a fun activity. A game of fetch is perfect for this. Throw the ball, praise your dog enthusiastically, and let them run!
- Keep it Short: The first session should be no more than 5-10 minutes long. We’re still building duration and positive reinforcement. After the short session, take the harness off and give your dog lots of praise and a jackpot reward (a handful of their favorite treats).
- Review the Footage: This is an important diagnostic step! Watch your first clip. How does it look? Is the harness shifting a lot, causing the camera to bounce or tilt? If so, you may need to adjust the fit. Is the angle good? Maybe you want to try the chest mount next time for a different perspective.
Troubleshooting Tip: If your dog keeps stopping to scratch at the harness or roll around to get it off, it’s a clear sign of discomfort. The fit might be wrong, or they may simply need more time getting used to it in shorter, treat-filled sessions back at home.
Don’t be discouraged if the first video isn’t perfect. This stage is all about learning what works for you and your dog and ensuring the process stays fun for your furry filmmaker.
Hitting the Trails and Getting Epic Footage

Graduating to Real Adventures
Once your dog is consistently comfortable during short filming sessions in the backyard, you’re ready for the main event: adventure time! Whether it’s a mountain trail, a sandy beach, or a forest path, this is where the magic happens.
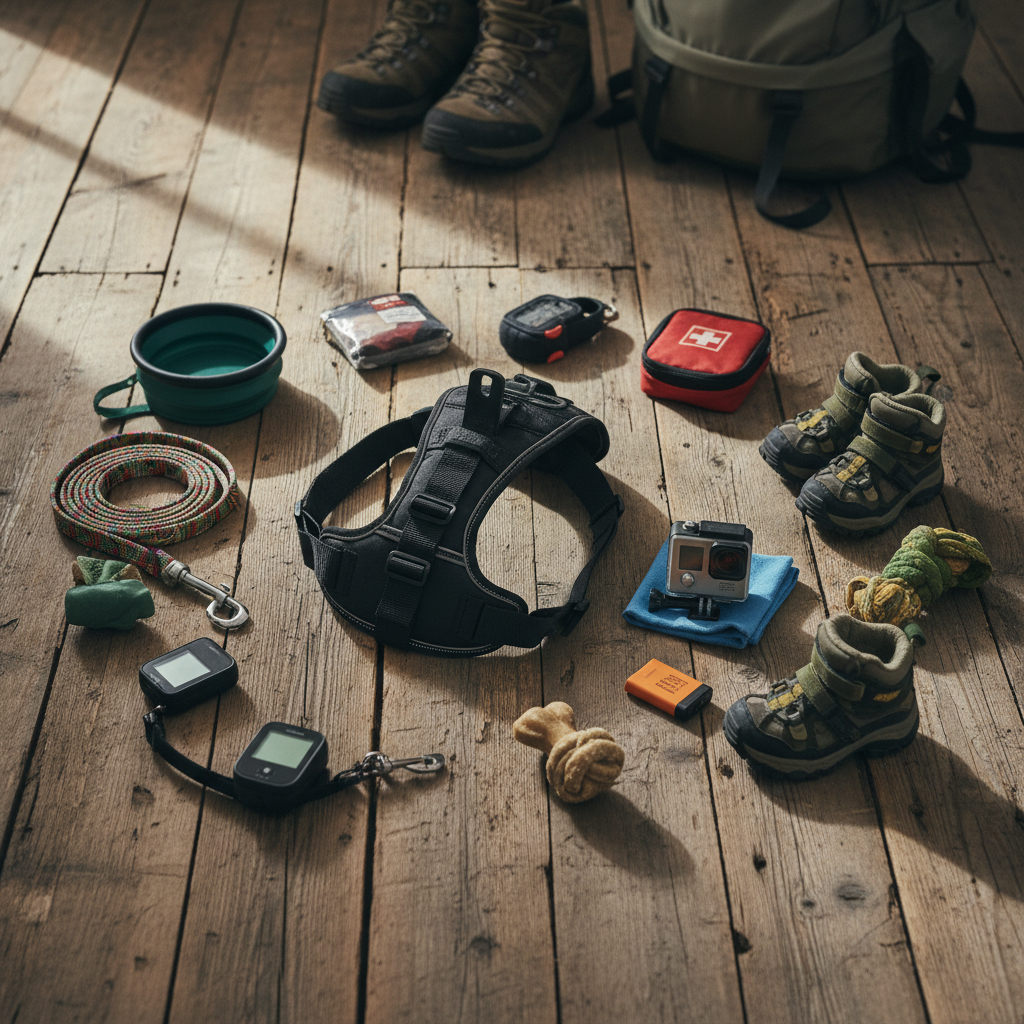
Before You Go
Always pack with your dog’s needs in mind. Bring plenty of water, a collapsible bowl, and some treats. And don’t forget your camera essentials: a fully charged battery (or two!) and a clean lens cloth. A little mud or drool on the lens can ruin a great shot.
On the Adventure
- Regular Fit Checks: During any long hike or activity, stop every 30-45 minutes to check the harness. Make sure it hasn’t loosened or shifted in a way that could cause rubbing or chafing. This is also a great time for a water break for your pup.
- Monitor Your Dog’s Stamina: Wearing a harness with a camera adds a small amount of extra weight and can cause your dog to tire out a bit faster. Be mindful of their energy levels and be prepared to cut the adventure short if they seem fatigued. Always prioritize their well-being over getting the shot.
- Let Them Be a Dog: Don’t get so caught up in filming that you forget to let your dog enjoy the experience. Let them sniff, explore, and splash in puddles. The best footage comes from letting your dog do what they do naturally. If they decide to take a roll in the grass, just go with it—it might be your favorite clip of the day!
Capturing Different Activities
Think about the unique perspective each activity offers. A hike will give you sweeping views as your dog crests a hill. A run on the beach provides a thrilling, low-angle shot of sand and waves. If your dog is a swimmer, the underwater and surface-level shots can be absolutely mesmerizing. Experiment with different environments to see what kind of footage you love most.
Pro Tips for Pawsome POV Videos

From Good Footage to Great Film
You’ve mastered the training, and your dog is a happy little cam-operator. Now, how do you make sure the video you capture is actually fun to watch? Here are a few technical and creative tips to elevate your dog’s POV content.
Camera Settings Matter
- Use a Wide Field of View (FOV): Settings like SuperView on a GoPro are perfect. A wide FOV captures more of the environment and has a more immersive, forgiving feel, which helps counteract the natural shakiness.
- Turn on Stabilization: Use the highest level of electronic image stabilization your camera offers (e.g., HyperSmooth). This is the single most important setting for getting usable footage from a running dog.
- Shoot at a Higher Frame Rate: Filming at 60 frames per second (fps) instead of the standard 30 fps will make motion look much smoother. It also gives you the option to create cool slow-motion clips when you’re editing.
Editing is Your Best Friend
Raw footage from a dog’s back can be a bit… much. A little editing goes a long way.
- Keep Clips Short: No one wants to watch 20 minutes of shaky, uninterrupted running. Trim your footage down to the best moments—the leap over a log, the splash into the water, the happy greeting of another dog. Create a highlight reel of 3-5 minute videos.
- Add Music: The right soundtrack can completely change the mood of your video, turning a simple walk into an epic journey.
- Vary the Shots: Don’t just use the dog’s POV. Intercut your video with clips you’ve filmed on your phone or another camera. Show shots of your dog from your perspective, close-ups of their happy face, and wide shots of the beautiful landscape. This tells a much more complete and engaging story of your adventure together.
Conclusion
Training your dog to carry a GoPro is more than just a fun project—it’s a new way to bond and share incredible experiences. By focusing on the right gear, positive reinforcement, and your dog’s comfort above all else, you can unlock a whole new world of memories. Remember to be patient, keep it fun, and celebrate every small step of progress. The shaky, slobbery, and joyful footage you capture will be a priceless treasure, a true glimpse into the world as seen through the eyes of your best friend. Now, grab your gear, some treats, and get ready to start your next great adventure together!