Does the sight of a squirrel, another dog, or a particularly interesting smell turn your leisurely walk into an unexpected arm workout? If you’ve ever felt like you were flying a kite in a hurricane while walking your dog, you’re not alone. Leash pulling is one of the most common frustrations for pet owners. We’ve tried ‘heel,’ we’ve tried ‘wait,’ but sometimes, you need something more intuitive—something that tells your dog, ‘Hey, let’s hold our ground for a second.’ Enter the ‘Anchor’ cue.
This isn’t your typical ‘stay’ command. The Anchor cue is a dynamic skill that teaches your dog to engage their core and become ‘heavy’ against leash pressure. It’s about teaching them to yield to the pressure by bracing, rather than fighting against it by pulling harder. It’s a subtle but powerful communication tool that can transform your walks from a constant battle into a cooperative partnership. In this guide, we’ll break down exactly how to teach this invaluable skill, step by step, using positive, fun, and effective methods. Get ready to drop anchor and enjoy the stroll!
What Exactly is the ‘Anchor’ Cue and Why is it a Game-Changer?
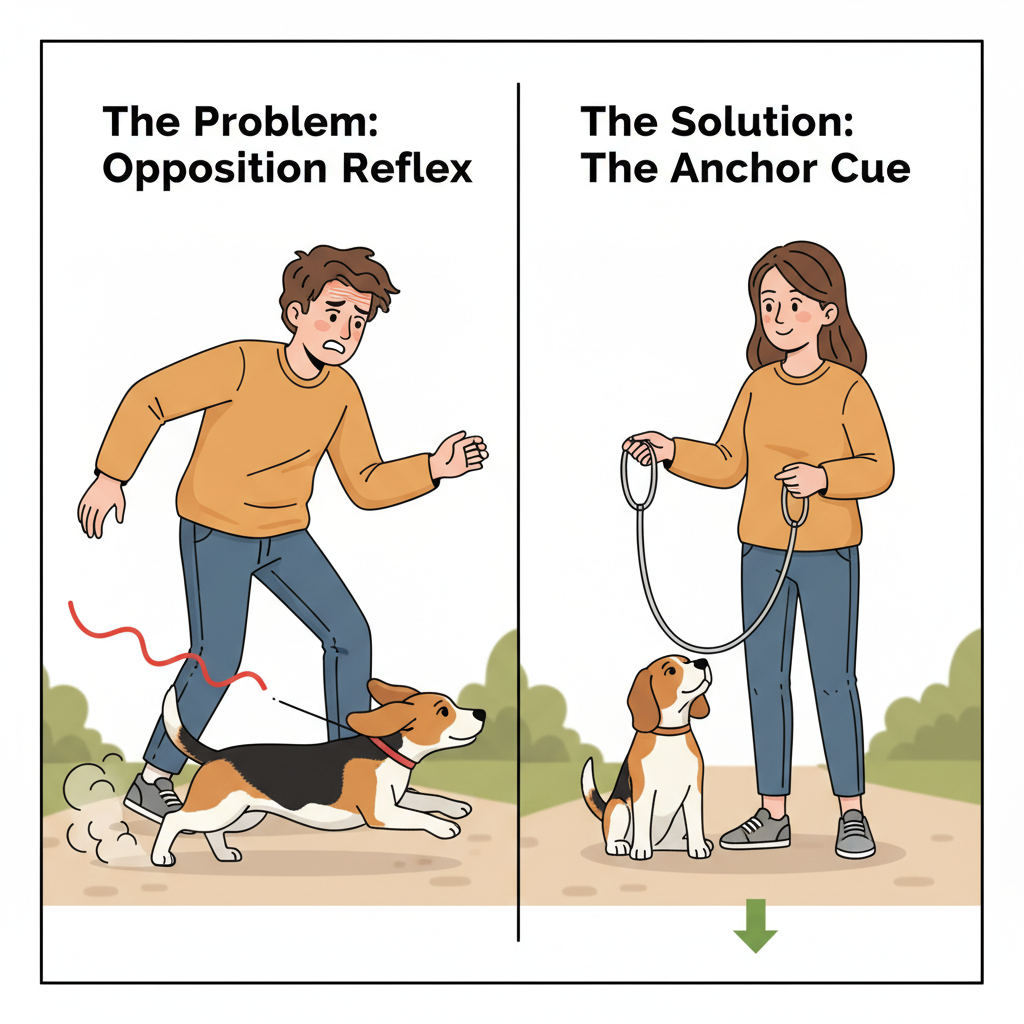
Before we dive into the ‘how-to,’ let’s get clear on the ‘what’ and the ‘why.’ The Anchor cue is a command that asks your dog to lower their center of gravity and hold their position, effectively making them ‘heavy’ and resistant to being moved. Think of it as your dog setting their brakes.
So, how is this different from a ‘stay’?
- ‘Stay’ is about position: A dog in a ‘stay’ is asked not to move from a specific spot or posture (sit, down, stand). The focus is on remaining motionless.
- ‘Anchor’ is about pressure: An ‘anchored’ dog is actively using its body to resist a pull. They can be sitting, standing, or even in a ‘down’ position. The focus is on stability against an external force—the leash.
The benefits of mastering this cue are immense and go far beyond just stopping pulling:
Enhanced Safety
Imagine you’re at a crosswalk and a car comes a bit too close, or you drop your keys and need a moment without being dragged. The Anchor cue can be a literal lifesaver, preventing your dog from lunging into a potentially dangerous situation. It gives you immediate, reliable control when you need it most.
Clearer Communication
Dogs often pull because the leash pressure itself is a confusing signal. They feel the tension and their instinct is to pull against it—this is called opposition reflex. The Anchor cue re-wires this instinct. You’re teaching a new, more desirable response to leash pressure. It becomes a clear signal that means ‘hold steady’ instead of ‘let’s go faster!’
Reduced Frustration for Both of You
Constantly correcting a pulling dog is exhausting for you and frustrating for them. It can strain your relationship and make walks a dreaded chore. By teaching a cooperative skill like the Anchor, you’re working with your dog, not against them. This builds confidence and strengthens your bond.
Expert Tip: The Anchor cue isn’t about overpowering your dog. It’s about teaching them a new language for the leash, turning a tool of restraint into a line of communication.
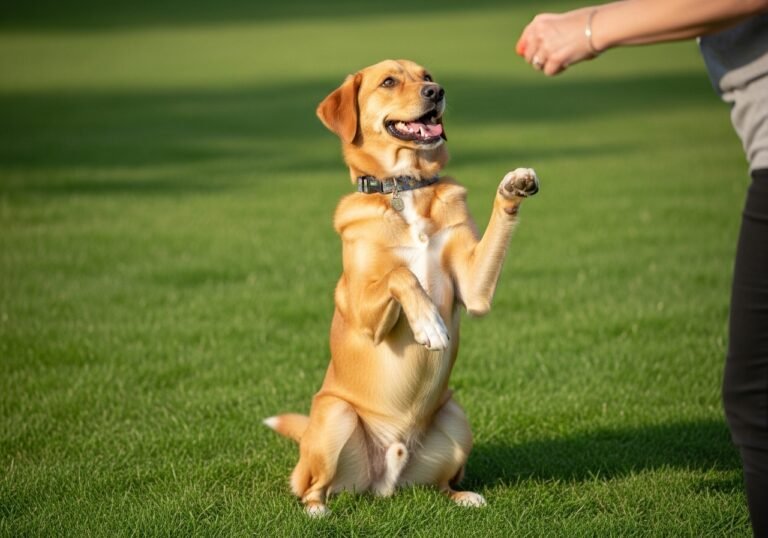
Gearing Up: What You’ll Need and The Right Mindset
Great training starts with great preparation. You don’t need a lot of fancy equipment, but having the right tools will make the process smoother and more effective. More importantly, getting into the right headspace is crucial for success.
Essential Equipment
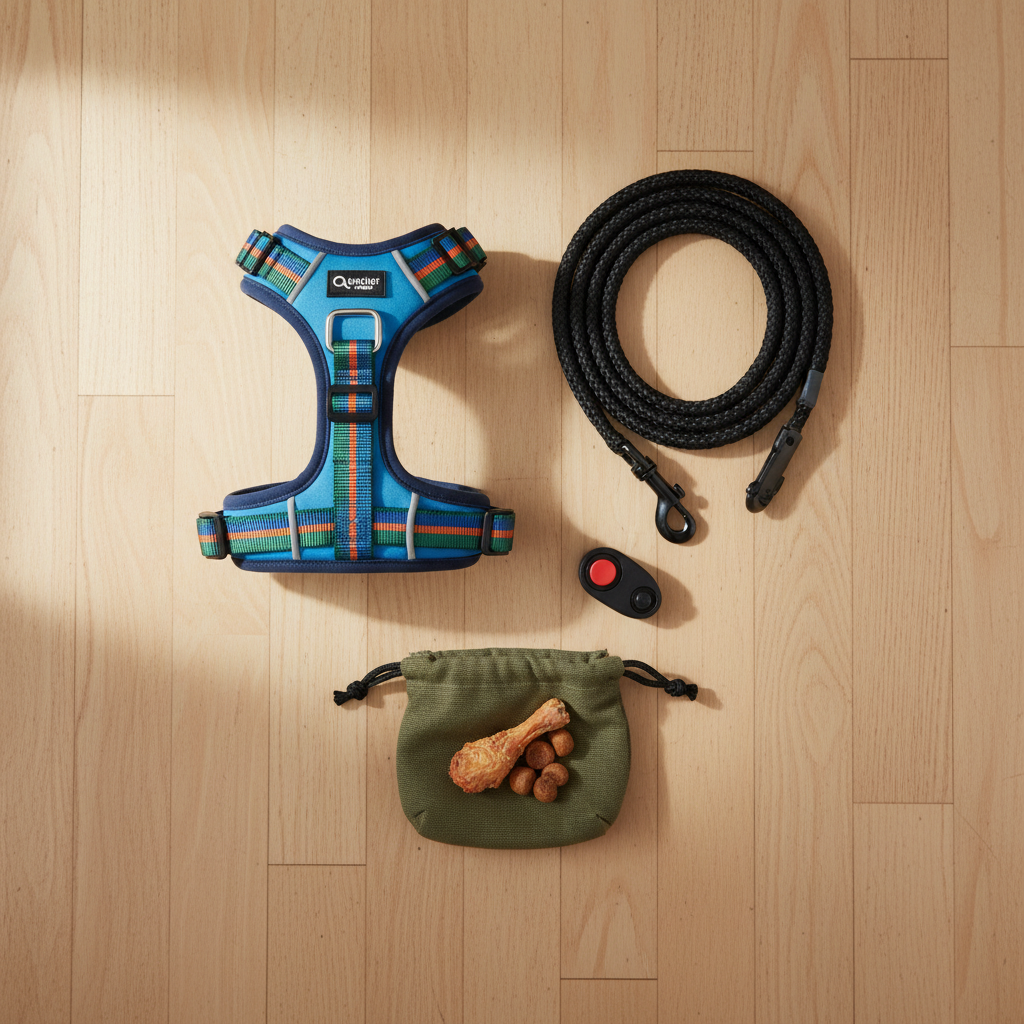
- A Well-Fitted Harness: For this exercise, a front-clip or dual-clip harness is ideal. It discourages pulling by redirecting your dog’s momentum sideways and takes pressure off their sensitive neck area, which is crucial for safety. Avoid using choke chains, prong collars, or slip leads for this training.
- A Standard Leash: A simple 6-foot nylon or leather leash is perfect. Avoid retractable leashes, as they teach dogs that pulling extends the leash, which is the opposite of what we want to accomplish.
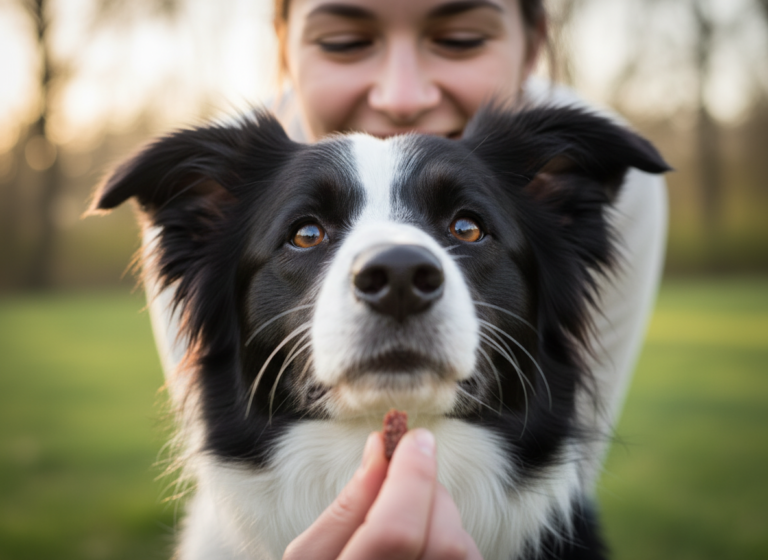
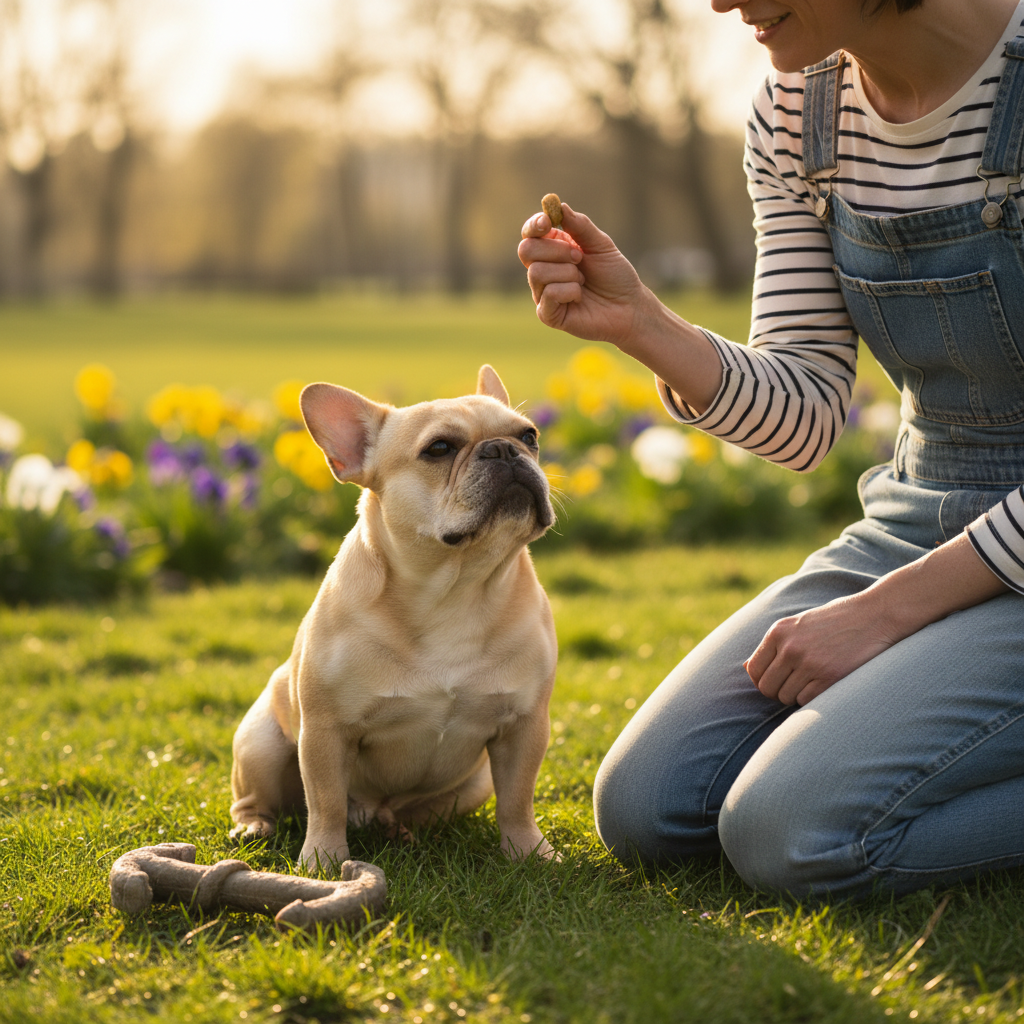
- High-Value Treats: We’re talking top-tier goodies here! Think small pieces of chicken, cheese, hot dogs, or their absolute favorite commercial treats. The reward needs to be motivating enough to make your dog really think and work for it. Keep them small so you can do lots of repetitions.
- A Clicker (Optional): If your dog is clicker-trained, a clicker can be a fantastic tool for precisely marking the moment your dog performs the correct behavior (bracing against the pressure). If not, a consistent verbal marker like ‘Yes!’ works just as well.
The All-Important Mindset
Your attitude is the secret ingredient. Remember these key principles before you begin:
- Patience is Paramount: Your dog isn’t learning to be ‘stubborn’; they’re learning a brand new physical skill. It will take time and many, many repetitions. Some days will feel like a huge leap forward, and others might feel like a step back. It’s all part of the process.
- Keep it Short and Sweet: Training sessions should be brief, around 5-10 minutes at most, once or twice a day. You want to end each session on a high note, leaving your dog feeling successful and eager for the next one.
- Stay Positive: This is a positive reinforcement exercise. We are rewarding the behavior we want to see, not punishing the behavior we don’t. Keep your energy light, fun, and encouraging. If you feel yourself getting frustrated, it’s time to end the session with an easy win and try again later.
The Step-by-Step Guide to Teaching the ‘Anchor’ Cue
Alright, let’s get to the fun part! We’re going to build this behavior in small, easy-to-digest layers. Remember to master each step before moving on to the next. Start in a low-distraction environment like your living room or backyard.
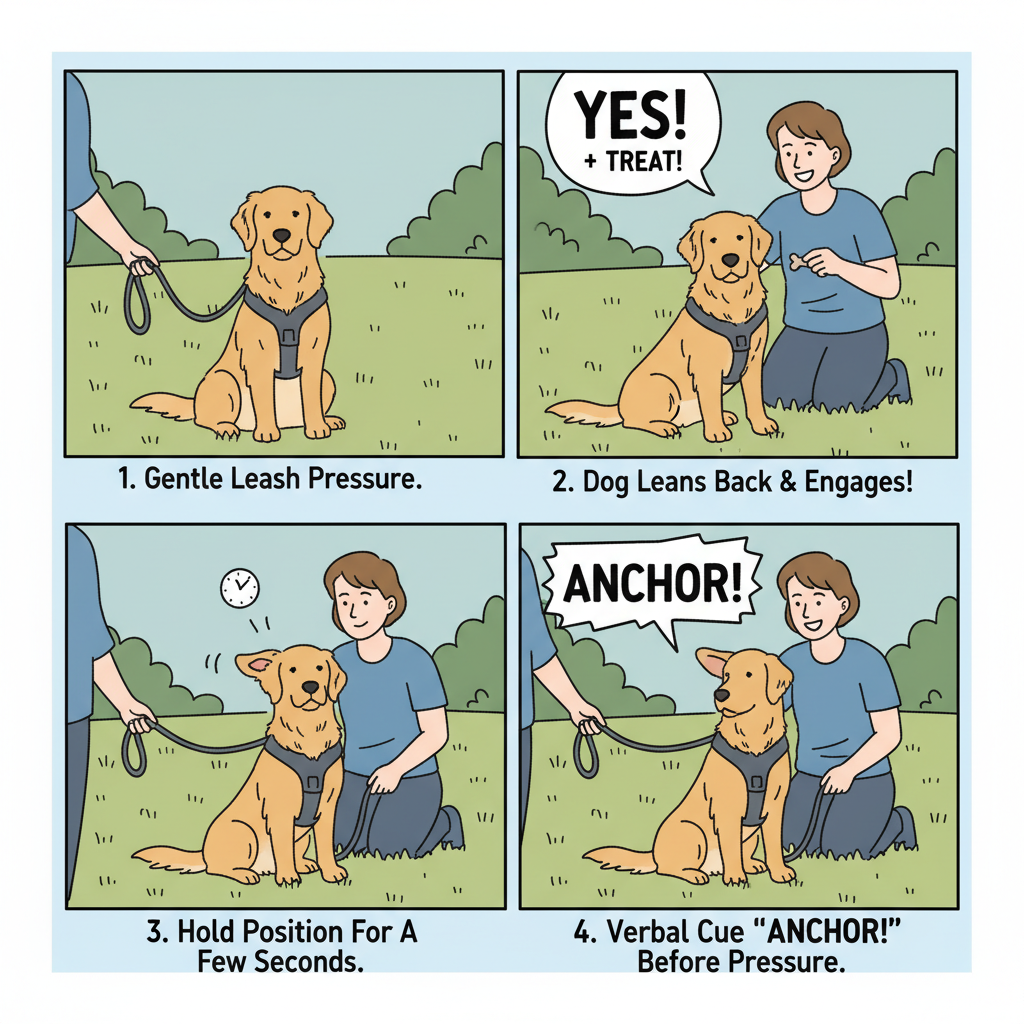
Step 1: Introduce Gentle Leash Pressure
The goal here is to change your dog’s perception of leash pressure from something to fight against to a signal for a reward. Start with your dog in a standing or sitting position. Hold the leash with no tension. Very, very gently, apply a tiny bit of steady pressure—just enough for your dog to feel it, but not enough to move them. The instant your dog responds by leaning back into the pressure even slightly, or simply not moving forward, mark the behavior (‘Yes!’ or click) and give them a treat right at their mouth. Release the pressure immediately after they get the treat. Repeat this 5-10 times.
Step 2: Build the ‘Heavy’ Feeling
Now we’ll ask for a little more. Gradually increase the leash pressure just a tiny bit more than in Step 1. You’re looking for your dog to actively brace against it. They might lower their head, shift their weight to their back legs, or tense their core. The moment you see that subtle shift into a ‘heavy’ posture, mark it and reward them enthusiastically. It’s crucial to release the pressure the moment they get the reward. This teaches them that bracing, not pulling, is what makes the pressure go away and brings the good stuff.
Step 3: Add Duration
Once your dog is reliably bracing against the pressure, we can start asking them to hold it for longer. Apply the pressure and wait for them to get heavy. Instead of marking and rewarding immediately, count ‘one-one thousand’ in your head, then mark and reward. Gradually increase the duration—two seconds, then three, and so on. If your dog breaks the anchor, you’ve gone too fast. Simply reset and try again with a shorter duration. The goal is to build their ‘muscle memory’ for holding the position.
Step 4: Introduce the Verbal Cue: ‘Anchor!’
Now that your dog understands the physical action, it’s time to name it. Just before you apply the leash pressure, say your cue clearly and happily: ‘Anchor!’. Then apply the pressure, wait for them to get heavy, mark, and reward. After many repetitions, your dog will begin to associate the word ‘Anchor’ with the action of bracing. The goal is for them to eventually perform the action on the verbal cue alone, without needing the leash pressure first.
Step 5: Generalize the Behavior
Your dog might be a pro at anchoring in the living room, but the real test is the great outdoors! Start practicing in your quiet backyard, then on the sidewalk in front of your house, and gradually work your way up to more distracting environments like the park. This process is called ‘generalization.’ Each time you change the environment, you may need to go back a step or two and make it easier for your dog to succeed. Be patient and reward generously for their efforts in new, distracting places.
Troubleshooting Common Roadblocks
Training is never a perfectly straight line. It’s normal to hit a few bumps in the road. Here are some common challenges and how to navigate them with a cool head and a pocket full of treats.
My dog just walks through the pressure and pulls anyway.
This usually means one of two things: the pressure is too much, too soon, or the reward isn’t valuable enough. Go back to Step 1 and use the lightest pressure imaginable—think of it as the weight of a feather. Also, upgrade your treats! If kibble isn’t cutting it, switch to something irresistible like tiny bits of cheese or freeze-dried liver. Make the right choice (resisting) way more appealing than the wrong one (pulling).
My dog gets frustrated and starts barking or nipping at the leash.
Frustration is a sign that the training session has gone on too long or the task is too difficult. Your dog is essentially saying, ‘I don’t understand what you want, and I’m stressed!’ End the session immediately with a simple, successful cue they know (like ‘sit’) and give them a reward. Next time, make the session much shorter and the steps easier. Break the behavior down into even smaller pieces if you have to.
My dog offers other behaviors like ‘down’ or ‘spin’ instead of bracing.
This is actually a good sign! It means your dog is engaged and trying to figure out the puzzle. They’re thinking, ‘What does this human want? Maybe if I lie down?’ Simply ignore the incorrect behaviors (don’t mark or reward them) and wait for that tiny, correct shift in weight. The moment they do it, have a treat party! They will quickly learn which specific action earns the reward.
Remember: Every ‘mistake’ is just information. It’s your dog telling you what they don’t yet understand. Adjust your technique, make it easier, and celebrate the small successes.
Putting it All Together: Real-World Applications
You’ve put in the work, and now it’s time to see the payoff! The Anchor cue is incredibly versatile. Here are some practical, everyday scenarios where it will become your new best friend.
| Scenario | How to Use the ‘Anchor’ Cue | Why It Works |
|---|---|---|
| The Sudden Squirrel | You spot the squirrel before your dog does. Calmly say ‘Anchor!’ and apply gentle, steady pressure. Be ready to reward heavily when they hold their ground as the distraction appears. | It proactively engages your dog’s brain before their prey drive fully kicks in, giving them a known job to do (‘stay heavy’) instead of reacting instinctively. |
| Chatting with a Neighbor | Your neighbor stops to say hello. Instead of your dog pulling to greet them, give the ‘Anchor’ cue. You can now have a conversation without being tugged in every direction. | It provides a clear expectation for your dog’s behavior during pauses on a walk. They learn that a stopped human means it’s time to be stationary and calm. |
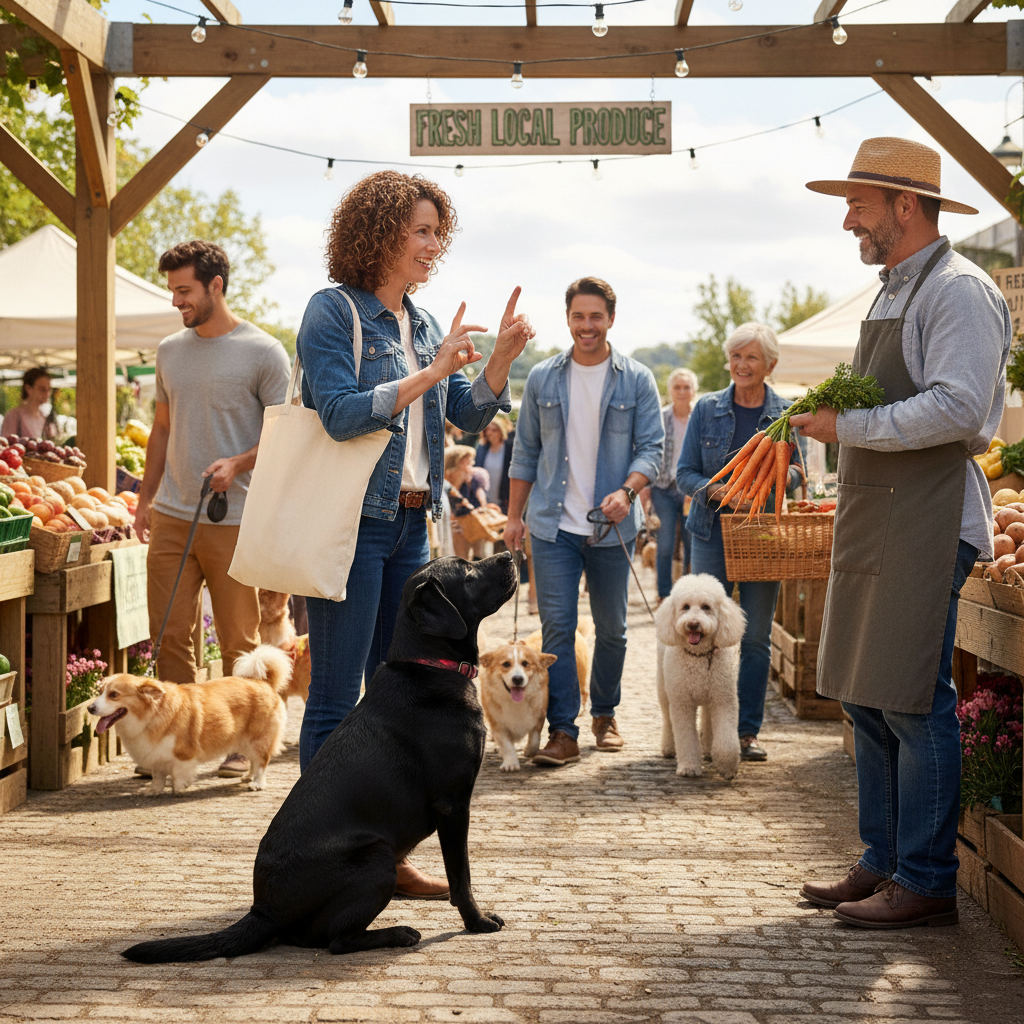
| Navigating Crowded Areas | Walking through a busy farmer’s market or a crowded street can be overwhelming. Use short, frequent ‘Anchor’ cues to keep your dog close and focused on you amidst the chaos. | It acts as a ‘reset’ button, helping your dog check in with you and remain calm rather than getting overstimulated by all the sights and sounds. |
| At a Crosswalk | This is a critical safety application. As you approach the curb, give the ‘Anchor’ cue. This prevents them from stepping into the street before you’ve given the all-clear. | It builds a strong, reliable habit of waiting at thresholds, which is a vital safety skill that can prevent accidents. |
The key is to be proactive. Try to anticipate situations where you’ll need your dog to hold steady and give the cue before they start to pull. This sets them up for success and reinforces the idea that the Anchor is a fun, rewarding, and cooperative game you play together on walks.
Conclusion
Teaching the ‘Anchor’ cue is so much more than just a trick to stop leash pulling. It’s a profound investment in your relationship with your dog. You’re replacing conflict and frustration with communication and teamwork. You’re teaching your dog how to handle challenging situations with confidence and providing them with a predictable way to earn rewards and praise. Every successful ‘Anchor’ on a walk is a testament to the trust and understanding you’ve built together.
Remember to be patient, stay positive, and celebrate every small victory along the way. Your walks are about to become more peaceful, more connected, and a whole lot more enjoyable for both of you. Now go on, and show the world what a strong, stable, and well-anchored team looks like!