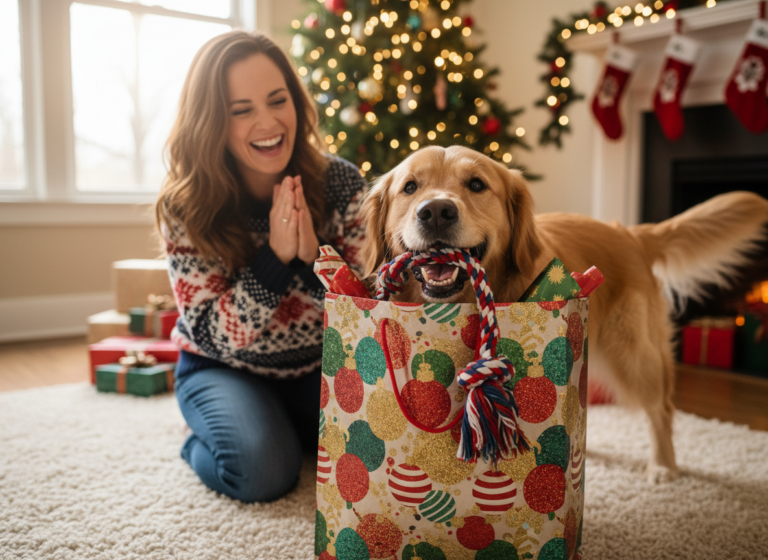
Let’s be honest, who doesn’t love scrolling through Instagram and seeing an impossibly cute photo of a dog doing something adorable? And right now, one of the most popular trends is the whimsical shot of a dog on a swing. It’s sweet, a little silly, and guaranteed to rake in the likes. But before you rush out to the backyard with your pup and your phone, there’s a lot to consider. Creating this magical photo isn’t just about pointing and shooting; it’s about safety, patience, and understanding your dog’s comfort level.
This guide is your ultimate resource for turning that dream photo into a reality—the right way. We’ll break down everything from choosing the perfect, safe swing to training your dog to pose like a pro. Remember, the goal isn’t just a great picture; it’s creating a fun, positive bonding experience for you and your best friend. A stressed-out pup does not make for a happy photo. So, let’s get ready to swing into action and capture some memories safely!
Safety First! Pre-Swing Prep & Considerations
Safety First! Pre-Swing Prep & Considerations
Before we even think about camera angles or filters, we have to talk about the most important part of this entire process: safety. Your dog’s well-being is non-negotiable. A cute photo is never worth risking their physical or emotional health. Taking the time to prepare properly will set you both up for a fun and stress-free photoshoot.
Is Your Dog a Swing Candidate?
First, have an honest conversation with yourself about your dog’s personality. Not every dog is cut out for this kind of activity, and that is perfectly okay! A good candidate for a swing photoshoot is typically:
- Calm and Confident: A dog that is generally relaxed in new situations and not easily spooked by new objects.
- Well-Trained: A solid ‘sit’ and ‘stay’ command are pretty much essential. The better their obedience foundation, the easier this will be.
- Patient: This process can take time. A dog that can handle sitting still for more than a few seconds will be more successful.
- Physically Sound: Ensure your dog has no joint issues, back problems, or balance impairments that could make sitting on a swing uncomfortable or dangerous. Senior dogs or dogs with arthritis might need to sit this one out.
If your dog is anxious, fearful, or hyperactive, forcing them onto a swing will only cause them stress. You know your dog best. If this doesn’t sound like a fun activity for them, consider a different kind of photoshoot, like a beautiful portrait in a field of flowers.
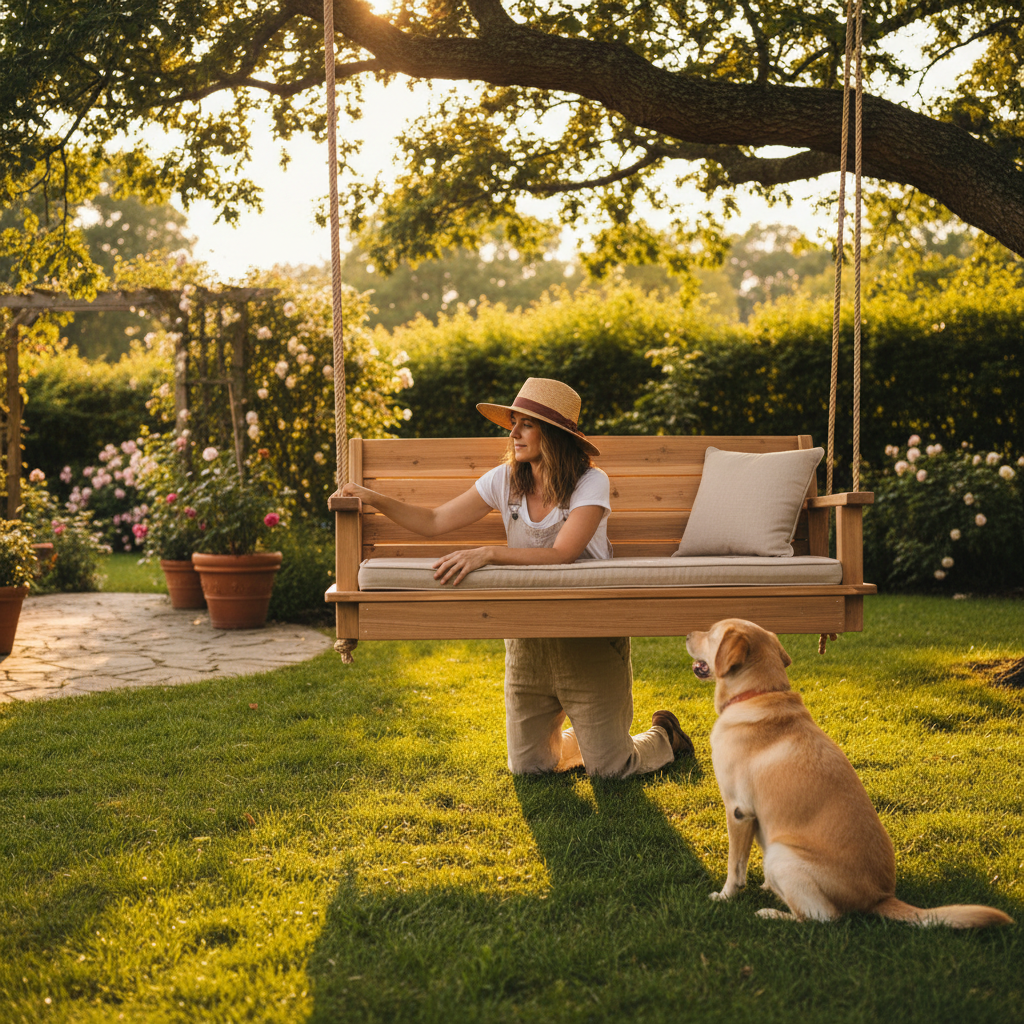
Choosing the Right Swing
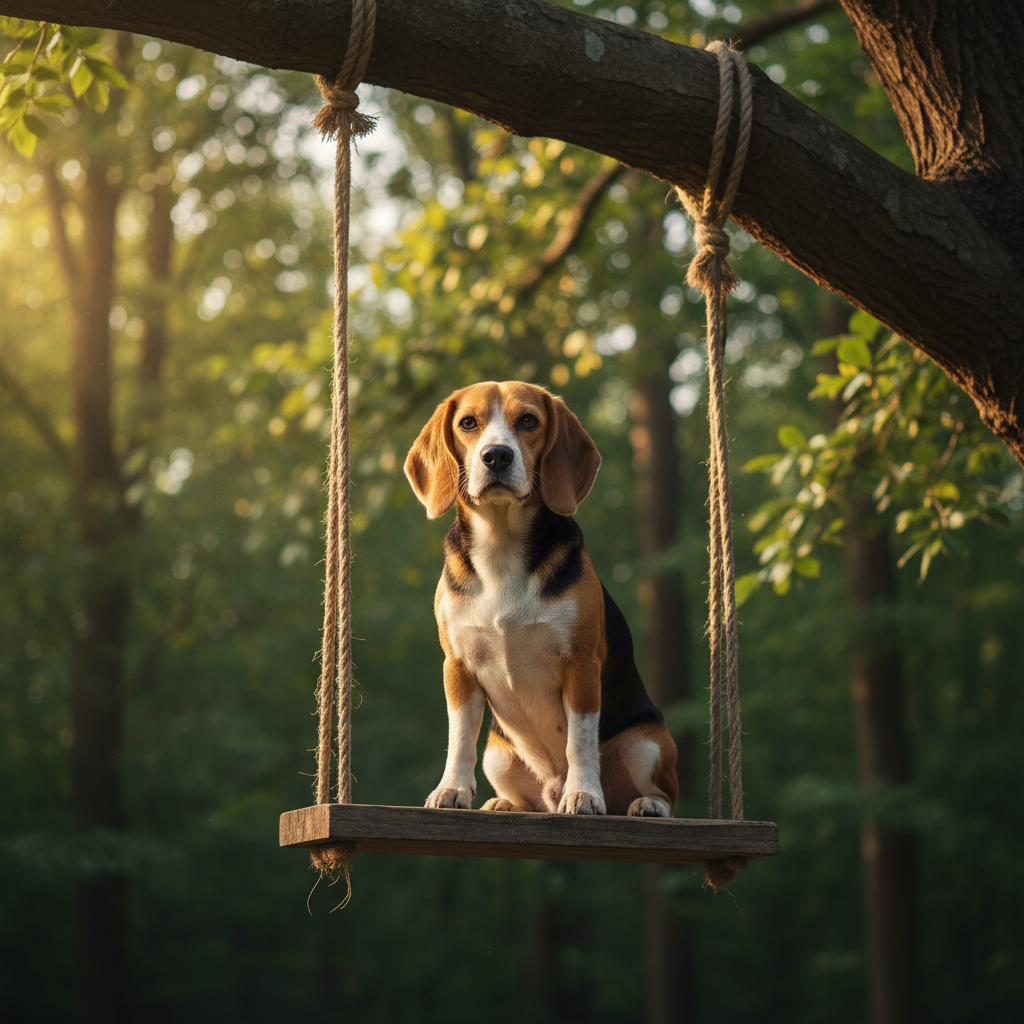
The swing itself is your most important piece of equipment. Forget those flimsy, narrow plank-and-rope swings from your childhood. You need something stable and secure.
- Low to the Ground: This is the number one rule. The swing should be no more than a foot off the ground, preferably less. This way, your dog can easily get on and off, and if they do decide to jump, there’s virtually no risk of injury.
- Wide and Stable Seat: Look for a swing with a wide, flat seat that gives your dog plenty of room to sit comfortably without their paws dangling off the sides. A bench-style swing, a tire swing (used while stationary), or a custom-made low platform swing are all great options.
- Sturdy Construction: Ensure the swing and the structure it hangs from (a strong tree branch, a dedicated swing set frame) can handle well over your dog’s weight. Give it a good push and pull to test for stability before your dog gets anywhere near it.
Expert Tip: Never, ever use a high swing or a swing designed for children. Your dog’s center of gravity and understanding of safety are completely different from a human’s. Always prioritize a low, stable platform.
Gearing Up: Your Photoshoot Toolkit
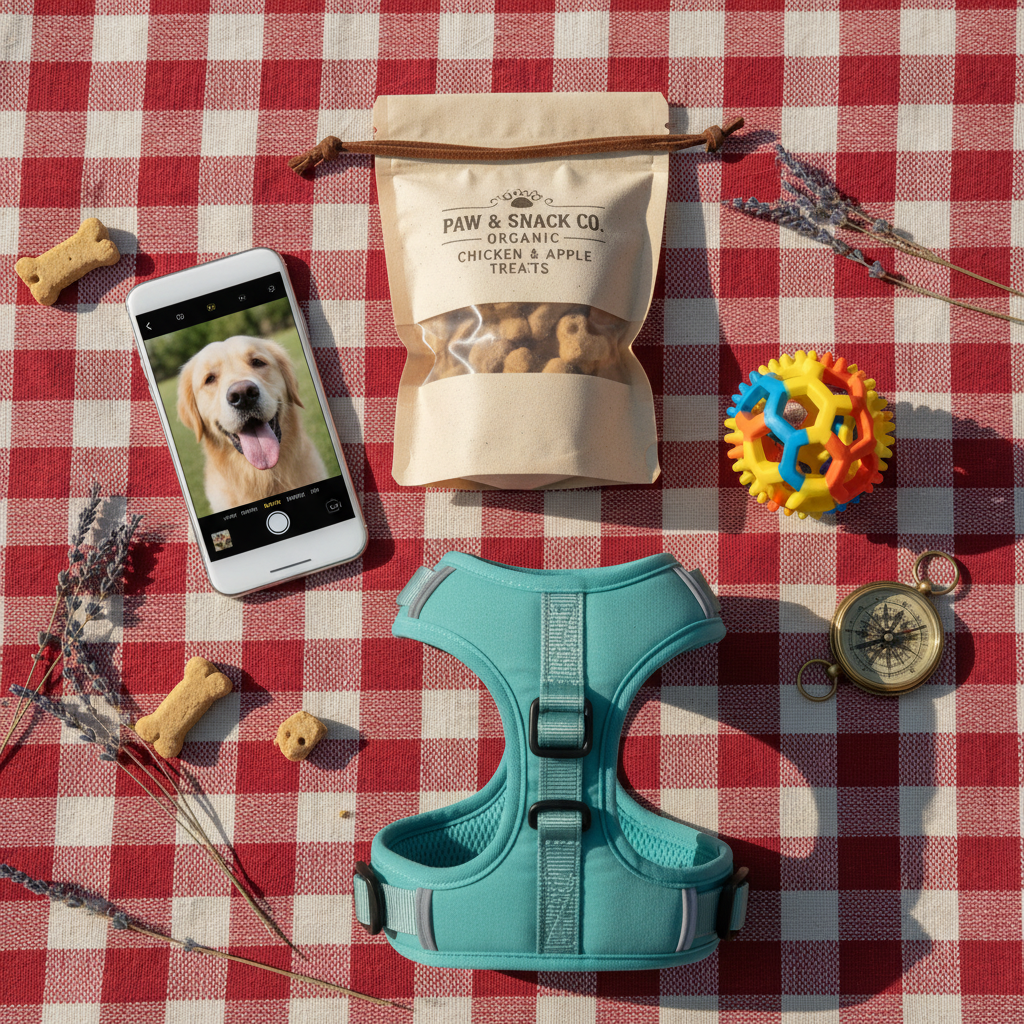
Gearing Up: Your Photoshoot Toolkit
Once you’ve sorted out the safety checks, it’s time to gather your supplies. Having everything you need on hand before you bring your dog into the picture will make the process smoother and more enjoyable. Think of it as setting up your studio for your star model!
The Essentials Checklist:
- A Safe Swing: As discussed, low, wide, and stable is the only way to go.
- High-Value Treats: We’re not talking about their everyday kibble. You need the good stuff! Think small pieces of cooked chicken, cheese, or their absolute favorite store-bought training treats. These will be your primary tool for positive reinforcement.
- A Favorite Toy: A squeaky toy or a beloved ball can be invaluable for getting your dog’s attention and directing their gaze toward the camera at the crucial moment.
- A Helper: This is almost a necessity. Having a second person to help is a game-changer. One person can focus on managing the dog (giving treats, holding the toy, ensuring safety), while the other person can focus on being the photographer.
- Your Camera or Smartphone: Make sure your device is charged and has plenty of storage space. You’ll be taking a lot of pictures!
- A Well-Fitting Harness: While you shouldn’t be tying your dog to the swing, having a harness on them can give you a gentle way to guide them or steady them if needed. It’s much safer than pulling on a collar.
- Patience and a Positive Attitude: This is the most important item on the list! Your dog will feed off your energy. If you are relaxed, happy, and patient, they are far more likely to be calm and cooperative. If you get frustrated, they will get stressed.
The Step-by-Step Guide to the Perfect Swing Pose
The Step-by-Step Guide to the Perfect Swing Pose
Alright, your swing is safe, your treats are ready, and your attitude is positive. It’s time to bring in your furry superstar! This process is all about baby steps and positive reinforcement. Never force your dog to do anything they are uncomfortable with. Let’s break it down.
-
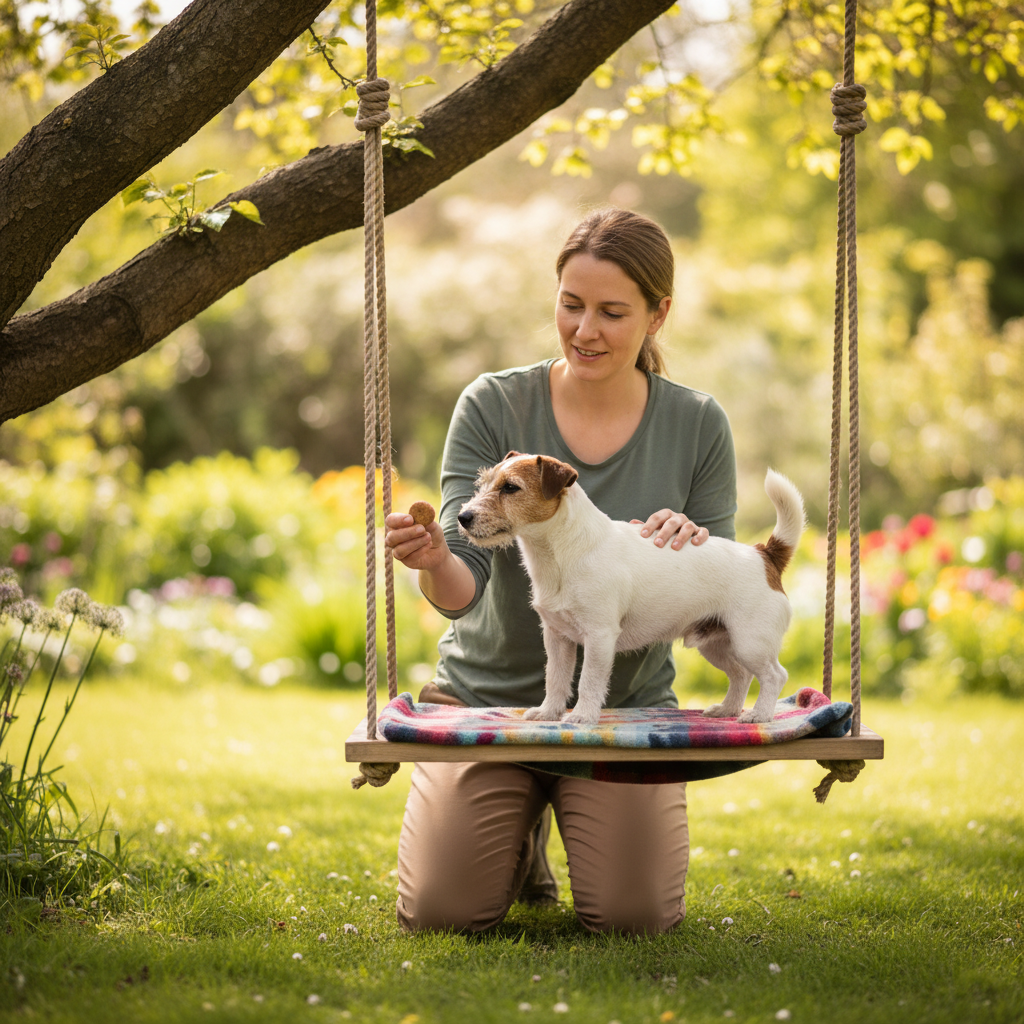
Step 1: The Grand Introduction
Bring your dog over to the stationary swing on a loose leash. Let them sniff it, walk around it, and get comfortable with its presence. Don’t try to get them on it yet. Just toss a few treats on the ground near the swing. The goal here is simple: Swing = Nothing Scary.
-
Step 2: Building Positive Vibes
Now, start placing treats directly on the seat of the swing. Encourage your dog to take them. They might stretch their neck to get them, or maybe put one or two paws up on the seat. Praise them enthusiastically for any interaction! You are teaching them that great things happen on and around this new object. Keep this session short and fun, just a few minutes.
-
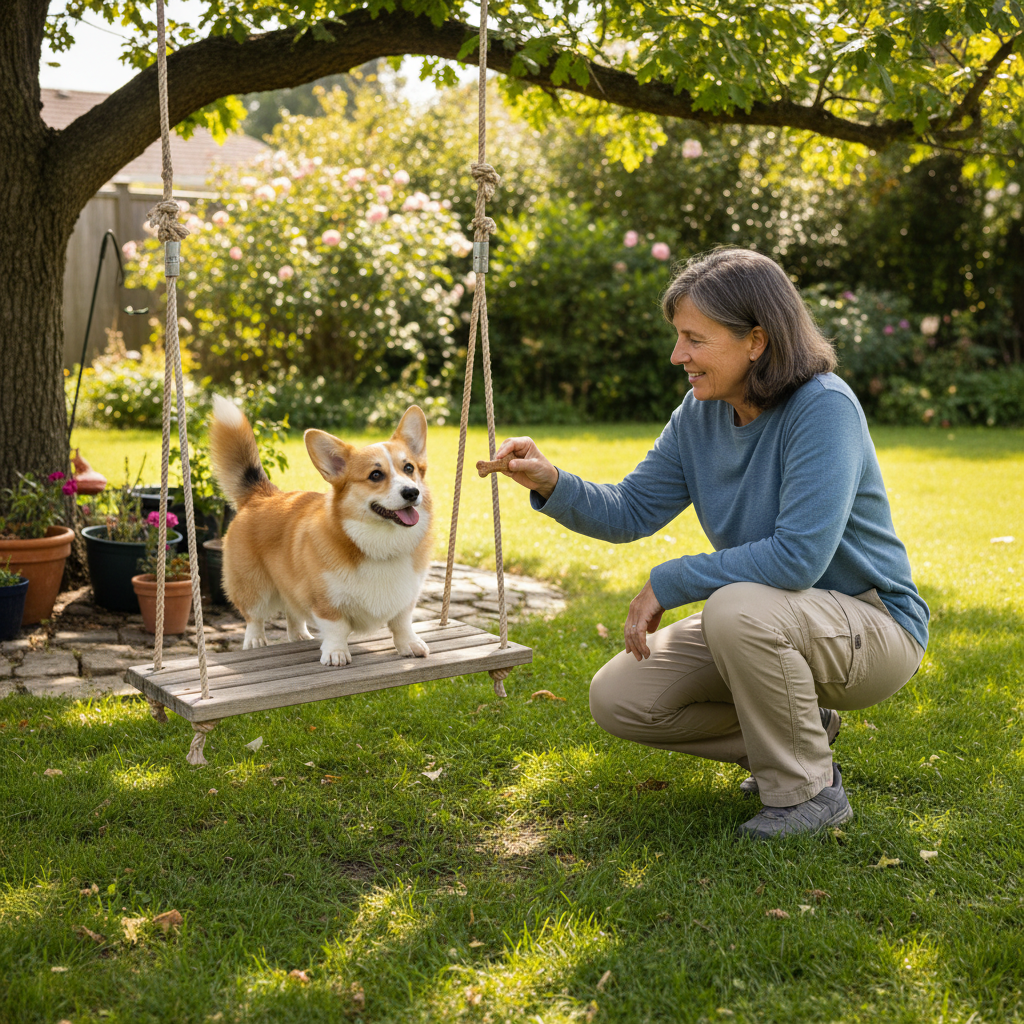
Step 3: The Gentle Ascent
Once your dog is happily taking treats from the swing’s seat, it’s time to encourage them to get on. Hold a high-value treat just over the seat and use a command they know, like ‘up’ or ‘place’. Lure them into a sitting position on the swing. Do not lift or push them onto it unless they are a very small dog and you are doing so very gently. The goal is for them to choose to get on. The moment their bottom touches the seat, give them the treat and lots of praise. Then, let them get right off. Repeat this several times. On, treat, praise, off.
-
Step 4: Perfecting the ‘Stay’
When your dog is comfortable getting onto the swing, you can start working on duration. Ask them to ‘sit’ and then ‘stay’. Start with just one second, then reward and release them. Gradually increase the duration of the ‘stay’ by a few seconds at a time. This is where a strong foundation in obedience training really pays off. Keep the swing completely still during this phase.
Remember: Watch your dog’s body language. Are their ears back? Are they lip-licking or yawning? These are signs of stress. If you see them, end the session on a positive note and try again another day. Shorter, successful sessions are better than one long, stressful one.
-
Step 5: Adding a Touch of Motion (Optional)
This step is only for the most confident and comfortable dogs. If your dog is rock-solid in their ‘stay’ on the stationary swing, you can try introducing a tiny bit of motion. We’re talking a gentle, one-inch sway. Have your helper move the swing ever so slightly while you continue to reward and praise your dog. If they show any signs of fear, stop immediately and go back to the stationary practice.
-
Step 6: It’s Showtime!
Now for the fun part! With your dog comfortably holding their ‘stay’ on the (mostly) stationary swing, it’s time to grab your camera. This is where your helper becomes the official ‘Attention Getter’. Have them stand next to you and use the squeaky toy or call your dog’s name to get them to look toward the camera. Snap away! Use burst mode to capture multiple frames in a second—you’re more likely to get that one perfect shot with a great expression.
Pro Photography Tips for Insta-Worthy Shots
Pro Photography Tips for Insta-Worthy Shots
You’ve mastered the safety and training, now let’s make sure the final photo is as stunning as your pup’s performance. You don’t need a fancy camera to take a great picture; these tips work just as well for smartphones.
Lighting is Everything
Good lighting can make or break a photo. The best time to shoot outdoors is during the ‘golden hour’—the first hour after sunrise and the last hour before sunset. The light is soft, warm, and incredibly flattering. Avoid shooting in the harsh midday sun, which creates unflattering shadows and can cause your dog to squint.
Get Down on Their Level
One of the biggest mistakes people make when photographing pets is shooting from a standing position, looking down at them. This angle isn’t very engaging. Instead, get down on your dog’s level! Kneel or even lie on the ground to get a shot that is eye-to-eye. This creates a much more intimate and professional-looking portrait.
Focus on the Eyes
The old saying ‘the eyes are the window to the soul’ is especially true for pets. Make sure your dog’s eyes are in sharp focus. On most smartphones, you can tap on the screen where their eyes are to set the focus point. A photo with sharp, expressive eyes will always be more powerful.
Use Burst Mode
Dogs are unpredictable! They might hold a pose for a moment and then suddenly turn their head or perk up their ears. By using your camera’s burst mode (holding down the shutter button), you can capture a rapid series of photos. This dramatically increases your chances of catching that perfect, fleeting expression.
Mind Your Background
A beautiful subject can be ruined by a distracting background. Before you start shooting, take a look at what’s behind the swing. Is there a garbage can, a messy porch, or a parked car? If so, try to change your angle to get a cleaner background, like a simple fence, a wall of green bushes, or an open field. Using ‘Portrait Mode’ on your phone can also help by blurring the background and making your dog pop.
Troubleshooting Common Swing Scenarios
Troubleshooting Common Swing Scenarios
Even with the best preparation, things don’t always go according to plan. Here’s how to handle a few common hiccups with patience and positivity.
‘My dog is scared of the swing!’
Don’t push it. Go all the way back to Step 1. The goal is to build a positive association, and that can take time. Spend several short sessions just rewarding your dog for being near the swing. Let them approach at their own pace. If they never become comfortable with it, accept it and move on. Their comfort is more important than the photo.
‘My dog won’t sit still!’
This is a classic! It usually means one of two things: the ‘stay’ command isn’t strong enough yet, or the session has gone on for too long and your dog is getting bored or antsy. First, go back to basics and practice the ‘stay’ command on solid ground, then on the stationary swing for very short durations. Second, keep your training sessions short and sweet—no more than 5-10 minutes at a time. Always end on a high note when they’ve done something well.
‘I can’t get my dog to look at the camera!’
This is where your helper is a superhero. Have them stand directly behind the camera and use a squeaky toy or make an interesting noise to get the dog’s attention. You can also try holding a treat right above the camera lens. Be ready to snap the picture the second their eyes meet the lens!
‘My dog keeps trying to jump off.’
This is a clear sign they are not comfortable or feel unstable. First, double-check that the swing is wide enough and not moving. If they still seem unsure, go back to just rewarding them for getting on and letting them get right off. They need to feel like they have control of the situation. Shortening the duration of the ‘stay’ will help build their confidence.
What NOT to Do: Common Mistakes to Avoid
What NOT to Do: Common Mistakes to Avoid
Sometimes, knowing what to avoid is just as important as knowing what to do. Steer clear of these common pitfalls to ensure your photoshoot is safe and successful.
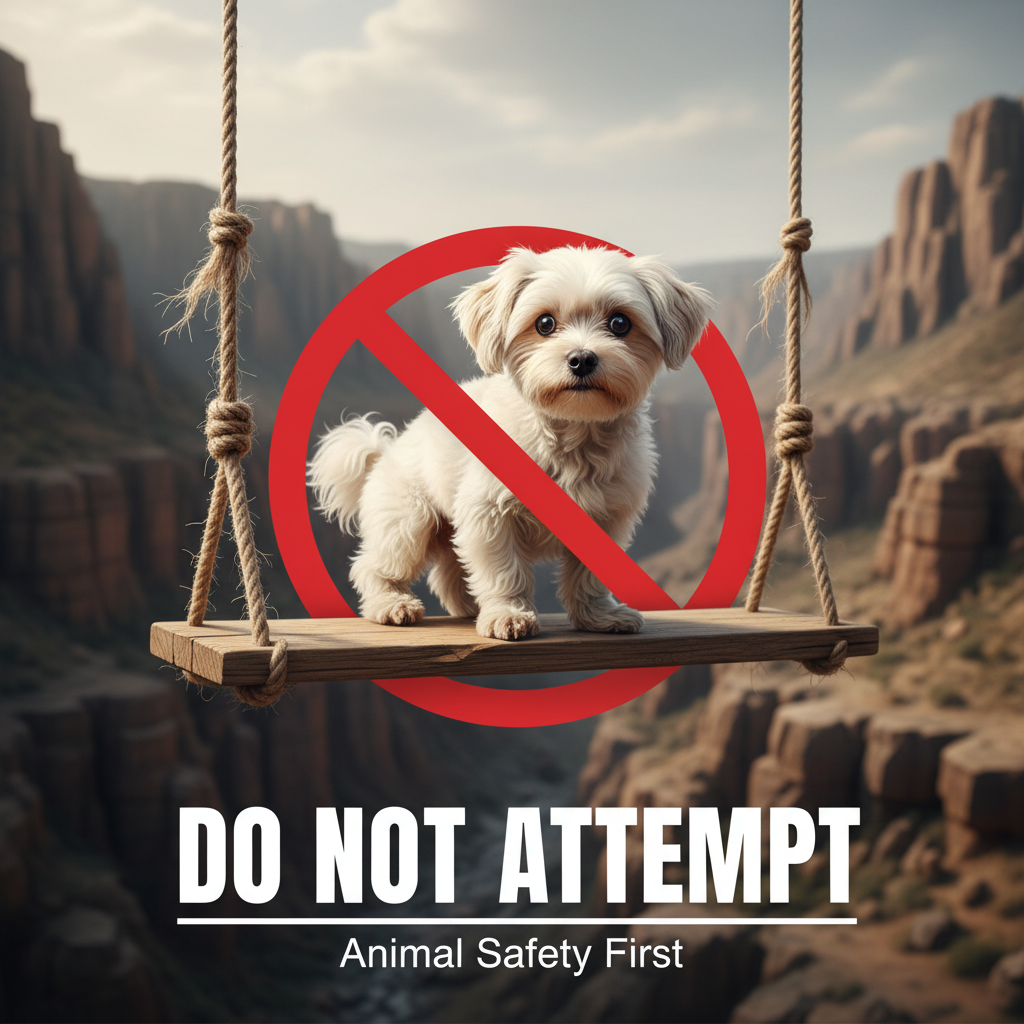
- Don’t Use an Unsafe Swing: Never place your dog on a high swing, a narrow swing, or a swing that is not structurally sound. This is the fastest way to an accident.
- Don’t Force Your Dog: Never push, pull, or physically force your dog onto the swing. This will create a negative association and can cause fear and anxiety. The entire process must be their choice, guided by positive reinforcement.
- Don’t Ignore Stress Signals: Learn to read your dog’s body language. Yawning when not tired, excessive panting, whale eye (showing the whites of their eyes), tucked tail, and flattened ears are all signs of stress. If you see these, it’s time to stop.
- Don’t Make Sessions Too Long: A dog’s attention span is short. Keep your training and photo sessions brief (5-10 minutes) to keep them engaged and happy. It’s better to have several short, positive sessions than one long, frustrating one.
- Don’t Tie Your Dog to the Swing: Never restrain your dog on the swing. They must be free to get off whenever they want to. Tying them could lead to serious injury if they try to jump or fall.
- Don’t Forget the Rewards: This should be a fun and rewarding experience. Be generous with treats and praise throughout the entire process, not just at the very end.
Conclusion
And there you have it! Posing your dog on a swing for that perfect Instagram photo is absolutely achievable, but it’s a journey built on a foundation of trust, safety, and a whole lot of patience. By choosing the right equipment, listening to your dog’s body language, and turning the entire process into a fun game, you’re doing more than just taking a picture—you’re strengthening your bond.
Remember, the goal is a happy dog, first and foremost. The incredible photo is just the cherry on top. Some dogs will take to it instantly, while others may need more time or decide it’s not for them, and that’s okay. Celebrate the small victories, keep it positive, and cherish the fun moments you spend together. Now go have some safe and happy photoshoot adventures!