Hey there, fellow dog lover! Have you ever watched a dog politely offer a paw and thought, ‘I wish my dog could do that!’? Well, you’re in luck. Teaching your dog to ‘shake hands’ is one of the most classic and charming tricks in the book, and it’s surprisingly easy to teach. It’s a fantastic way to build your dog’s confidence and strengthen the incredible bond you share.
Now, about that ‘5 minutes’ in the title. Let’s be real: your dog probably won’t have a perfect, ready-for-Broadway handshake after a single five-minute session. The secret is in the method—using short, focused, and super positive 5-minute training bursts. Dogs, especially puppies, have short attention spans. By keeping sessions brief and fun, you’ll see amazing progress without either of you getting frustrated. This guide is all about working smarter, not harder, using the power of positive reinforcement to make learning a game. So grab some tasty treats, find a comfy spot, and let’s get ready to teach your furry friend their new favorite party trick!
Getting Started: What You’ll Need for Success
Before you and your pup start your training journey, let’s gather a few simple things. The good news is you probably have everything you need already! Success here is less about fancy equipment and more about setting the right stage for learning.
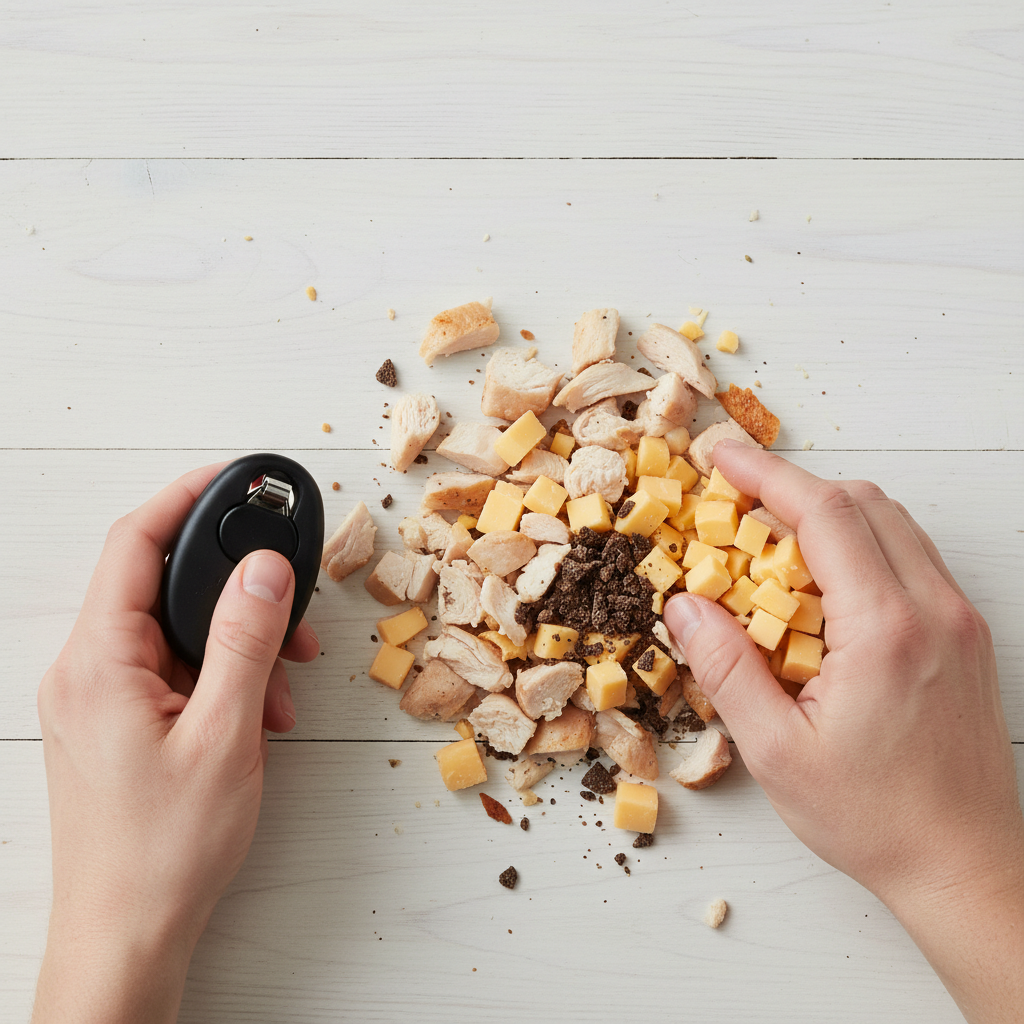
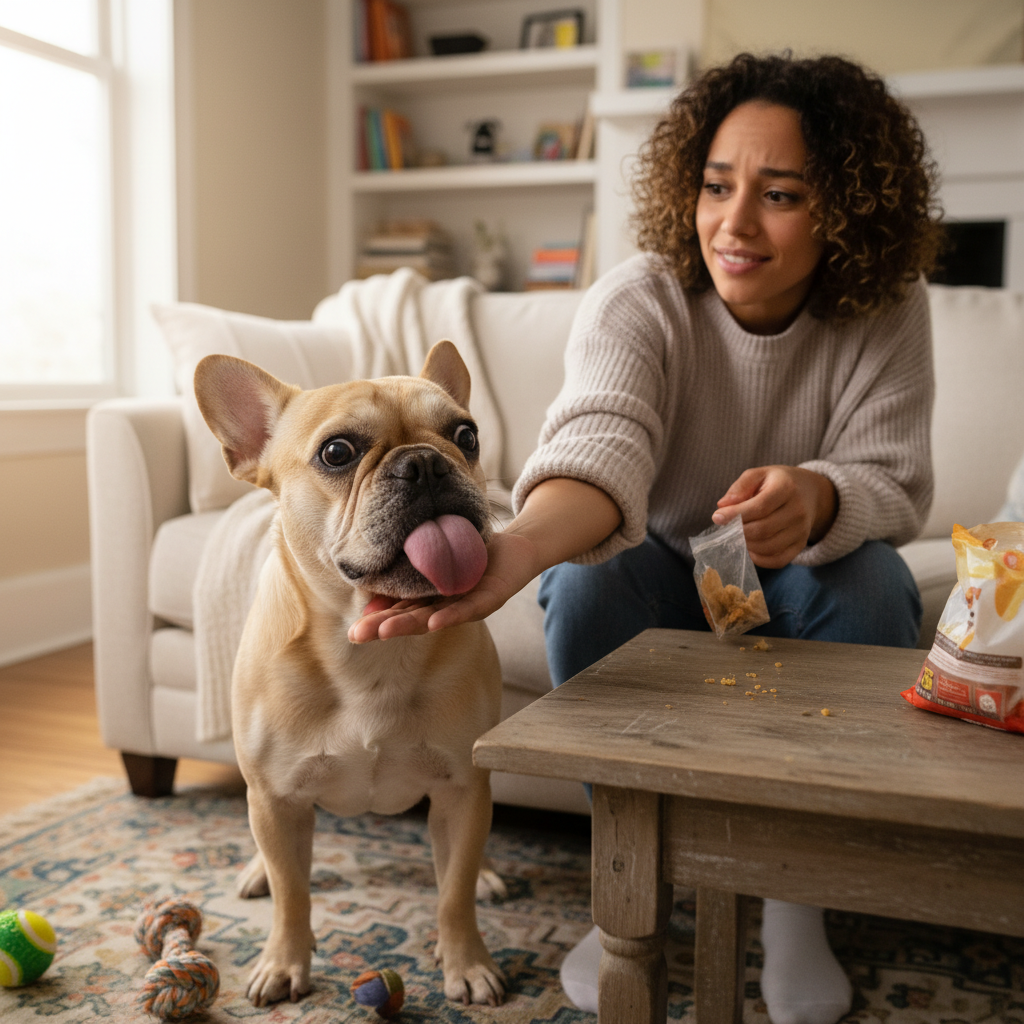
High-Value Treats
This is your secret weapon! While your dog might work for their regular kibble, high-value treats are the special, extra-delicious rewards that really get their attention. Think of it as their training paycheck—you want to make it a good one! These should be small, soft, and easy to swallow quickly so you don’t break the flow of the training session.
- Examples: Tiny pieces of cooked chicken or turkey, small cubes of cheese, bits of a hot dog, or store-bought soft training treats.
- Pro Tip: Find out what your dog truly loves. The smellier, the better! This will keep them motivated and eager to figure out what you’re asking.
A Quiet, Distraction-Free Space
Imagine trying to learn a new skill with the TV blaring and people walking in and out of the room. It’s tough! Your dog feels the same way. Choose a time and place where you can both focus. A quiet living room, a hallway, or even a calm backyard (without squirrels!) will work perfectly. The goal is to make you and the treats the most interesting things in the room.
A Clicker (Optional but Recommended)
A clicker is a small plastic device that makes a distinct ‘click’ sound. In training, it’s used to ‘mark’ the exact moment your dog does the right thing. The click is faster and more precise than saying ‘Good dog!’ and it instantly tells your pup, ‘Yes, that’s what I wanted!’ If you don’t have a clicker, no worries! You can use a verbal marker instead. Just choose a short, sharp word you don’t use in everyday conversation, like ‘Yes!’ or ‘Click!’, and use it with the same consistency.
Your Enthusiastic Attitude!
This is the most important tool of all. Dogs are incredibly perceptive and feed off our energy. If you’re excited, patient, and positive, your dog will be too. Keep your voice light and happy, and be ready to celebrate the small wins. Your encouragement is a reward in itself!
The 5-Minute Method: A Step-by-Step Guide to ‘Shake’
Alright, it’s go-time! Find your quiet spot, have your treats ready, and get your dog in a comfortable ‘sit’ position in front of you. Remember to keep it fun and upbeat. Here’s how to break down the ‘shake’ into simple, easy-to-learn steps.
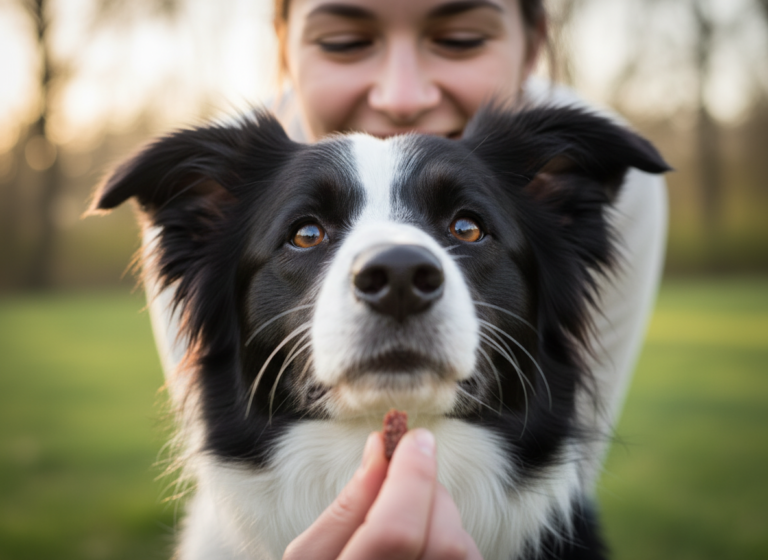
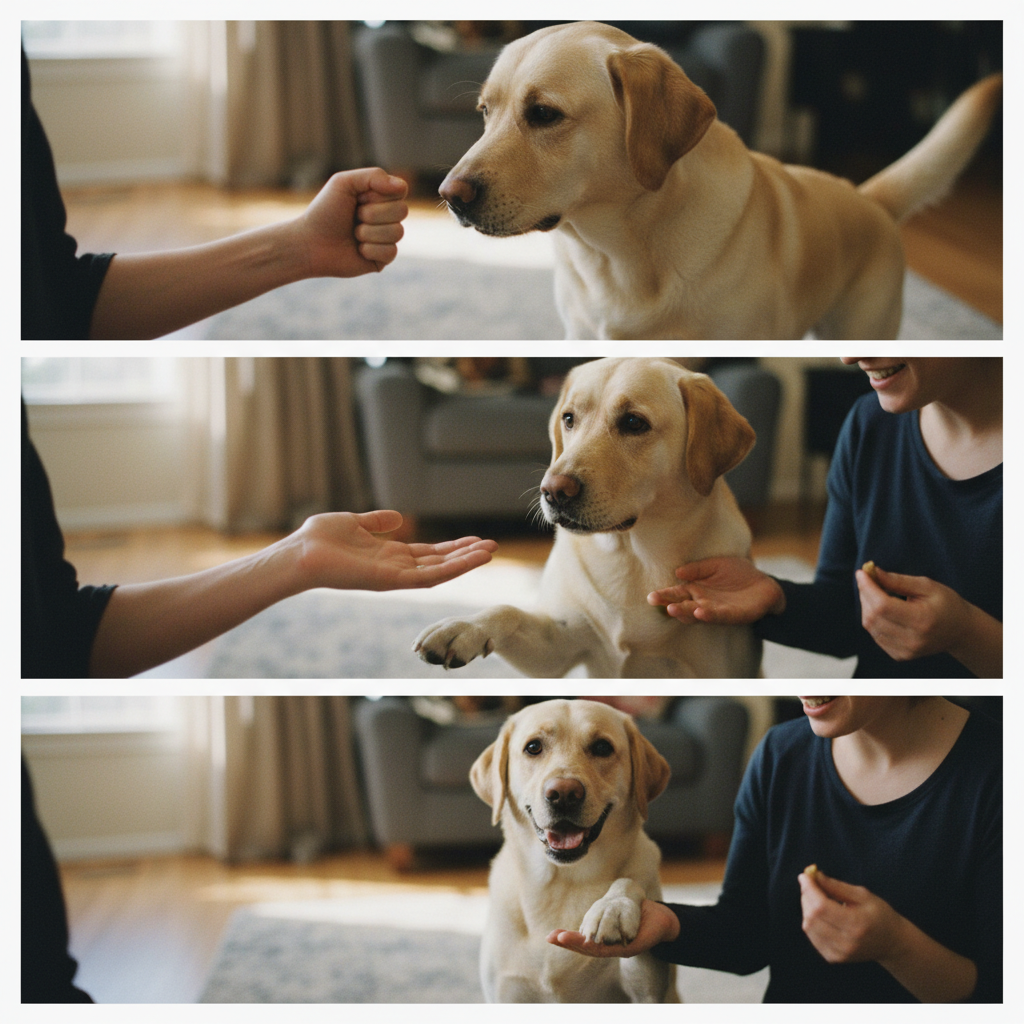
- Step 1: Capture the Paw Movement (The Lure). Take a tasty, smelly treat and close your hand around it, making a fist. Hold your fist down near your dog’s nose, just a few inches off the ground. Let them sniff it. Curiosity will take over! Your dog will likely try to figure out how to get the treat. They might nudge, lick, or—and this is what we’re waiting for—paw at your hand.
- Step 2: Mark and Reward. The very instant you feel their paw touch your hand, even if it’s just a tiny scratch, you need to act fast. Click your clicker or say your verbal marker (‘Yes!’). Immediately open your fist and let them have the treat. Timing is everything here! You are marking the specific action of the paw touching your hand. Repeat this process 5-10 times, until your dog is reliably pawing at your closed fist as soon as you present it.
- Step 3: Introduce the Verbal Cue. Now that your dog understands the game (‘If I touch the hand, I get the treat!’), it’s time to give the action a name. Just as you present your closed fist, say your cue word clearly and happily: ‘Shake!’ As soon as they paw your hand, mark and reward as before. You are now building an association between the word ‘Shake’ and the action of lifting their paw.
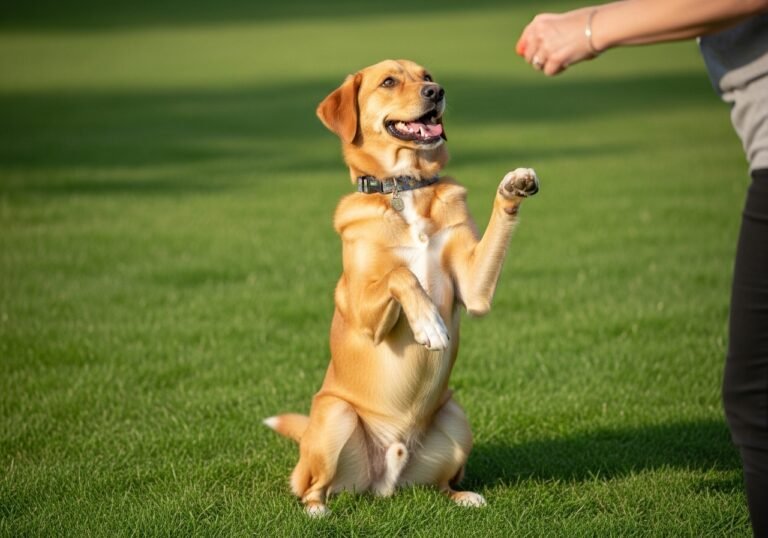
- Step 4: Shape the Behavior (Transition to an Open Hand). This is where the magic happens. After a few successful repetitions with the verbal cue, try presenting your hand as an open palm, as if you’re going in for a real handshake. Say ‘Shake!’ Your dog might be a little confused at first since the picture looks different. Be patient. If they hesitate, you can briefly go back to the closed fist to remind them. Mark and reward any attempt to touch your open palm. At first, you might reward just a nose nudge, then a single claw, and finally, the full paw resting in your hand. You are ‘shaping’ the behavior into the final, polished trick.
- Step 5: Fade the Lure and Generalize. The treat in your hand was a ‘lure’ to get the behavior started. Now that your dog understands the verbal cue ‘Shake’ and the open-hand signal, you can start practicing without a treat in your shaking hand. Keep the treats in your other hand or a pocket. Say ‘Shake,’ present your empty open hand, and when they do it, mark and reward them from your other hand. This teaches them to perform the cue without needing to see the reward first.
Expert Tip: Keep your sessions short! A 5-minute session is perfect. You can do a few of these throughout the day. Always end on a high note with a successful repetition so your dog is excited for the next session.
Troubleshooting: What If My Dog Isn’t Getting It?
Don’t worry if you hit a little snag—it happens to every trainer and every dog! Learning isn’t always a straight line. The key is to stay patient and positive. Here are some common challenges and how to work through them.
- ‘My dog just licks my hand instead of pawing.’ This is very common! Your hand smells delicious, after all. The solution is simple: ignore the licking. Don’t reward it, don’t say ‘no,’ just wait. The moment your dog gets frustrated with licking and makes even the tiniest paw movement—a twitch or a small lift—mark and reward that! You are teaching them that only the paw gets the prize.
- ‘My dog is too energetic and just mouths or nips at my hand.’ For puppies and mouthy dogs, this is a frequent issue. If their teeth touch your skin, let out a sharp but not angry ‘Ouch!’ and briefly pull your hand away for a few seconds. This mimics how puppies teach each other about bite pressure. It tells them, ‘Hey, that’s too much!’ Then, calmly resume the exercise. This is a great way to teach bite inhibition alongside the trick.
- ‘My dog won’t lift their paw at all. They just stare at me.’ Some dogs are less naturally ‘pawsy’ than others. If your dog is stuck, you can help them figure it out. Try gently tapping the back of their front leg or tickling their paw. This often causes a natural reflex to lift the paw. The second they lift it, even a millimeter off the ground, mark and reward! You might need to do this a few times to show them what you’re looking for.
- ‘My dog was doing great, but now they seem bored or distracted.’ This is a classic sign of a training session that has gone on too long. Remember the 5-minute rule! It’s always better to have three separate, super-successful 2-minute sessions than one frustrating 10-minute one. If you see signs of distraction (sniffing the ground, looking away, yawning), end the session on a positive note with an easy win (like a simple ‘sit’) and try again later.
The golden rule of troubleshooting is to take a step back. If your dog is struggling with Step 4, go back to Step 3 for a few easy wins to rebuild their confidence before trying again. Training should always be a confidence-builder, not a test!
Beyond the Basics: Perfecting the ‘Shake’ and Next Steps
Congratulations! Your dog is reliably offering their paw. You’ve taught them a new skill, which is a huge accomplishment. Now, let’s make that ‘shake’ rock-solid and explore what other fun tricks you can build from this foundation.
Proofing the Behavior
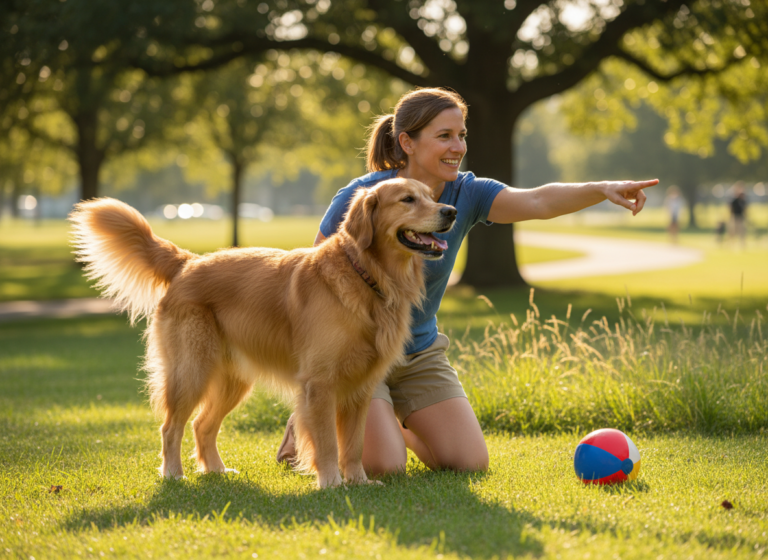
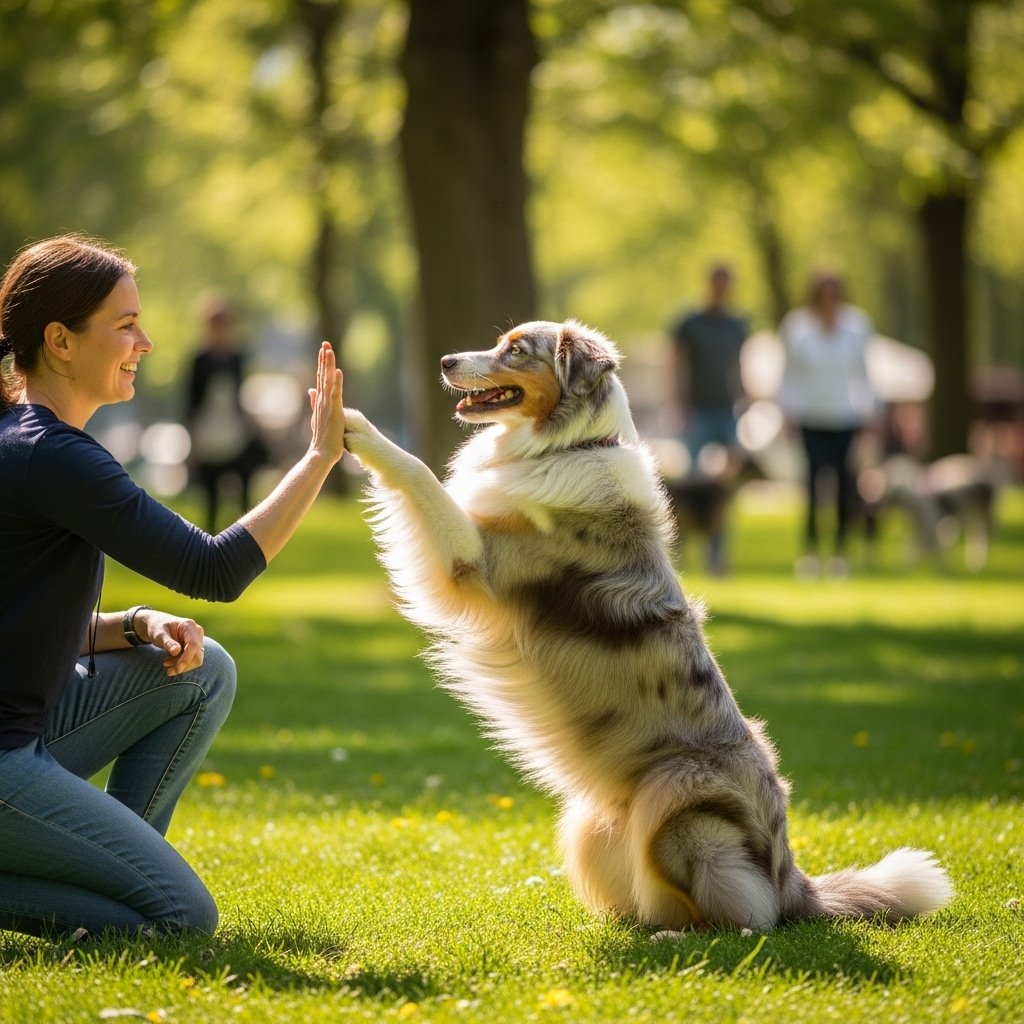
‘Proofing’ is a training term for teaching your dog to perform a command reliably in various situations. Just because your dog can ‘shake’ perfectly in the quiet living room doesn’t mean they’ll remember how at a busy park. To proof the behavior, you need to generalize it.
- Change the Location: Start practicing in other rooms of the house. Then move to the backyard. Eventually, try it on a quiet walk or at a pet-friendly store. Start with low-distraction environments and gradually work your way up.
- Add Different People: Ask a family member or a friend to ask your dog to ‘shake.’ This teaches your dog that the command isn’t just for you.
- Vary Your Position: So far, you’ve probably been sitting on the floor. Try asking for a ‘shake’ while you’re standing up, or sitting on a chair.
Teaching the Other Paw
Want to double the fun? Teaching your dog to offer their other paw is a great next step. The process is exactly the same, but you’ll use a different cue word to avoid confusion. Hold the treat in your opposite hand to encourage them to use the other paw, and when they do, mark and reward. Popular cues include ‘Other Paw’ or ‘Paw-five’.
Fading the Treats
While treats are essential for teaching, you don’t want to be a walking vending machine forever. Once the ‘shake’ is reliable, you can move to an intermittent reward schedule. This means you don’t reward with a treat every single time. Maybe you reward two shakes in a row, then skip one, then reward the next three. This actually makes the behavior stronger! Also, start incorporating other rewards your dog loves.
| Reward Type | Example | When to Use |
|---|---|---|
| Food Rewards | High-value training treats, kibble | When first teaching a new skill or in high-distraction areas. |
| Praise Rewards | ‘Good boy!’, ‘Awesome job!’ in a happy tone | Use generously and often, both with and without treats. |
| Toy Rewards | A quick game of tug or fetch with a favorite toy | Great for high-energy dogs after a successful training session. |
| Life Rewards | Getting to go outside, having their leash put on, getting their dinner | Ask for a ‘shake’ before a desired activity. The activity is the reward! |
What’s Next?
The ‘shake’ is a fantastic gateway trick! The paw-targeting skill it teaches can easily be shaped into other cool commands. Consider teaching your dog:
- High-Five: The same as a shake, but you hold your hand up higher.
- Wave: After they lift their paw for a shake, move your hand away so they are left holding it in the air. Mark and reward the ‘wave.’
- Press a Button: You can teach them to press dog-friendly buttons or a tap light.
Conclusion
And there you have it! You’ve successfully navigated the steps to teaching one of the most beloved dog tricks around. By breaking it down into small, manageable pieces and keeping your energy positive, you’ve shown your dog that learning with you is a fun and rewarding game. Remember, the real prize isn’t just the trick itself; it’s the focused time you spend together, strengthening your communication and deepening your bond.
Don’t get discouraged if your dog has an ‘off’ day. Just like us, dogs learn at their own pace. The key is consistency and patience. Keep those training sessions short, sweet, and full of praise. Before you know it, your pup will be charming everyone they meet with their polite and clever handshake. Now go grab your furry friend and show them what a great team you are. Happy training!