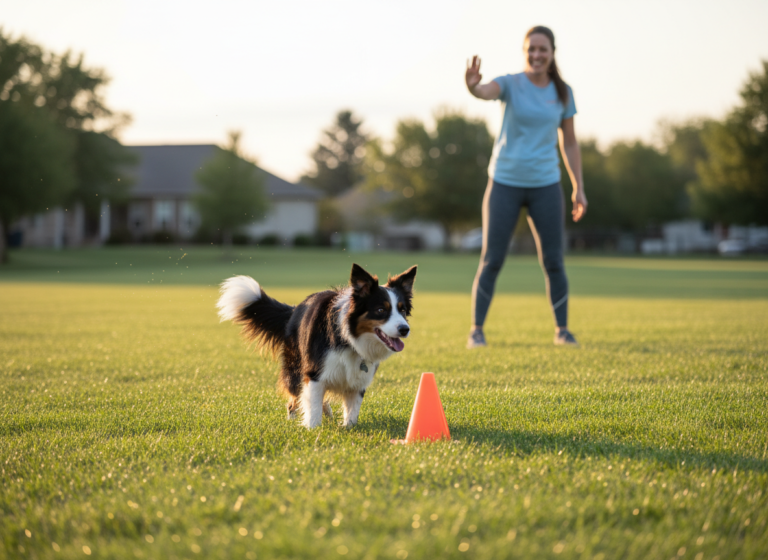
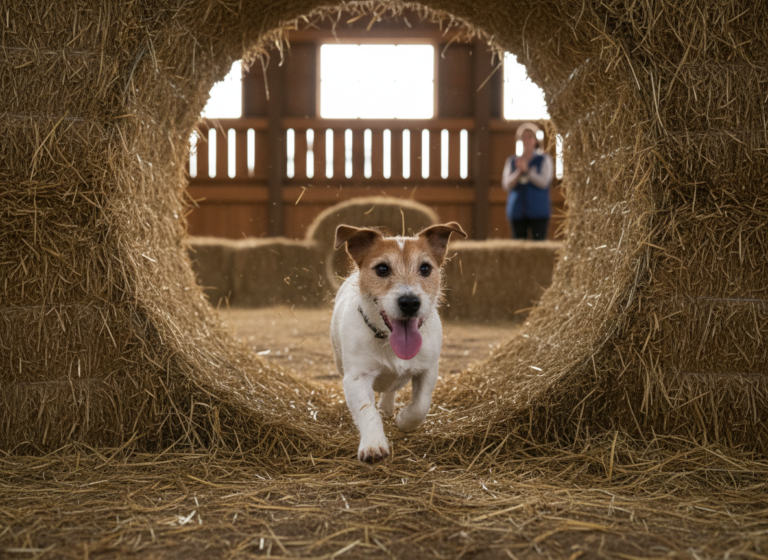
Welcome to the exciting world of dog agility! If you’ve ever watched an agility competition, you’ve seen dogs joyfully zipping through tunnels, soaring over jumps, and weaving through poles. One of the classic obstacles you’ll encounter is the collapsed tunnel, often called the ‘chute.’ To us, it looks like a simple fabric tube. But to our dogs, it can be a dark, strange, fabric-monster that touches their body as they run through it. A little intimidating, right?
Don’t worry! Teaching the chute is a fantastic trust-building exercise for you and your furry teammate. With a bit of patience, a whole lot of treats, and the right approach, you can transform this obstacle from a source of hesitation into a moment of pure, unadulterated fun. This guide will walk you through everything, step-by-step, to build your dog’s confidence and have them conquering the collapsed tunnel like a pro. Let’s get started!
What Exactly is a Collapsed Tunnel (and Why Do Dogs Sometimes Hesitate)?
Before we jump into training, let’s break down what we’re working with. Understanding the obstacle from your dog’s perspective is the first step to becoming a great trainer and teammate for them.
The Anatomy of a Chute
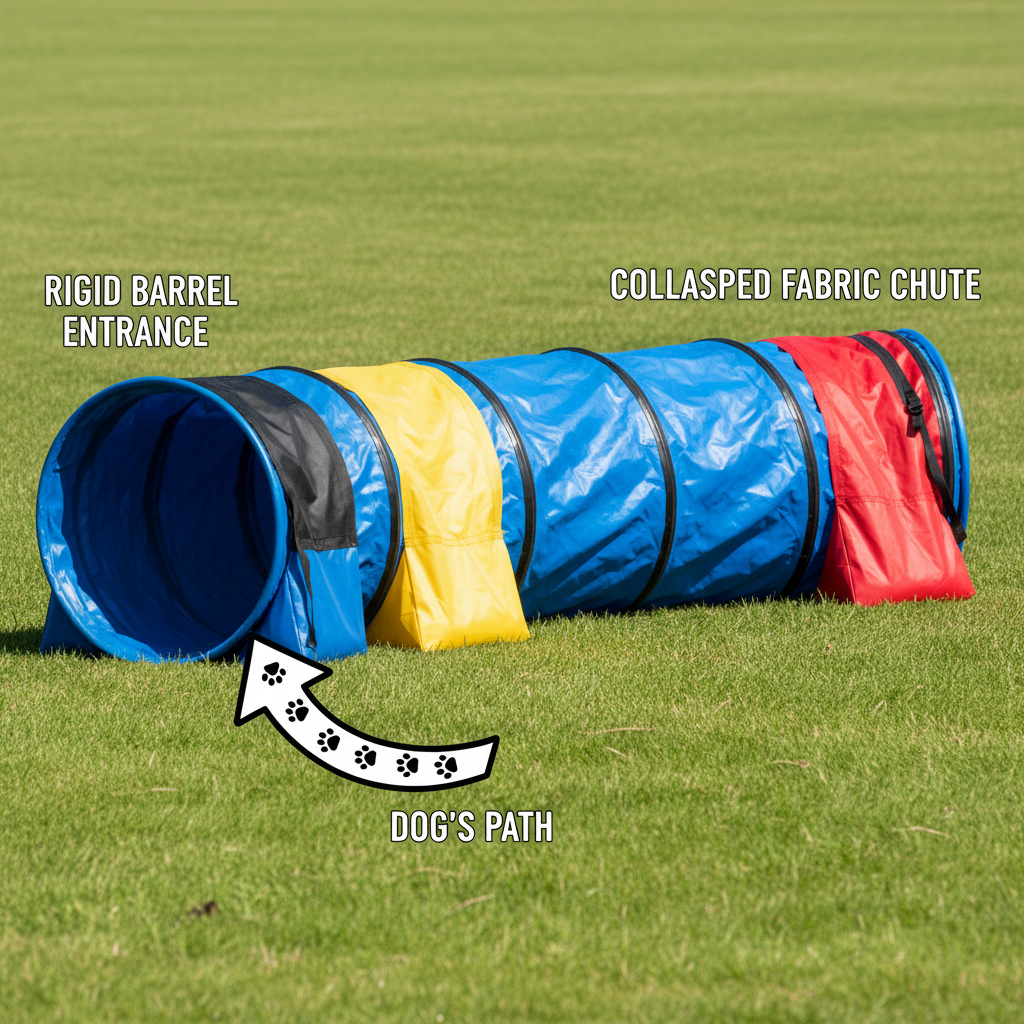
A collapsed tunnel isn’t just one piece. It has two distinct parts:
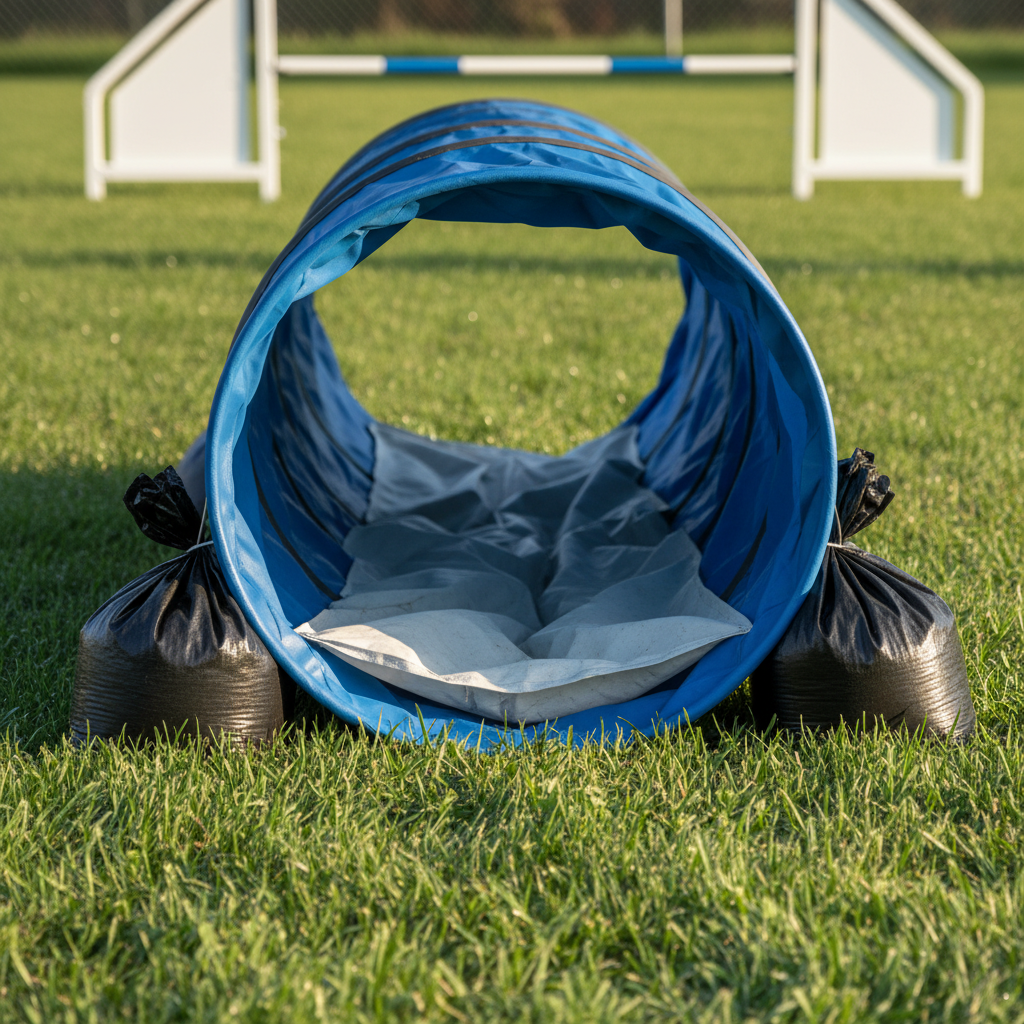
- The Barrel: This is the entrance. It’s a short, rigid, open tunnel, usually about 3 feet long. It provides a stable and inviting opening for the dog to enter.
- The Chute: This is the long, fabric tube attached to the end of the barrel. It lies flat on the ground, hence the name ‘collapsed tunnel.’ When a dog runs through, they have to push their way through the fabric to get to the other side.
A Dog’s-Eye View
So, why the hesitation? Imagine you’re a dog. You’re asked to run full speed into a dark hole that suddenly closes in around you. You can’t see the exit, and something is touching your back and sides the whole way through. It’s a very different sensory experience from an open tunnel!
Expert Tip: The key challenge with the chute is the combination of darkness and the feeling of the fabric on the dog’s body. It goes against their natural instincts to run into a tight, dark space where they can’t see the exit. Our job is to show them it’s not just safe, it’s a super fun game!
Recognizing these potential fears allows us to approach training with empathy and patience. We’re not just teaching them to run through a tube; we’re building their confidence and teaching them to trust that we’ll only ask them to do fun, safe things.
Gearing Up for Success: What You’ll Need
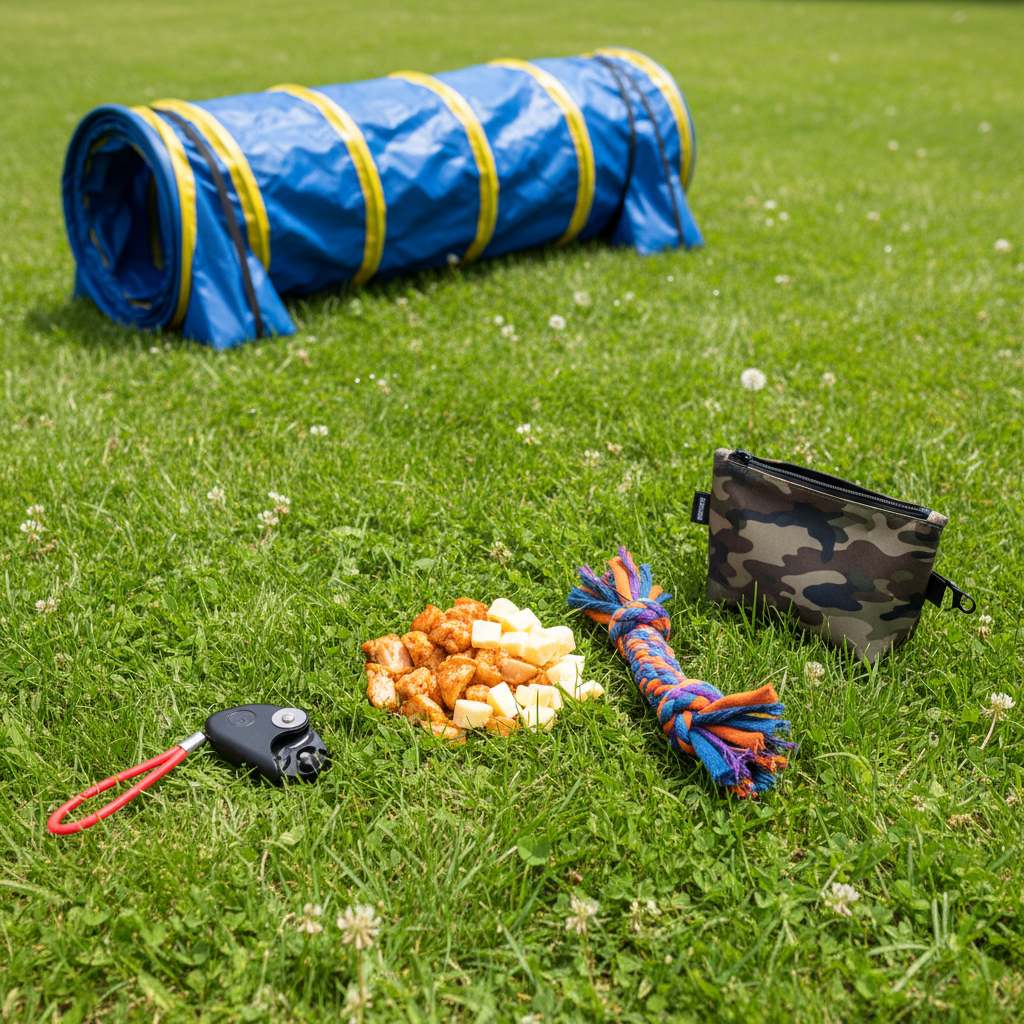
Having the right tools on hand before you start will make your training sessions smoother, more effective, and a lot more fun for both of you. You don’t need a ton of fancy equipment, but a few key items are essential for chute training.
Your Training Toolkit:
- A Collapsed Tunnel/Chute: Of course, you’ll need the obstacle itself! You can find lightweight, portable versions online that are perfect for backyard practice. Ensure it has a way to be staked or weighted down for safety.
- High-Value Treats: We’re talking top-tier, can’t-resist-it goodies. Think small pieces of chicken, cheese, hot dogs, or a special training bait your dog goes crazy for. This isn’t the time for dry biscuits. The reward needs to be worth the bravery!
- A Favorite Toy: If your dog is more motivated by toys than food, have their absolute favorite tug or fetch toy ready. It should be something you can easily toss through the chute.
- A Helper (Highly Recommended): Especially in the beginning, having a second person makes training much easier. One person can help hold the chute open and manage the dog, while the other can be at the exit to call and reward them.
- A Positive Attitude: This is the most important tool in your kit! Your dog feeds off your energy. Stay patient, keep it light and fun, and celebrate every tiny bit of progress. Your excitement is a powerful reward.
Once you’ve gathered your gear, find a safe, non-slip surface to practice on, like a grassy lawn. Avoid slippery surfaces like decks or concrete. Now, you’re ready to turn that fabric tube into a super-fun doggy waterslide!
The Step-by-Step Guide to Chute Confidence
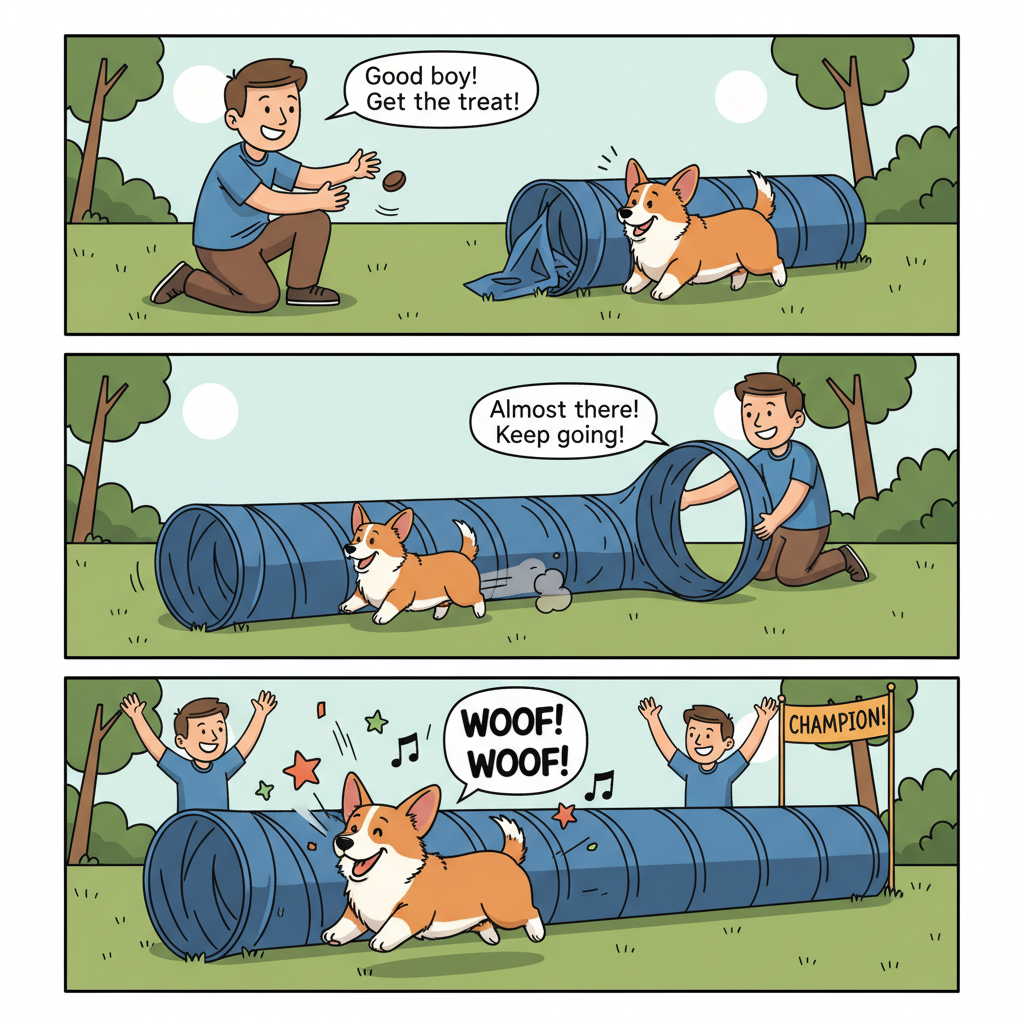
Alright, it’s game time! Remember, the goal here is to make the chute the best game ever. We’ll do this by breaking it down into tiny, achievable steps and rewarding every ounce of effort. Keep your sessions short (5-10 minutes max) to keep your dog engaged and wanting more.
-
Step 1: The Barrel Game
Forget the collapsed part for now. Let’s just focus on the open, rigid barrel entrance. Place the barrel on the ground and let your dog investigate it. Toss a treat just inside the entrance. When they stick their head in to get it, praise them enthusiastically! Repeat this, tossing the treat a little further in each time, until they are happily walking through the 3-foot barrel to get their reward. Make it a party every time they exit!
-
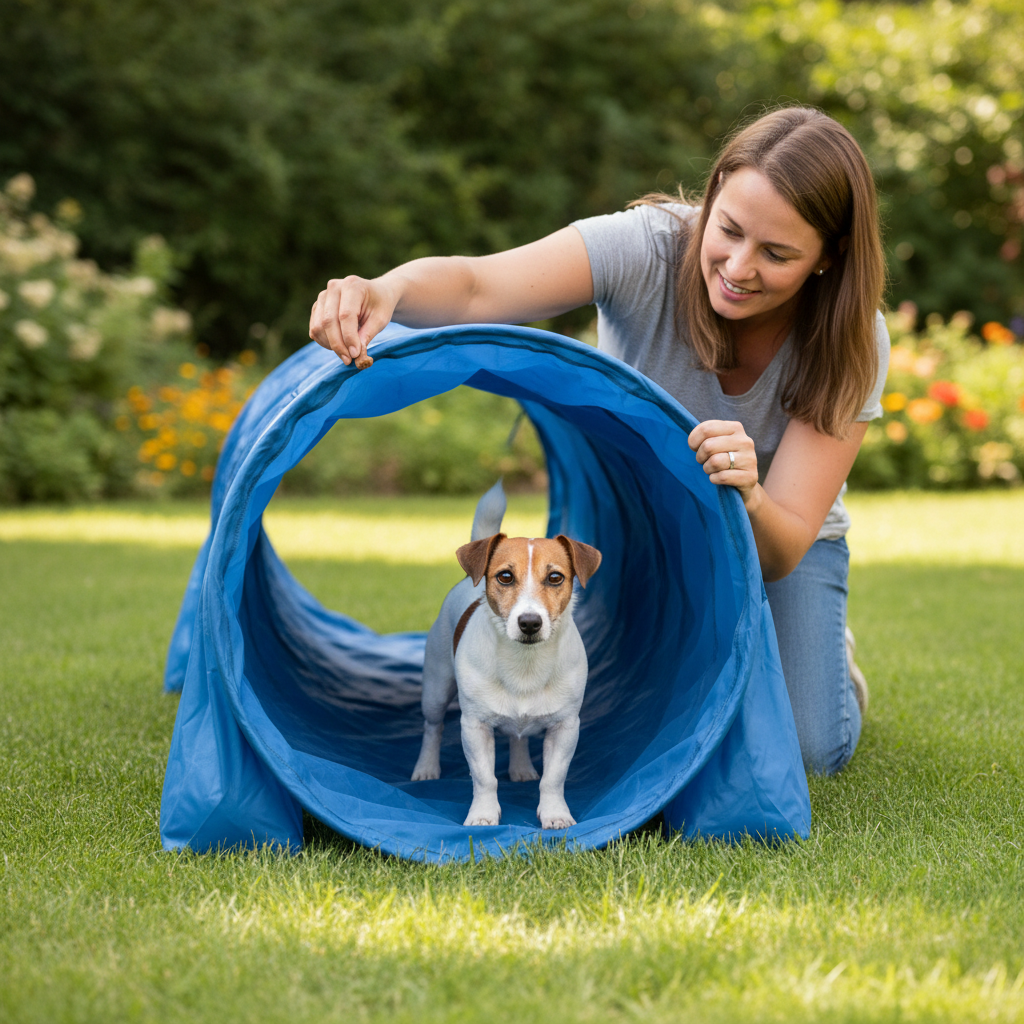
Step 2: The ‘Scrunched’ Chute
Now we introduce the fabric, but in the least intimidating way possible. Scrunch the entire fabric chute up so it’s like a very short, wrinkly tunnel that your dog can clearly see through. The goal is for them to run through the barrel and exit almost immediately. Have your helper hold the fabric up and open, or you can prop it open. Call your dog through, and as soon as they pop out the other side, have a ‘treat party.’ They should feel like they just won the lottery.
-
Step 3: Introducing the Fabric’s Touch
This is a crucial step. With the chute still mostly scrunched up, have your helper hold the exit end but allow just a little bit of the fabric to drape down. As your dog runs through, the fabric will gently brush their back. This is their first experience with the ‘collapsed’ sensation. Reward BIG! If they don’t hesitate, you’re on the right track. If they do, go back to Step 2 for a few more reps before trying again.
Pro Tip: Use a ‘target’ toy or a handful of treats at the exit. Tossing a toy just as they enter gives them a clear and exciting goal to run towards, helping them power through any uncertainty about the fabric.
-
Step 4: Gradually Lengthening the Chute
Here’s where the patience comes in. Over several training sessions, slowly start to lengthen the chute. Un-scrunch it by just a foot or two at a time. Your helper should still hold the exit open so your dog can see the light at the end of the tunnel. The goal is to gradually increase the amount of time they spend inside with the fabric on their back. If at any point your dog hesitates, you’ve gone a bit too far, too fast. Simply shorten the chute back to a length where they were successful and work from there.
-
Step 5: The Full Drop!
Once your dog is confidently and speedily running through the chute while your helper holds the end open, it’s time for the final step. Have your helper get ready to reward, but this time, don’t hold the exit open. Let it lie flat on the ground. Send your dog through. They’ll run in, feel the darkness, and then have to use their own momentum and intelligence to push their way out. The moment their head pops out of that fabric, erupt in the biggest celebration you can imagine! Lots of treats, praise, and toy time. They did it! You’ve successfully taught the collapsed tunnel.
Troubleshooting Common Chute Challenges
Even with the best training plan, you might hit a snag. That’s completely normal! Every dog learns at a different pace. Here are some common challenges and how to work through them with a positive, problem-solving mindset.
Challenge: “My Dog Won’t Even Go In!”
The Cause: This is usually a fear of the dark entrance or a simple lack of understanding of what you’re asking. They see a dark hole and think, “Nope, not for me!”
The Solution: Go back to basics. Make the entrance the best place on earth. Don’t even ask them to go through. Just feed them their dinner next to it. Play with their favorite toy right at the entrance. Toss high-value treats just inside the rim of the barrel. The goal is to build a positive association with the obstacle itself, without any pressure to perform. Shorten the chute all the way back to just the barrel and master that game again before adding any fabric.
Challenge: “They Enter but Panic or Get Stuck Midway.”
The Cause: This is almost always a reaction to the sensation of the fabric closing in on them. It can be scary, and their instinct is to freeze or try to back out (which is difficult and even scarier).
The Solution: You’ve likely extended the chute too quickly. The key is desensitization. Shorten the chute significantly, back to a point where they were rock-solid confident. Have your helper lift the fabric completely off their back as they run through. Then, gradually re-introduce the touch of the fabric, letting it just graze their back for a split second. Reward heavily for any forward momentum. This is a trust issue, so prove to them that nothing bad will happen when the fabric touches them.
Challenge: “They Go Through, But They’re Super Slow and Hesitant.”
The Cause: This signals a lack of confidence or motivation. They’re willing to do it, but they aren’t convinced it’s fun or worth the effort.
The Solution: Amp up the value! Use an even better treat or a more exciting toy. Increase your own energy and excitement. Have your helper call them through with incredible enthusiasm. You can also try ‘back-chaining’—start them at the exit of a very short chute, reward, then move them back a step, reward, and so on. Also, make sure the chute is pointing towards something they want to go to, like the back door of the house or where you keep the toys. Use their natural drive to your advantage!
Safety First! Playing it Smart with the Chute
Agility is all about fun, and the best way to keep it fun is to keep it safe. The collapsed tunnel is a safe obstacle when used correctly, but there are a few important things to keep in mind every time you practice.
- Secure the Barrel: The rigid barrel entrance must be secured to the ground so it doesn’t roll or move when your dog enters. Most agility-grade chutes come with stakes or have loops for tunnel bags (which you fill with sand). A moving entrance can frighten a dog and cause them to avoid the obstacle.
- Check the Fabric: Before every session, make sure the fabric chute is laid out straight and is not twisted. A twisted chute can be confusing and potentially dangerous for a dog running at full speed.
- Train on a Safe Surface: Always practice on a non-slip surface like grass. Avoid concrete, asphalt, or slippery wood decks, which don’t provide good traction for your dog’s paws.
- Keep Sessions Short & Sweet: Repetitive practice can be physically and mentally tiring. Keep your training sessions short (5-10 minutes) to prevent fatigue and keep your dog’s motivation high. Always end on a successful and positive note!
- Never, Ever Force Your Dog: This is the golden rule of all dog training. Never push, pull, or drag your dog through the chute. This will only create fear and destroy their trust in you. If they are scared, it’s our job to break it down into smaller, more manageable steps.
By prioritizing safety, you ensure that agility remains a positive and joyful experience for your canine partner, strengthening your bond with every successful run.
Conclusion
Congratulations! You now have all the tools and knowledge you need to teach your dog to confidently conquer the collapsed tunnel. Remember that the journey is just as important as the destination. Every treat you give, every word of praise you offer, and every small step of progress you celebrate builds a stronger, more trusting relationship between you and your dog.
The chute is more than just an agility obstacle; it’s a testament to your dog’s trust in you. Be patient, stay positive, and most importantly, have fun together. Before you know it, you’ll see your dog bursting out of that fabric chute with a wagging tail and a look of pure joy, ready for the next challenge you can tackle as a team. Happy training!