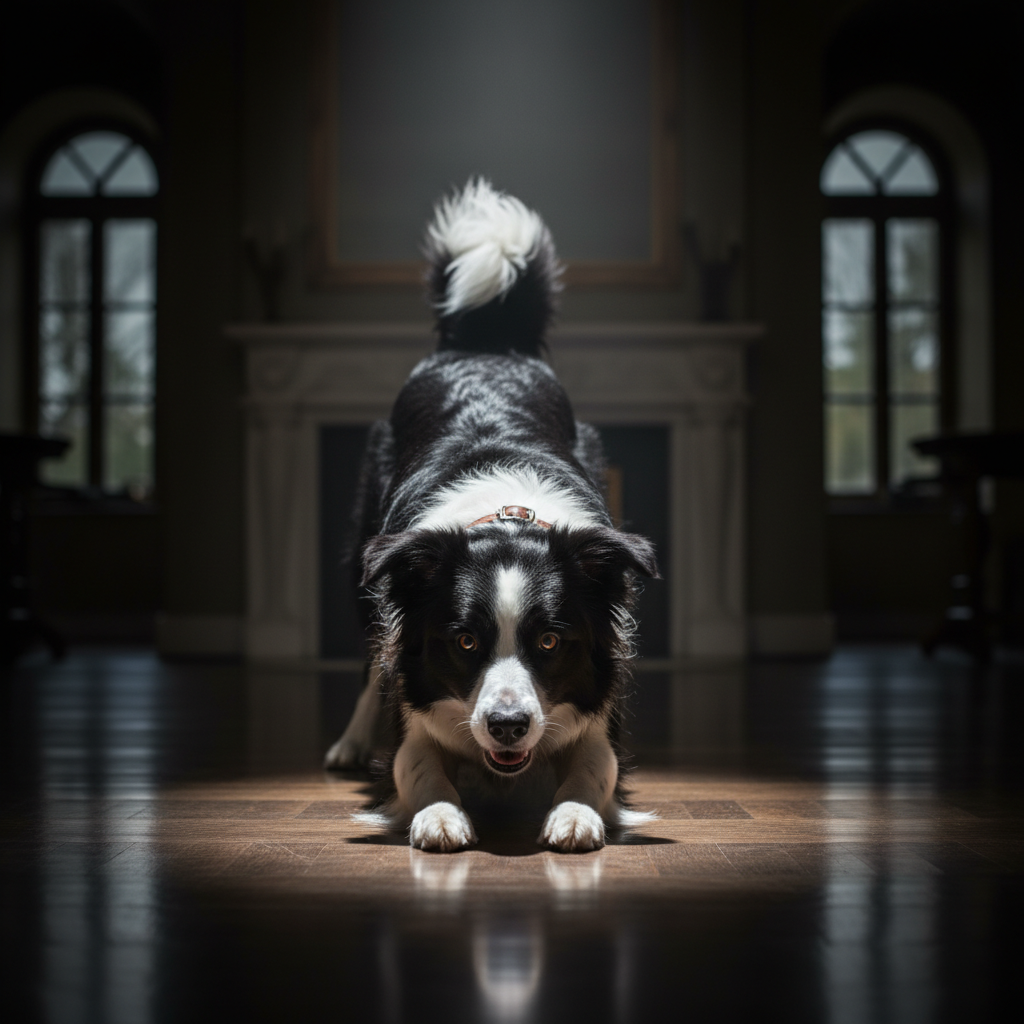
Have you ever seen a dog perform a trick so charming it made the whole room applaud? Well, get ready to be that proud pet parent! Teaching your dog to take a bow is one of the most delightful and impressive tricks you can add to their repertoire. It looks fancy, but here’s a little secret: it’s surprisingly easy to teach because it mimics a natural canine behavior—the ‘play bow’ your dog uses to invite another dog to romp around.
This guide is your complete roadmap to turning that natural stretch into a show-stopping performance. We’ll walk you through everything from the gear you’ll need to the step-by-step training process, and we’ll even help you troubleshoot those little hiccups along the way. Not only will you have a blast training your furry friend, but you’ll also strengthen your bond and give their brain a great workout. So, grab some treats, find a comfy spot, and let’s get ready to wow your friends and family!
Setting the Stage for Success: What You’ll Need
Before you start your training session, gathering a few key items will make the process smoother and more fun for both you and your pup. Think of this as preparing your toolkit for success. You don’t need much, but having the right tools on hand makes all the difference.
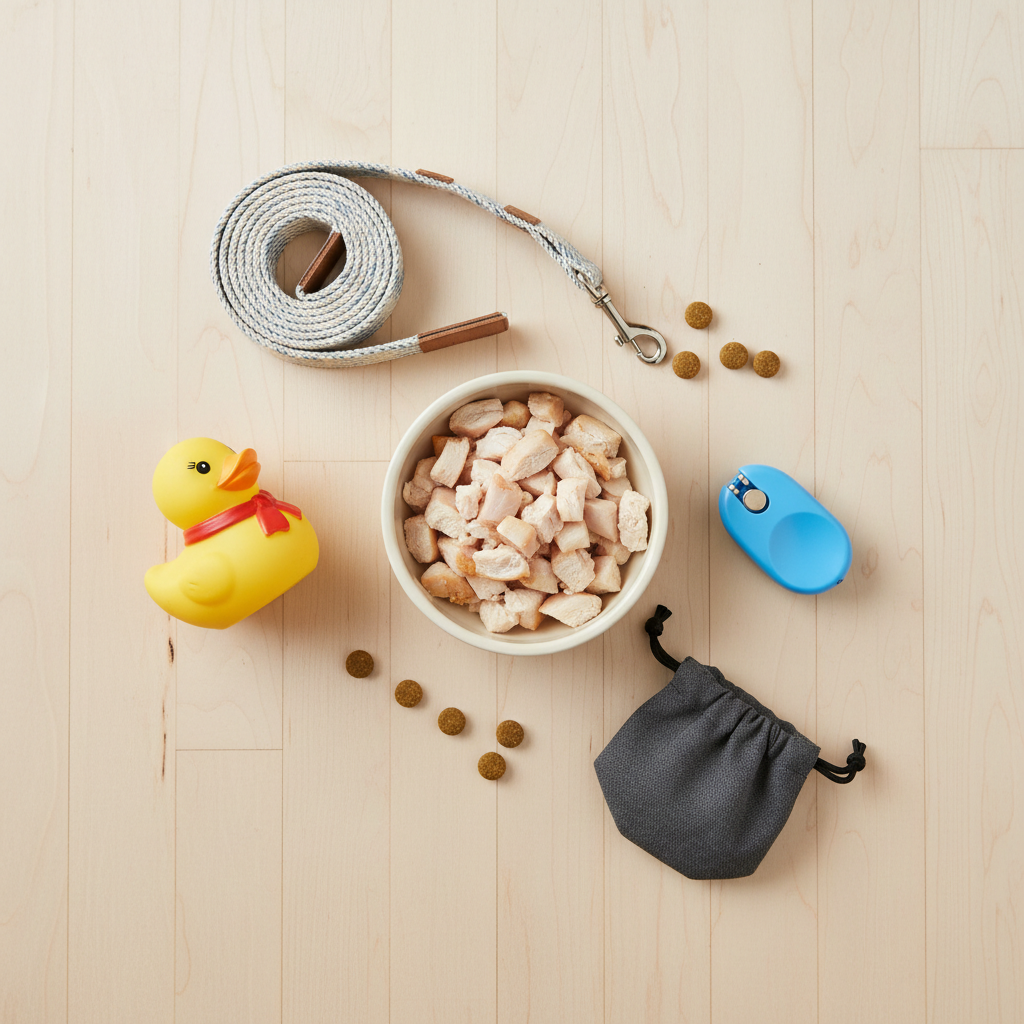
Essential Training Gear:
- High-Value Treats: We’re not talking about their everyday kibble here. You want something extra special that your dog absolutely loves. Think small, soft, and smelly morsels like tiny pieces of chicken, cheese, or commercial training treats. The goal is to make the reward so enticing that your dog is super motivated to work for it.
- A Clicker (Optional, but Recommended): A clicker is a fantastic tool for marking the exact moment your dog does the right thing. The ‘click’ acts as a precise signal that says, “Yes, that’s it! A treat is coming!” If you don’t have a clicker, you can use a verbal marker word like “Yes!” or “Good!” Just be sure to use it consistently and with an enthusiastic tone.
- A Quiet Training Environment: Choose a space with minimal distractions. Your living room, a quiet hallway, or a fenced backyard are all great options. The fewer squirrels, passing cars, or other pets there are to compete for your dog’s attention, the faster they will learn.
- A Positive Attitude: This is the most important tool of all! Dogs are incredibly attuned to our emotions. Keep the sessions short (5-10 minutes is perfect), upbeat, and full of praise. If you feel yourself getting frustrated, it’s time to end the session on a positive note with an easy win (like a ‘sit’) and try again later. Training should always be a game, not a chore.
Step-by-Step: From Play Bow to Polished Performance
This is where the magic happens! We’ll use a technique called ‘luring,’ which involves using a treat to guide your dog into the desired position. It’s an intuitive and positive way to communicate what you want. Follow these steps, and remember to be patient and celebrate the small wins!
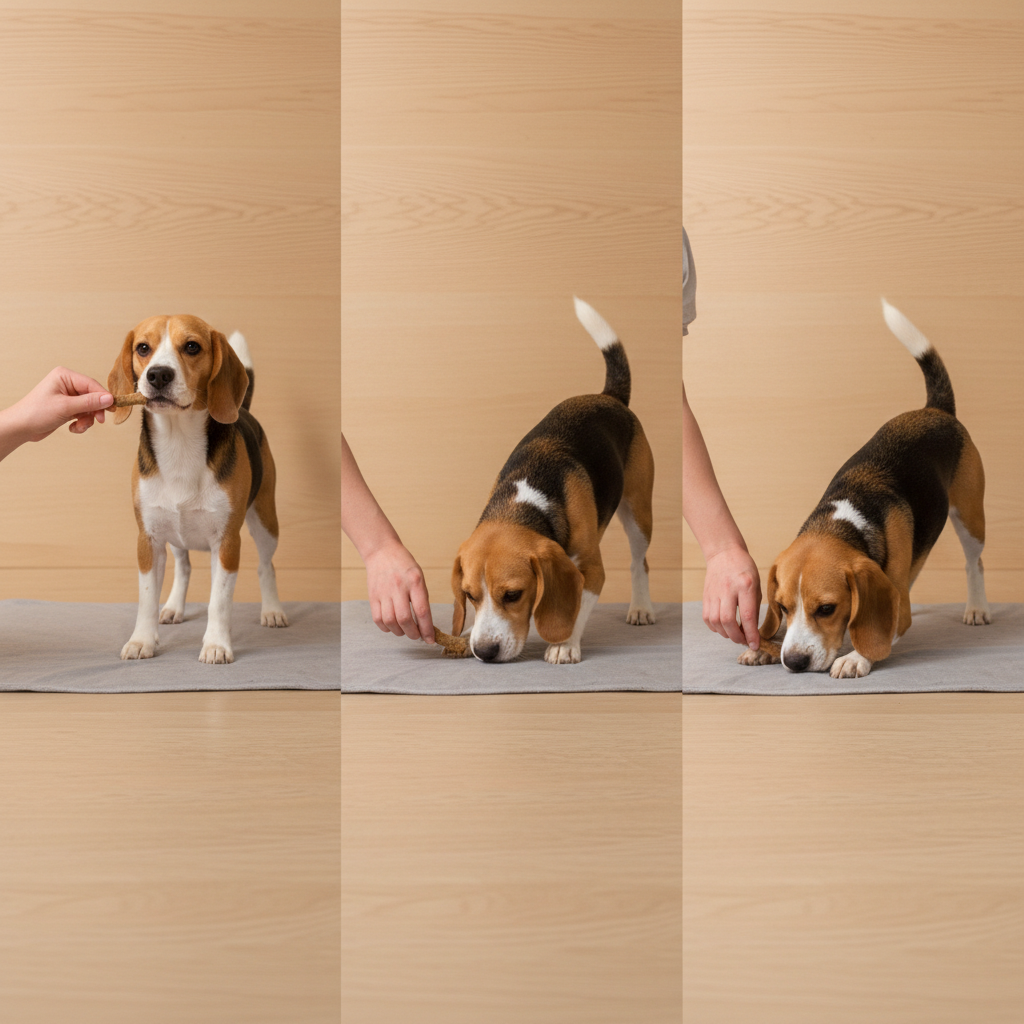
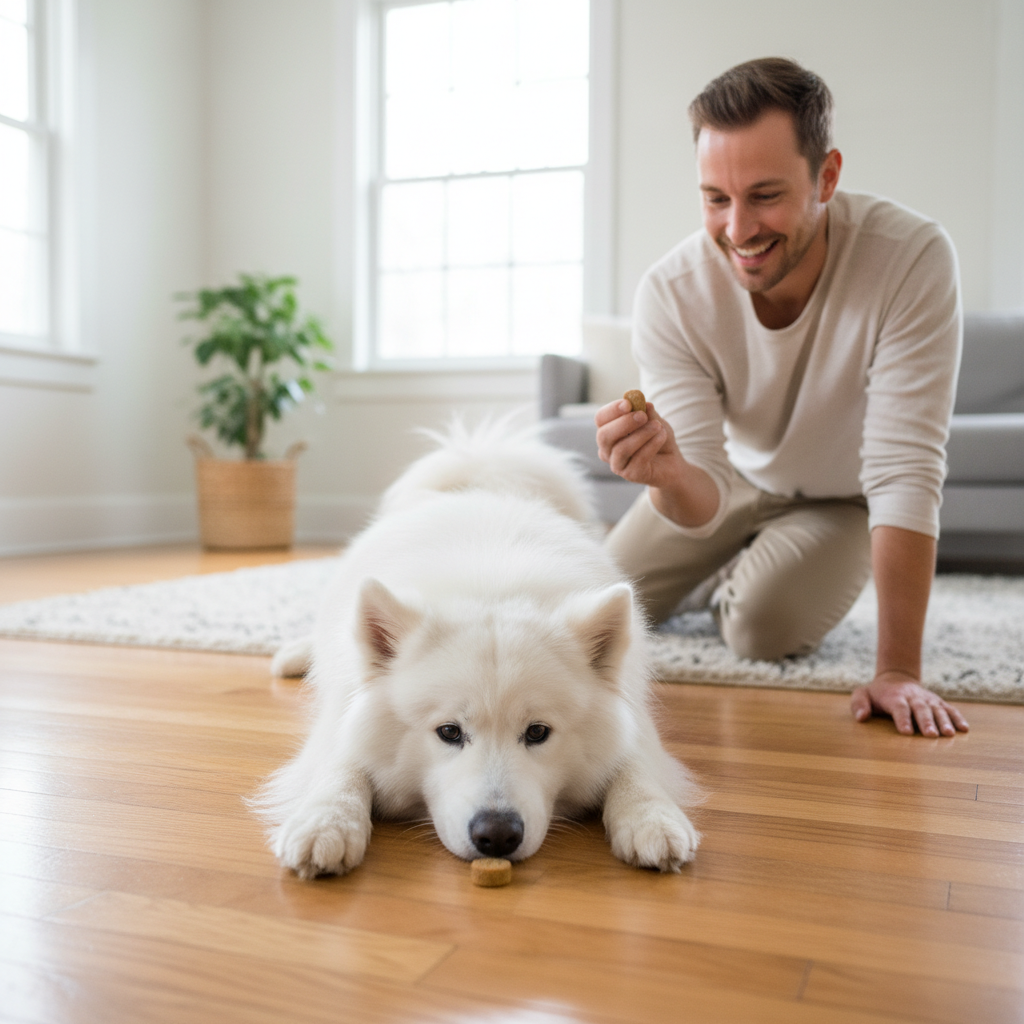
- Step 1: Master the Lure. Start with your dog in a standing position. Hold a tasty treat near their nose to get their attention. Slowly lower the treat straight down towards the floor, right between their front paws. The goal is for their head and chest to follow the treat downwards while their rear end stays up in the air. The moment their elbows touch the ground in that perfect bow pose, move to the next step.
- Step 2: Mark and Reward! As soon as your dog hits the bow position, ‘mark’ the behavior with your clicker or verbal marker (“Yes!”). Immediately follow the mark with the treat and lots of verbal praise like, “Good boy! What a great bow!” The timing here is crucial. You want to mark the exact instant they perform the action correctly.
- Step 3: Repeat and Reinforce. Practice this luring motion a few times in a row. Let your dog get up, reset, and try again. Keep the sessions short and exciting. You want them to think, “This is a fun game where I get delicious snacks!” After a handful of successful repetitions, take a break to play.
- Step 4: Introduce the Verbal Cue. Once your dog is reliably following the lure into a bow, it’s time to name the behavior. Just before you begin the luring motion, say your chosen cue word clearly. Popular choices are “Bow,” “Take a Bow,” or “Curtsey.” So, the sequence becomes: Say “Bow” -> Lure them into position -> Mark and Reward. After several repetitions, your dog will start to associate the word with the action.
- Step 5: Fade the Lure. Your ultimate goal is for your dog to perform the bow on the verbal cue alone. To get there, you need to gradually phase out the hand motion. Start by making the lure smaller and less obvious. Instead of luring all the way to the floor, maybe just gesture halfway. Then, just a small point towards the floor. Eventually, you’ll be able to fade the hand signal completely, and your dog will respond to just the word “Bow.” This takes time, so be patient and reward every successful attempt!
Oops! Troubleshooting Common Bowing Blunders
Even with the best instructions, sometimes our canine students get a little confused. Don’t worry, it’s all part of the process! Here are some of the most common issues you might run into and how to fix them.
My dog just lies down completely.
This is probably the most common hurdle. It happens when the dog relaxes all the way into a ‘down’ position instead of keeping their rear end up. The Fix: Speed up your mark and reward! The key is to click or say “Yes!” the very instant their elbows hit the floor, before their hindquarters have a chance to flop down. You can also try luring the treat slightly forward (away from their body) instead of just straight down, which can help keep their weight shifted back.
My dog just lowers their head but doesn’t bend their legs.
If your dog is just dipping their head for the treat, it means the lure isn’t quite effective enough. The Fix: Make sure you are luring the treat down and slightly back between their front paws. This encourages them to bend at the elbows to follow it. You might need to use a higher-value treat to increase their motivation to really stretch for it.
My dog gets distracted or loses interest quickly.
A short attention span is normal, especially for puppies or high-energy dogs. The Fix: Keep your training sessions super short—even just two or three minutes can be very productive. Ensure the environment is as distraction-free as possible and that your treats are genuinely exciting. Always end the session on a high note with a successful repetition so they’re eager for the next session.
Remember, every dog learns at a different pace. Stay patient, keep it positive, and focus on progress, not perfection. The goal is to have fun together!
From Good to Great: Pro Tips for a Show-Stopping Bow
Once your dog has mastered the basic bow, you can add some polish to make it a truly impressive performance. These tips will help you create a reliable and stylish trick that you can show off anywhere.
- Add a Release Cue: Teach your dog to hold the bow position until you give them a release word like “Okay!” or “Free!” To do this, simply delay giving them the treat for a second or two after they go into the bow. If they hold it, mark and reward. Gradually increase the duration they hold the pose. The release word signals that the trick is over and they can stand up.
- Practice in New Places (Generalization): Your dog might be a bowing expert in the living room, but can they do it at the park or a friend’s house? Once the trick is solid at home, start practicing in different environments. Start with low-distraction areas, like your backyard, and gradually work up to busier places. This process, called generalization, teaches your dog that “Bow” means the same thing no matter where you are.
- Put It on a Verbal Cue Only: The ultimate goal is to have your dog respond to the word “Bow” without any hand signal. To proof this, stand up straight, put your hands behind your back, and give the cue. If they hesitate, you may have faded the lure too quickly. Go back a step and practice with a smaller hand signal before trying again without one.
- Incorporate It into a Routine: For a real showstopper, string the bow together with other tricks your dog knows. For example, you could ask for a ‘spin,’ then a ‘sit pretty,’ and finish with a grand ‘take a bow’ as the finale. This is not only fun but also a fantastic mental workout for your dog.
By adding these finishing touches, you’re not just teaching a trick; you’re building a reliable, focused, and confident canine companion who loves to work with you.
Conclusion
Congratulations! You now have all the tools and knowledge to teach your dog one of the most charming tricks around. Remember that the journey of teaching your dog to take a bow is about so much more than the final performance. It’s about spending quality time together, improving your communication, and strengthening the incredible bond you share. Every training session is an opportunity to learn more about your dog and have fun in the process.
Be patient, stay positive, and celebrate every little bit of progress. Before you know it, your dog will be taking a bow on cue, and you’ll have a fantastic party trick that’s guaranteed to bring a smile to everyone’s face. Now go grab those treats and get ready to take a bow—you’ve both earned it!