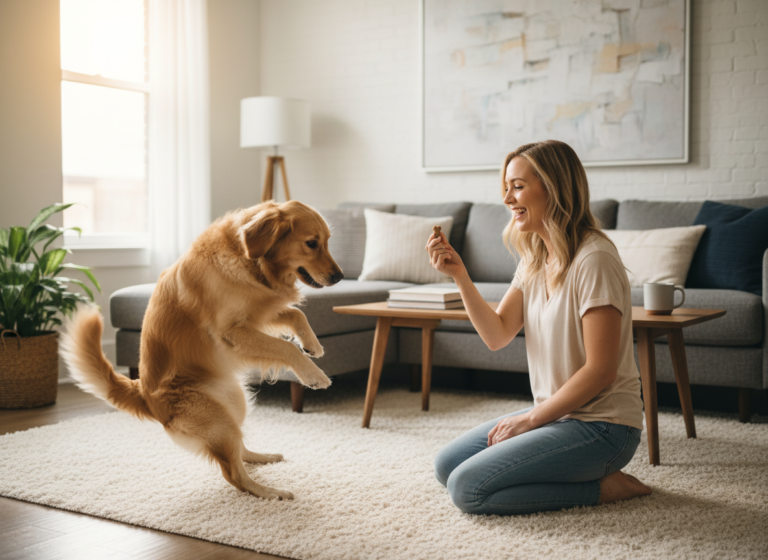
Have you ever seen a dog confidently trot between its owner’s legs and stay there, perfectly in sync, even while walking? That’s the “Middle” command, and it’s more than just a flashy trick. It’s a fantastic tool for building focus, a fun way to engage your dog’s brain, and a practical skill for navigating crowded spaces or managing a nervous pup.
The “Middle” position creates a safe, focused ‘home base’ for your dog. For an anxious dog, being tucked between your legs can feel like a secure den, shielding them from overwhelming stimuli. In a bustling farmer’s market or a busy vet waiting room, it keeps your dog close and out from underfoot. Plus, it’s a foundational skill for dog sports like canine freestyle and rally obedience. But let’s be honest—it also just looks incredibly cool and showcases the amazing bond you share. In this guide, we’ll break down the training process into simple, positive steps so you and your canine companion can master the middle and look like a seasoned pro team.
Gearing Up for Success: What You’ll Need
Gearing Up for Success: What You’ll Need
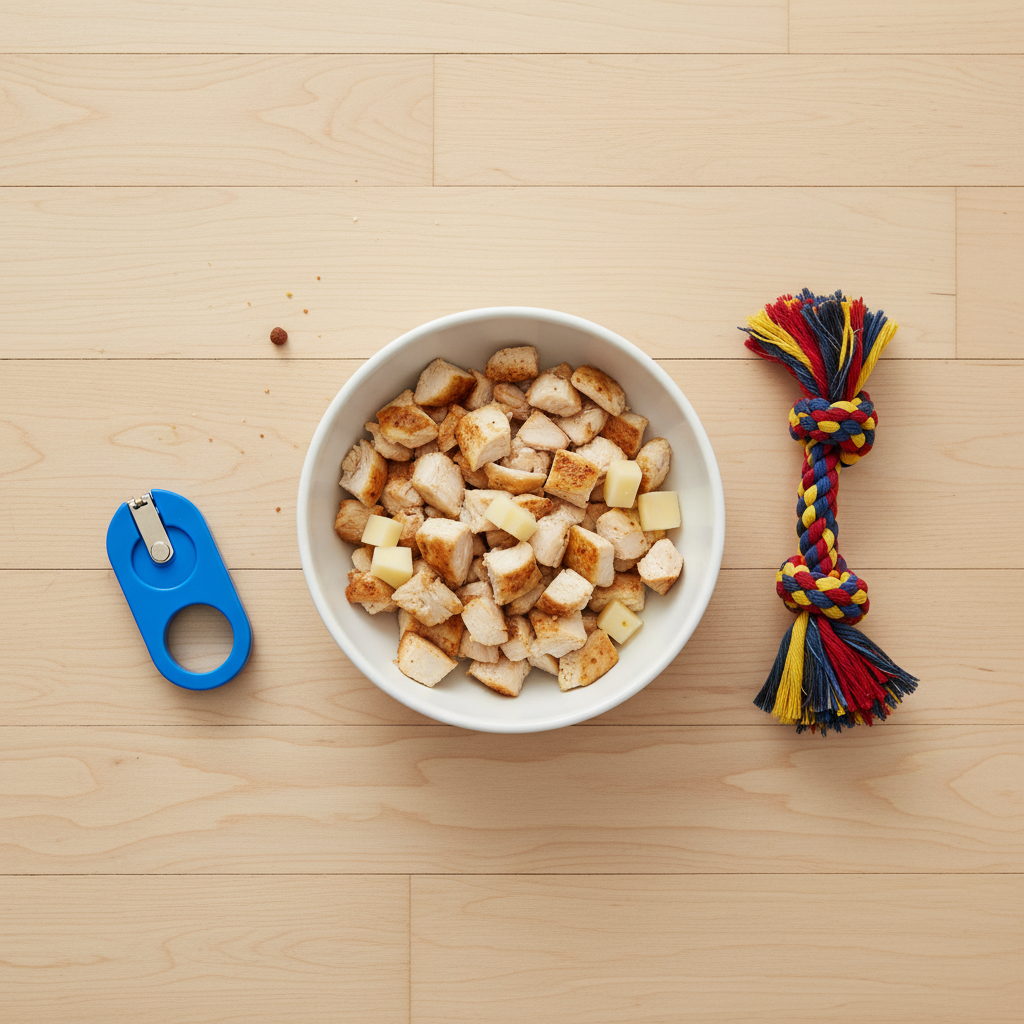
Before you start your first training session, it’s best to gather a few simple tools. Having everything ready ensures the session flows smoothly and keeps your dog engaged. Remember, the goal is to make this a fun and rewarding game for both of you!
- High-Value Treats: This is the star of the show! We’re not talking about your dog’s regular kibble. You need something extra special that your dog absolutely loves and will work hard for. Think small, soft, smelly treats like tiny pieces of chicken, cheese, hot dogs, or commercial training treats. The smaller the better, as you’ll be using a lot of them.
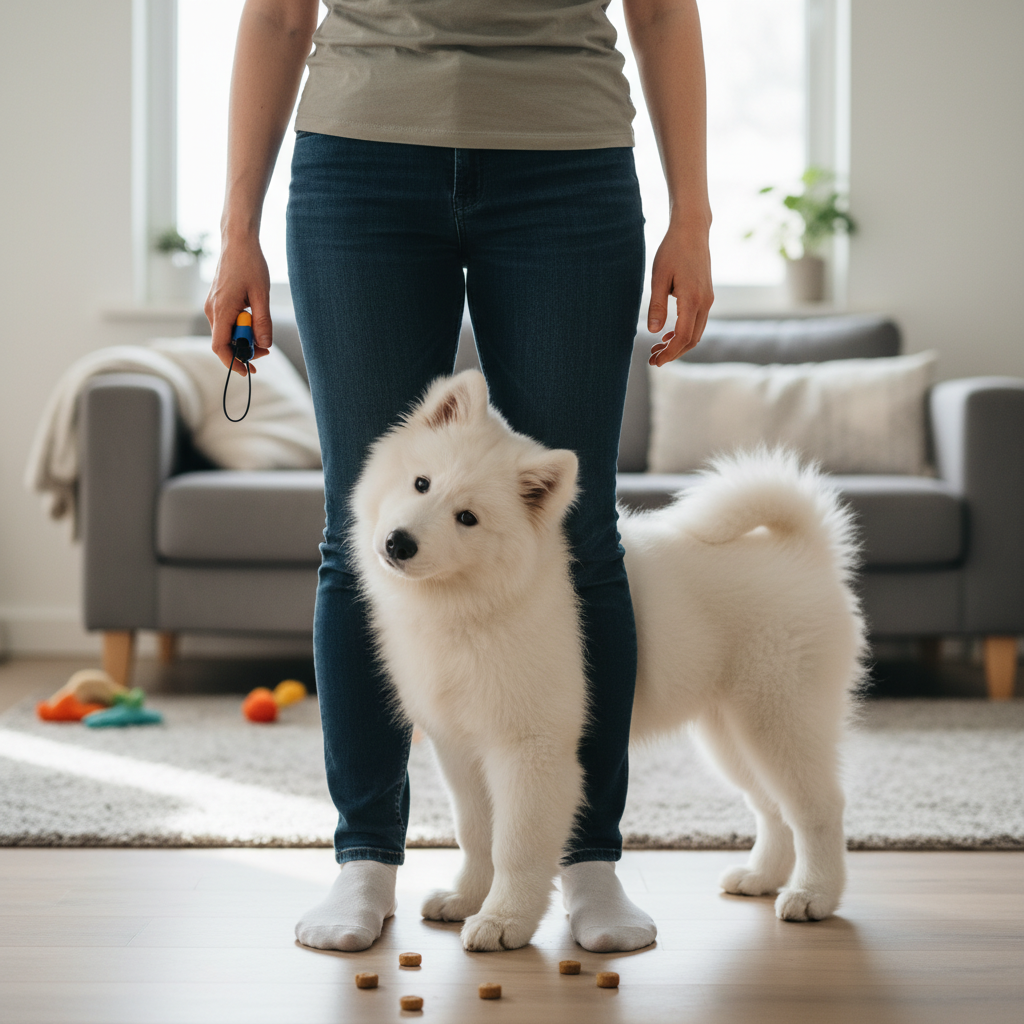
- A Clicker (Optional but Recommended): A clicker is a fantastic tool for marking the exact moment your dog does something right. The ‘click’ acts as a precise signal that means, “Yes, that’s it! A reward is coming!” If you haven’t used a clicker before, you’ll first need to ‘charge’ it by clicking and immediately giving a treat, repeating this about 10-15 times until your dog associates the sound with a reward. If you’re not using a clicker, a consistent verbal marker like a sharp “Yes!” or “Good!” works too.
- A Positive Attitude: This is non-negotiable! Dogs are incredibly attuned to our emotions. Your patience, enthusiasm, and energy will make or break the training session. Keep sessions short (5-10 minutes is plenty), end on a positive note, and always be your dog’s biggest cheerleader.
- A Distraction-Free Space: Start your training in a quiet area of your home, like the living room or a hallway, where your dog feels comfortable and won’t be easily distracted by squirrels, other pets, or family members walking by.
Expert Tip: Prepare your treats ahead of time by cutting them into pea-sized pieces. This allows for rapid reinforcement without your dog getting full too quickly, keeping them motivated for longer.
Phase 1: Luring the Basic “Middle” Position
Phase 1: Luring the Basic “Middle” Position
This first phase is all about introducing your dog to the concept of moving into the space between your legs. We’ll use a technique called ‘luring,’ which means using a treat to guide your dog’s nose—and therefore their body—where you want it to go. Let’s make it a fun game!
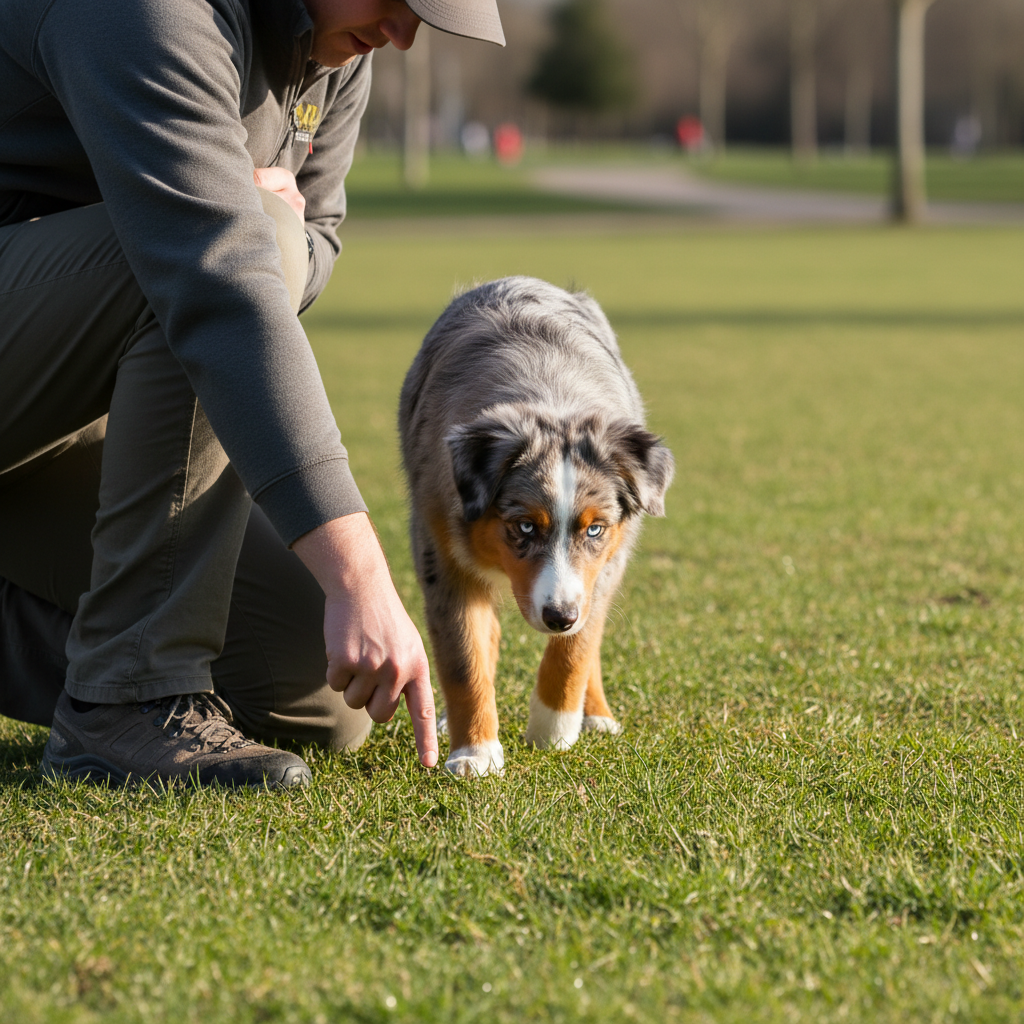
- Get into Position: Stand with your feet a comfortable distance apart, about shoulder-width or slightly wider. You want to create an inviting ‘tunnel’ for your dog to walk through. If you have a small dog, you may need to widen your stance considerably or even kneel at first.
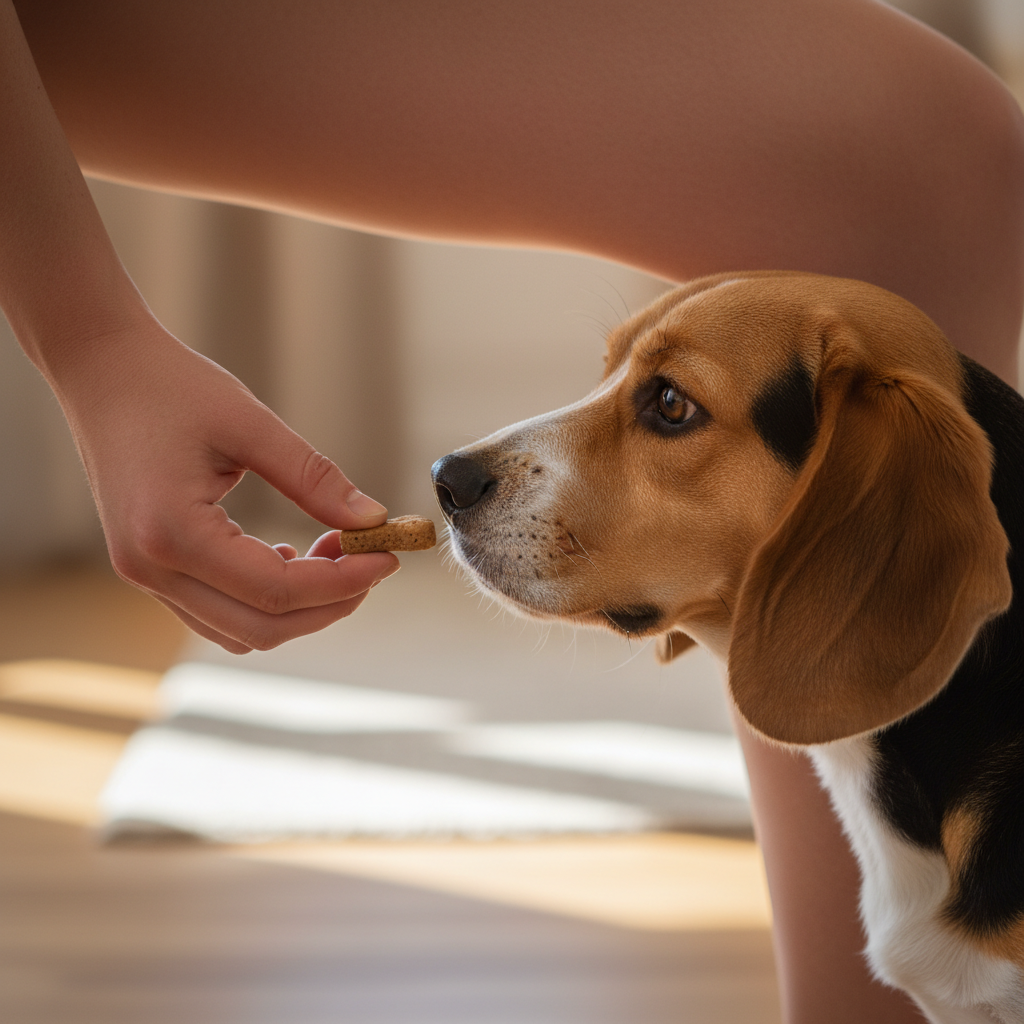
- Show the Lure: Take one of your high-value treats and hold it in your hand. Let your dog sniff it so they know you have something delicious. This gets their attention immediately.
- Lure Through Your Legs: With your dog in front of you, lower the treat hand down between your legs. As your dog’s nose follows the treat, guide them all the way through your ‘leg tunnel’ to your back. The moment they pass through, say your marker word (“Yes!”) or click, and give them the treat behind you.
- Reset and Repeat: Toss another treat a few feet away to ‘reset’ your dog’s position in front of you. This keeps the game moving and prevents them from just backing out. Repeat this luring process several times, always rewarding them for moving through your legs.
- Start Luring Into the Middle: Now, instead of luring them all the way through, we want them to stop in the middle. Lure your dog’s head between your legs. The moment their shoulders are aligned with your knees, click or say “Yes!” and deliver the treat right between your legs.
- Practice, Practice, Practice: Repeat this step multiple times. The goal is for your dog to confidently and eagerly move into the space between your legs. Keep the sessions short and upbeat. If your dog seems hesitant, make your stance wider and use lots of praise and encouragement.
Troubleshooting Tip: Is your dog trying to go around your legs instead of through them? Try practicing in a hallway with your back against a wall. This limits their options and makes moving through your legs the most obvious choice!
Phase 2: Adding the Verbal Cue and Fading the Lure
Phase 2: Adding the Verbal Cue and Fading the Lure
Once your dog is reliably moving into the middle position with the treat lure, it’s time to give this behavior a name and start removing the hand-held guide. The goal is for your dog to respond to the verbal cue “Middle” alone.
Introducing the Cue
The golden rule of adding a verbal cue is: Say the word, then do the action. Your dog will learn to associate the word with the movement that follows.
- Cue First, Lure Second: Get your dog’s attention. Say your chosen cue clearly and happily—”Middle!”—and then immediately use your treat lure to guide them into position, just as you did in Phase 1.
- Mark and Reward: As soon as they are in the correct position, click or say “Yes!” and reward them with the treat and plenty of praise.
- Repeat: Do this for several repetitions over a few sessions. You’re building a strong connection between the word “Middle” and the action of moving between your legs.
Fading the Food Lure
Now we need to transition from a full-hand lure to a more subtle hand signal, and eventually, no hand signal at all.
- The ‘Empty’ Hand: Go through the same motion as your lure, but without a treat in your hand. Say “Middle!” and guide them with your empty hand. When they get into position, click/mark and then bring your other hand (which was hiding behind your back) forward to give them a treat. This teaches them the reward doesn’t always come from the guiding hand.
- Make the Signal Smaller: Gradually make your hand signal less dramatic. Instead of a big sweep, maybe it’s just a point towards the ground between your feet. Continue to say “Middle!” before you give the signal. Reward every success.
- Test the Verbal Cue: After several successful reps with the small hand signal, try it! Stand in position, get your dog’s attention, and say “Middle!” with a hopeful expression. Don’t move your hands. Give them a moment to think. If they move into position, throw a jackpot party—give them several treats and lots of praise! If they don’t, that’s okay! Simply go back a step to the small hand signal for a few more repetitions before trying again.
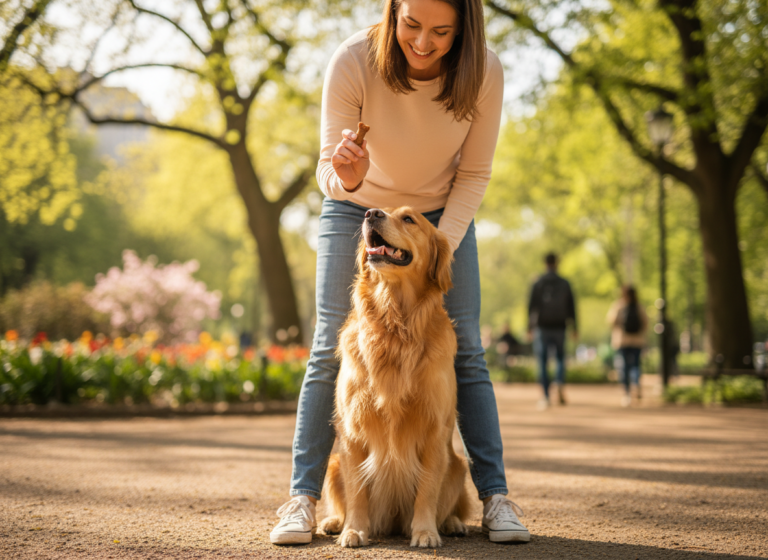
Phase 3: Building Duration and the Straddle Walk
Phase 3: Building Duration and the Straddle Walk
Your dog now knows what “Middle” means! The next step is to teach them to stay in that position and then to move with you. This is where the real magic happens and the ‘straddle walk’ comes to life.
Building Duration (Staying in Place)
We’ll start by teaching your dog to hold the middle position while you are stationary.
- Ask for a ‘Middle’: Cue your dog to get into the middle position. The moment they arrive, click/mark and reward.
- Add a Tiny Pause: On the next repetition, ask for a “Middle,” and then pause for just one second before you click and treat.
- Gradually Increase Time: Slowly, over many repetitions, increase the duration they must wait before the click/treat. Go from one second to two, then three, and so on. If your dog pops out of position, you’ve likely gone too fast. Just go back to a shorter duration where they were successful and build up more slowly.
- Deliver the Treat Low: When rewarding for duration, deliver the treat down between your knees. This encourages your dog to keep their head down and stay in position, rather than looking up and being tempted to pop out.
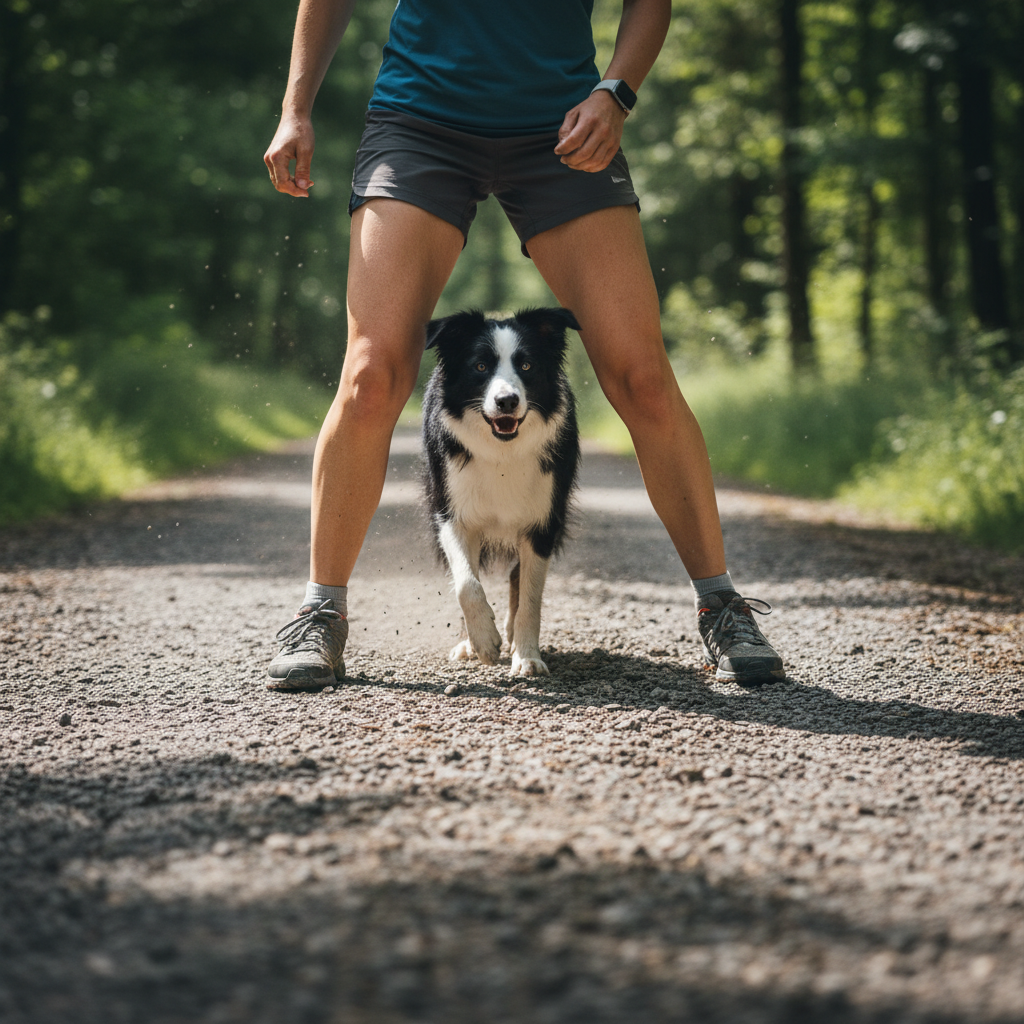
Introducing the Straddle Walk
Now for the movement! The key here is to start incredibly small.
- The Weight Shift: With your dog in a ‘middle-stay,’ simply shift your weight from one foot to the other. Don’t even lift your foot yet. If your dog stays, click and treat. This gets them used to your body moving above them.
- One Tiny Step: Ask your dog for a “Middle.” Take one very small step forward. The instant your dog moves with you to maintain the position, click and reward enthusiastically!
- Two Steps and Beyond: Once one step is easy, try two. Then three. Build distance very gradually. Keep the energy high and reward frequently to let your dog know they are doing exactly the right thing by sticking with you.
- Vary the Direction: Once your dog is confidently walking forward with you, practice taking a small step backward or turning slightly. This helps generalize the behavior so they learn that “Middle” means ‘stay between the legs, no matter which way they’re going.’
Pro Tip: Use a continuous stream of small treats (a ‘cookie stream’) when you first start walking. Hold a handful of treats and feed them one after another as you walk to keep them glued in the right spot.
Troubleshooting Common “Middle” Mishaps
Troubleshooting Common “Middle” Mishaps
Training is never a straight line, and it’s perfectly normal to hit a few bumps in the road. Don’t get discouraged! Every dog learns differently. Here are some common challenges and how to work through them with patience and positivity.
| The Problem | The Solution |
|---|---|
| My dog is hesitant or scared to go between my legs. | This is common, especially with timid dogs. Never force them. Instead, make your stance much wider to create a more open space. You can also try luring them with an extra-special treat or their favorite toy. Keep sessions very short and reward any small attempt, even if it’s just putting their head in the space. You can also try sitting on the floor with your legs open in a ‘V’ shape to seem less intimidating. |
| My dog goes all the way through instead of stopping in the middle. | You’re rewarding too late! Go back to the luring phase. Make sure you are clicking/marking and delivering the treat the instant their shoulders are aligned with your knees. Delivering the treat low and right between your legs, rather than behind you, will also help them understand where to stop. |
| My dog keeps backing out of the position. | This usually means you’re asking for too much duration too soon. Go back to rewarding them the moment they get into position. Then, rebuild the duration very slowly, one second at a time. Also, ensure you aren’t leaning over your dog, which can be intimidating. Stand up straight and relaxed. |
| My dog offers a ‘sit’ or ‘down’ in the middle. | While not a huge problem, if you want a standing ‘middle,’ simply reward them before they have a chance to sit. Use a faster rate of reward. If they do sit, you can lure them back up to a stand with a treat before rewarding. Be clear about the position you are rewarding for. |
| This works at home, but my dog ignores me at the park. | This is a classic issue of ‘generalization.’ Dogs don’t automatically transfer skills to new environments. You need to re-teach the command in progressively more distracting locations. Start in your backyard, then a quiet park, and so on. Lower your expectations in new places and use higher-value treats to keep their focus on you. |
Conclusion
Congratulations! You now have all the tools and techniques to teach your dog the amazing “Middle” command. From the first hesitant steps with a treat lure to a confident, synchronized straddle walk, this journey is about so much more than just learning a trick. It’s about building communication, trust, and a deeper partnership with your dog.
Remember to be patient, keep your training sessions fun and positive, and celebrate the small victories along the way. Every dog learns at a different pace, so enjoy the process and the quality time spent together. Before you know it, you’ll have a go-to command that not only looks impressive but also serves as a valuable tool for keeping your best friend safe, focused, and close by your side. Now go grab those treats and start practicing—you’ve got this!