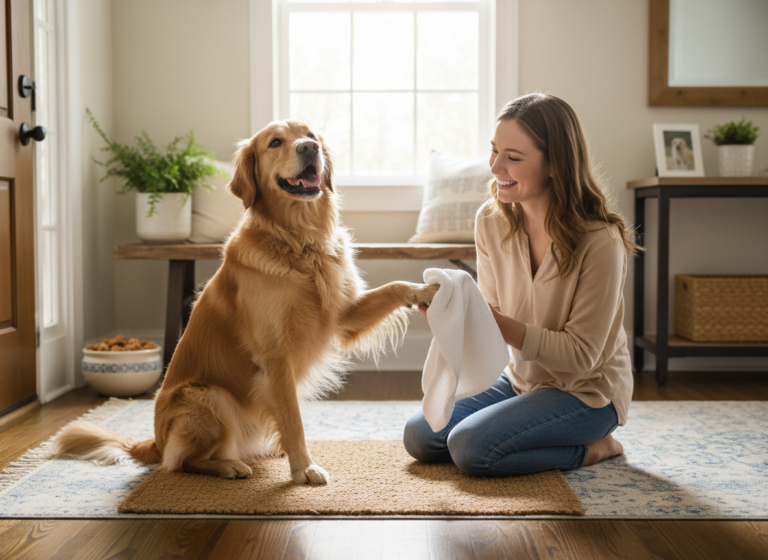
That post-bath shake that sends water flying everywhere? It’s a familiar scene for most dog owners. But what comes next can be even more chaotic: the dreaded blow dryer. For many dogs, the loud noise and forceful air turn a simple dry-off into a moment of panic. You’re not alone if you’ve ever felt like you needed a suit of armor just to get your pup dry. The good news is, it doesn’t have to be this way!
The fear your dog feels is very real. It’s a sensory overload—a loud, strange machine blowing hot air at them. But with a little patience and the right approach, you can transform the blow dryer from a scary monster into just another household appliance. This guide is your complete roadmap to desensitizing your dog, turning grooming time into a peaceful and positive experience for both of you. Let’s get started!
Why the Fear? Understanding Your Dog’s Blow Dryer Anxiety
Before we can solve the problem, we need to get inside our dog’s head. Why is a simple hair dryer so terrifying? It’s not because they’re being difficult; it’s a genuine fear response rooted in their sensory experience.
The Sound
Dogs have incredibly sensitive hearing, far superior to our own. They can hear frequencies we can’t even detect. The high-pitched whine and loud roar of a blow dryer can be overwhelming and even painful to their ears. To them, it might sound like a predator or a thunderstorm right next to their head.
The Sensation
Imagine someone unexpectedly blasting you with a stream of hot, forceful air. It would be startling, right? Your dog feels the same way. This unfamiliar and often intense sensation on their skin and fur can be very unsettling. They don’t understand where it’s coming from or why it’s happening, which triggers their fight-or-flight instinct.
Negative Associations
Sometimes, the fear comes from a past negative experience. Maybe the dryer was too hot once, or they were held down firmly during a previous grooming session. Dogs are brilliant at forming associations, and it only takes one bad experience to create a lasting fear. Our goal is to overwrite these old, scary associations with new, happy ones.
By understanding why your dog is scared, you can approach the situation with more empathy and patience, which is the secret ingredient to successful training.
Gearing Up for Success: Your Desensitization Toolkit
Having the right tools on hand before you begin will make the entire process smoother and more effective. You don’t need a lot of fancy equipment, just a few key items to set the stage for a positive experience.
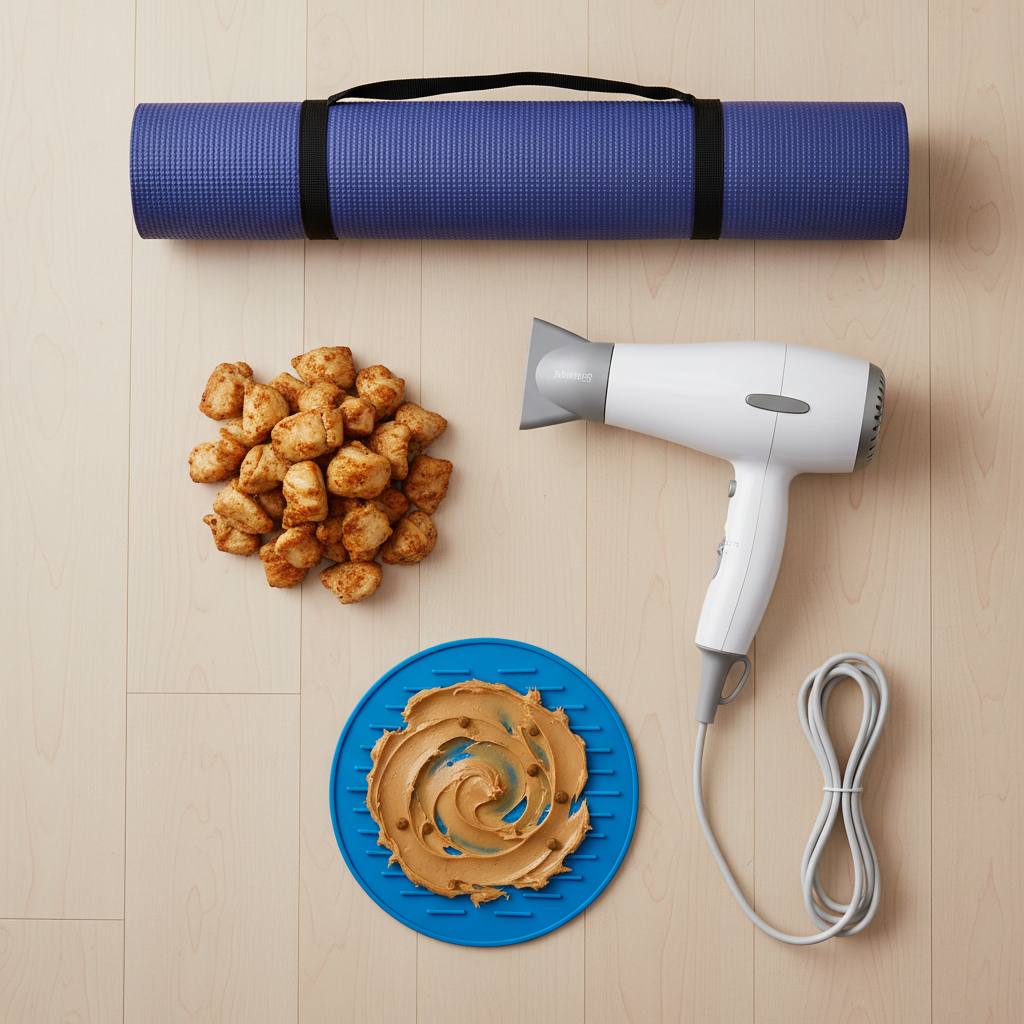
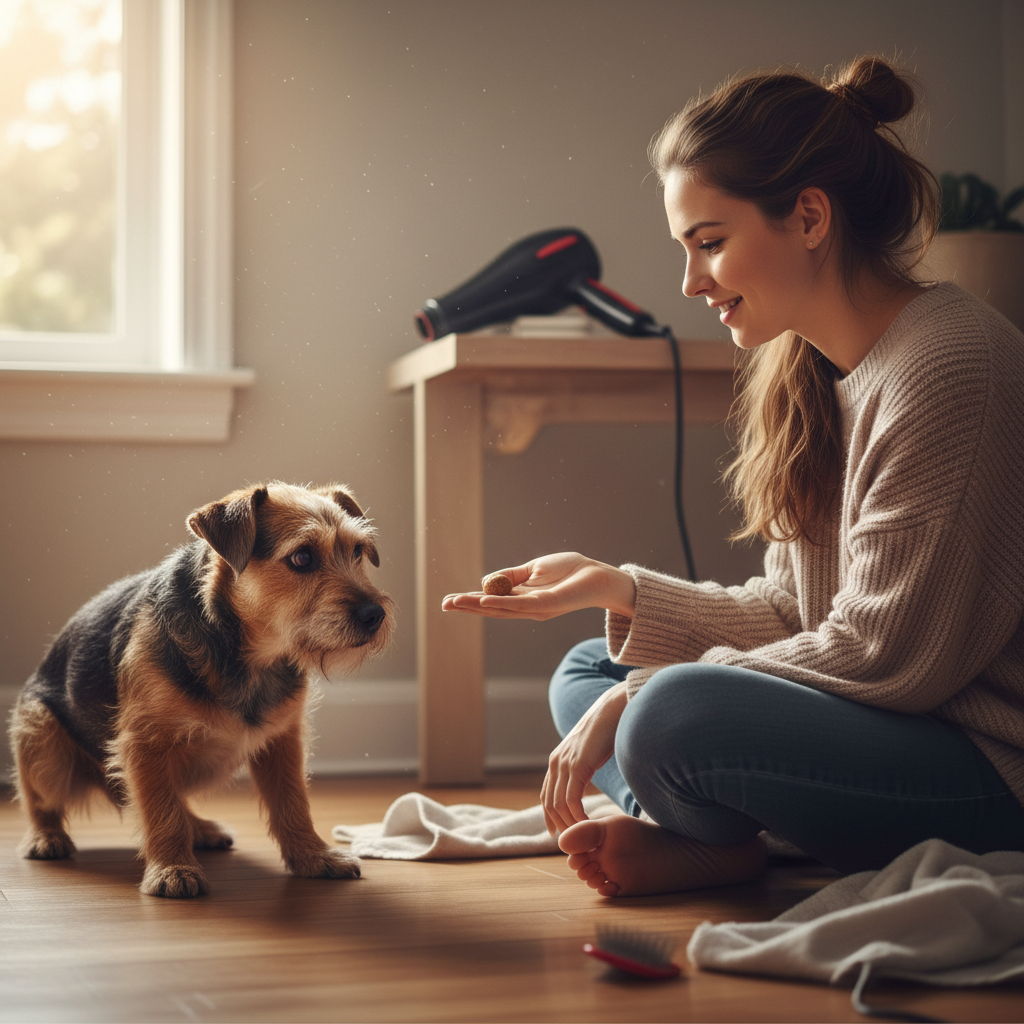
- High-Value Treats: We’re not talking about their everyday kibble. You need the good stuff! Think small pieces of cooked chicken, cheese, freeze-dried liver, or their absolute favorite store-bought treat. The goal is to make the reward so amazing that it starts to outweigh the fear.
- A Pet-Specific Blow Dryer (Optional but Recommended): Dryers made for humans can get dangerously hot very quickly. Pet dryers, often called ‘force dryers’ or ‘fluff dryers,’ are designed with dogs in mind. They often have multiple heat and speed settings, including a no-heat option, and are generally quieter than human dryers. If you must use a human dryer, always use it on the lowest heat and speed setting.
- A Lick Mat or Puzzle Toy: Smearing some peanut butter (xylitol-free!), cream cheese, or dog-safe pâté on a lick mat can keep your dog occupied and create a positive distraction during training sessions.
- A Comfortable, Non-Slip Surface: Place a bath mat or yoga mat on the floor. This ensures your dog feels secure and won’t slip, which could add to their anxiety.
- Patience and a Positive Attitude: This is the most important tool of all! This process takes time. Your calm and encouraging energy will be contagious and help your dog feel safe.
Gather all your supplies before you bring your dog into the room. Being prepared means you can focus all your attention on your pup and their reactions, which is key to building trust.
The Step-by-Step Desensitization Plan: From Fear to Acceptance
This is where the magic happens. The key to this entire process is to go at your dog’s pace. We are going to break this down into tiny, manageable steps. Never force your dog to do anything they are uncomfortable with. Each session should be short (5-10 minutes) and end on a positive note. Ready? Let’s begin.
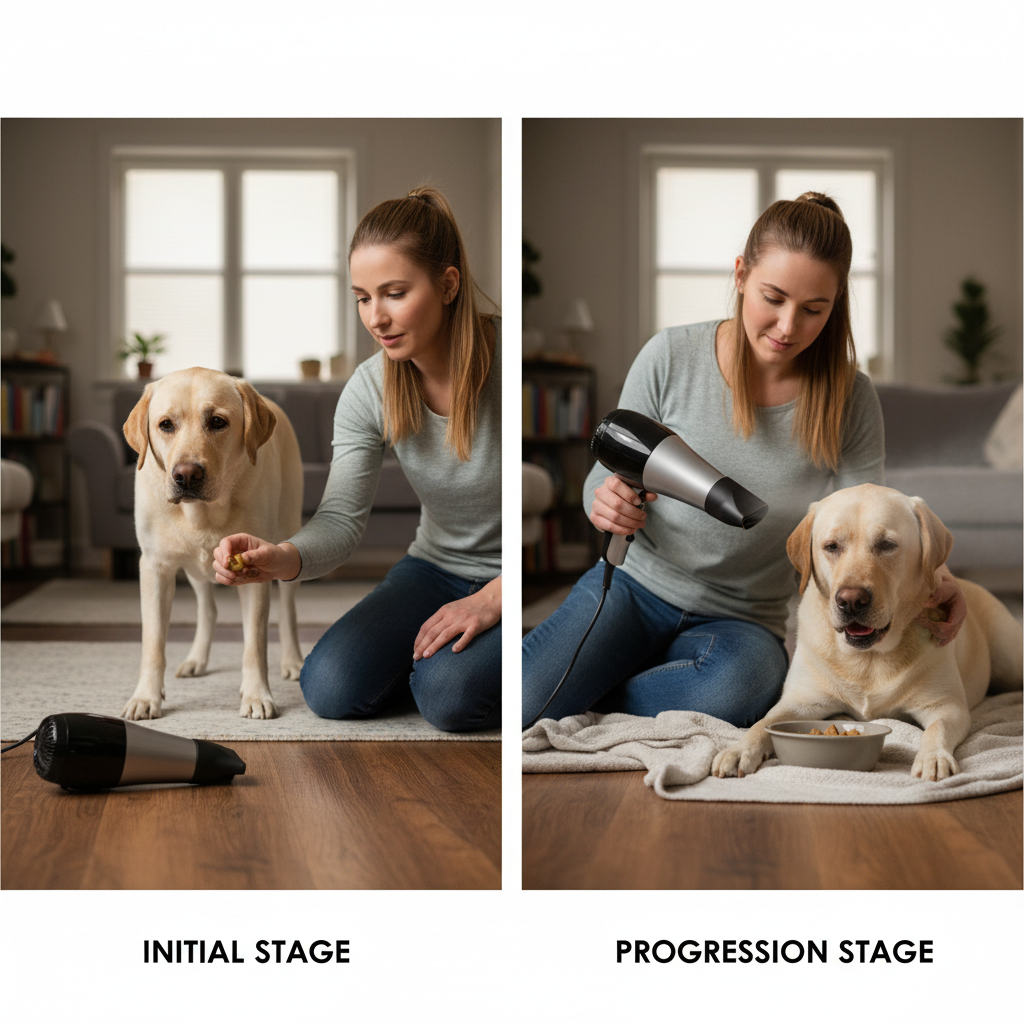
- Step 1: The Dryer is Just an Object. For the first few days, simply leave the blow dryer (unplugged and off) on the floor in a room where your dog hangs out. Let them investigate it on their own terms. Whenever they sniff it or look at it calmly, toss a high-value treat near it. Don’t say anything, just let them make the connection: Dryer on the floor = yummy things appear. Do this for a few short sessions a day for 2-3 days.
- Step 2: Touching the Object. Once your dog is comfortable with the dryer being on the floor, encourage them to touch it with their nose. Hold a treat right on the body of the dryer. When they touch it to get the treat, praise them enthusiastically. Repeat until they are happily booping the dryer for a reward.
- Step 3: Introducing the Sound (From a Distance). This is a big step. Have a partner or use an extension cord to turn the dryer on its lowest setting in another room, or at the farthest point of your current room. As soon as the sound starts, begin feeding your dog a steady stream of high-value treats. The second the sound stops, the treats stop. We want the dog to think, ‘That sound makes chicken rain from the sky!’ Keep the sound on for only a few seconds at a time.
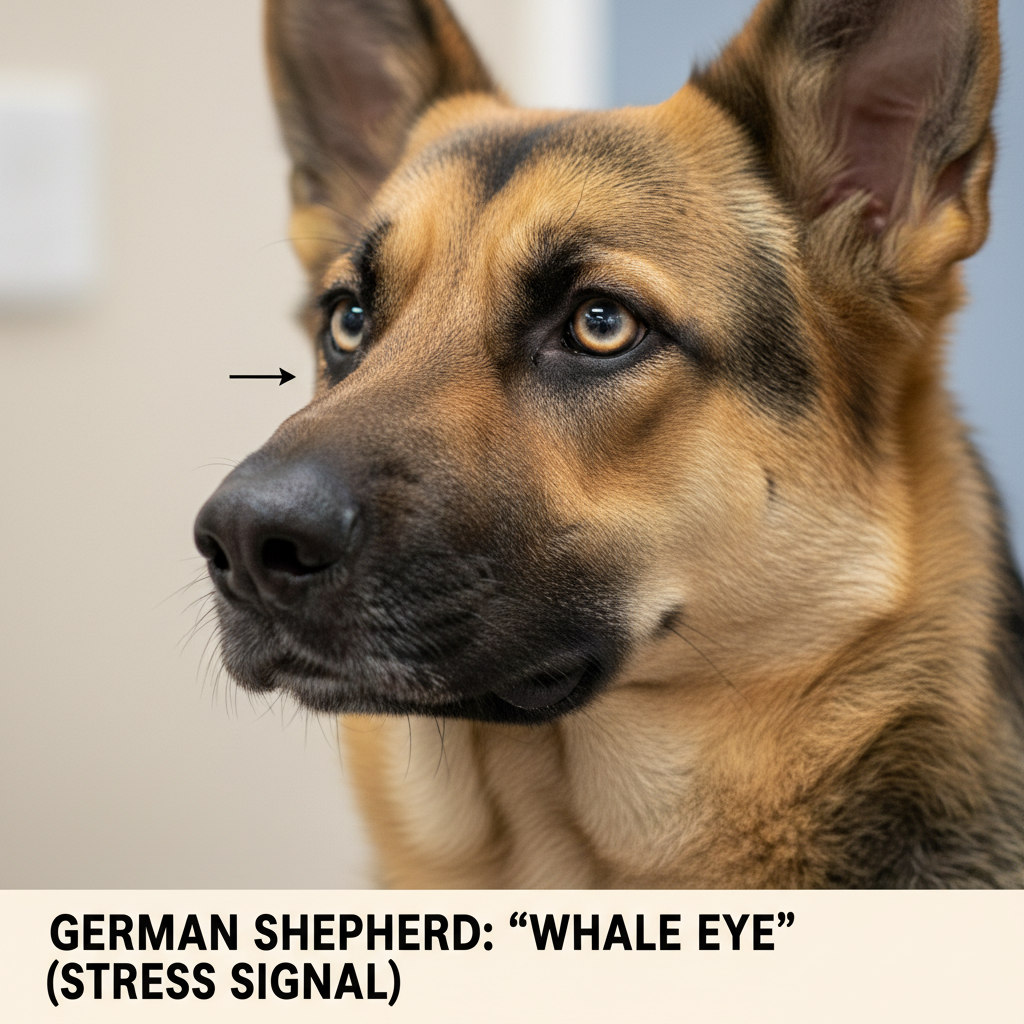
- Step 4: Closing the Gap. Over several sessions, gradually decrease the distance between your dog and the running dryer. Move it a few feet closer each time. Watch your dog’s body language carefully. If they show any signs of stress (like whale eye, lip licking, or backing away), you’ve moved too fast. Go back to the previous distance where they were comfortable and work there a bit longer before trying again.
- Step 5: Feeling the Breeze. With the dryer on its lowest, no-heat setting, point it away from your dog but close enough that they might feel a tiny bit of air. Reward them for staying calm. Gradually, start to direct the airflow towards their back feet (an area that’s generally less sensitive) for just a second, then immediately reward. The sequence is: one second of air, treat, air off.
- Step 6: Building Duration. Slowly increase the duration of the airflow on their body. Go from one second to two, then three, always rewarding heavily. Move from their back feet to their body, saving their head and neck for last as these are the most sensitive areas.
- Step 7: Introducing Warmth. Once your dog is completely comfortable with the cool air, you can switch to the lowest warm setting. Keep the sessions short and the dryer moving to avoid concentrating heat on one spot. Pair it with lots of praise and treats.
Pro Tip: End every single training session on a high note! Even if you only made tiny progress, finish with a treat and some praise so your dog’s final memory of the interaction is a positive one.
Reading the Signs: How to Speak Your Dog’s Language
Your dog can’t tell you in words when they’re getting stressed, but they are constantly communicating through their body language. Being able to spot the early signs of anxiety is crucial. It allows you to stop or take a step back before your dog becomes truly overwhelmed. Pushing them past their comfort zone will only set your training back.
Look for these subtle (and not-so-subtle) signs of stress:
- Yawning: A yawn when they aren’t tired is a classic sign of stress.
- Lip Licking or Nose Licking: Quick flicks of the tongue are a common appeasement signal.
- Whale Eye: When you can see the whites of your dog’s eyes in a crescent shape, it means they are anxious and monitoring a perceived threat.
- Pinned Back Ears: While ear position varies by breed, ears held flat against the head often indicate fear.
- Tucked Tail: A tail tucked between the legs is a clear sign of fear or submission.
- Panting: Panting when it’s not hot and they haven’t been exercising is a sign of stress.
- Freezing or Becoming Stiff: A sudden stillness can be the precursor to a bigger reaction.
- Trying to Escape: If your dog is actively trying to leave the room, they are telling you they’ve had enough.
If you see any of these signs, don’t get discouraged! It’s just information. It means you need to increase the distance, lower the intensity, or go back to the previous step. Respecting their communication is the fastest way to build the trust needed to succeed.
Troubleshooting Common Roadblocks
Even with the best plan, you might hit a snag. Don’t worry, it’s completely normal! Here are some common issues and how to work through them.
‘My dog just barks at the dryer!’
Barking is often a ‘distance-creating’ behavior. Your dog is trying to make the scary thing go away. If this happens, you’re likely too close or the intensity is too high. Go back to Step 3 or 4 and increase the distance significantly until they can see the dryer without barking. Reward the silence. Slowly, session by session, decrease the distance again. The goal is to stay ‘sub-threshold’—at a level where they are aware of the dryer but not so stressed that they need to react.
‘My dog won’t take treats.’
A dog that is too stressed will often refuse food, even their favorite kind. This is a major red flag that you’re moving too fast. If your dog won’t take a treat they normally love, their cortisol (stress hormone) levels are too high for learning to happen. End the session immediately on a calm note (no dryer involved), and try again another day, taking several steps back in the process. Make the next session incredibly easy for them to succeed.
‘We’re stuck on one step and can’t seem to move forward.’
It’s common to hit a plateau. If you’re stuck, try changing one of the variables. Can you try a different room in the house? Can you use an even higher-value treat (like tiny bits of steak)? Can you make the sessions even shorter, like just 2-3 minutes? Sometimes a small change is all it takes to get over the hump. And remember, patience is paramount. It’s better to spend a week on one step than to rush and undo all your hard work.
Conclusion
Congratulations! You now have a complete, humane, and effective plan to help your dog overcome their fear of the blow dryer. Remember that this is a journey of trust-building, not a race to the finish line. Every dog is an individual, and your pup will progress at their own unique pace. Celebrate the small victories, whether it’s a calm sniff of the dryer or tolerating the sound from across the room.
By replacing fear with positive experiences, you’re not just making grooming easier; you’re strengthening the bond you share with your best friend. With patience, consistency, and a pocketful of tasty treats, you can transform blow-dry time from a dreaded chore into a calm and manageable part of your routine. You’ve got this!