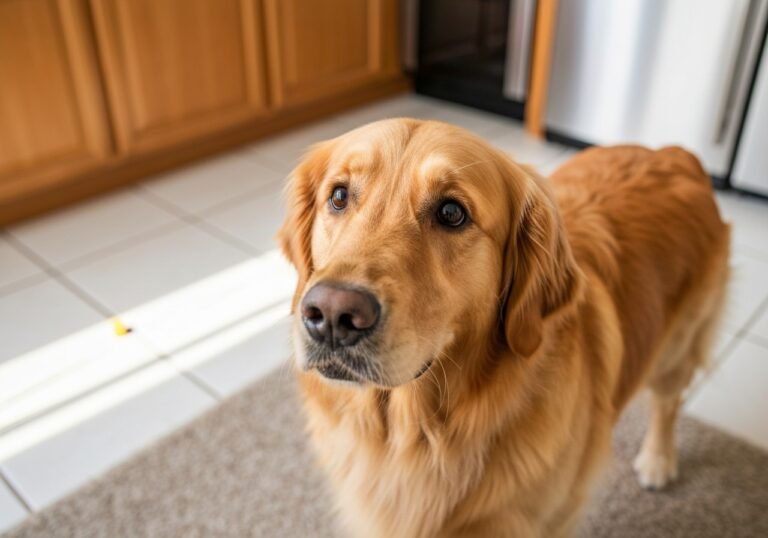
Have you ever tried to share a tiny morsel of your dinner with your beloved pup, only to have them nearly take your fingers—and the fork—with it? If you’re nodding along, you’re not alone! Many dogs, in their sheer excitement for food, can be a bit… grabby. While their enthusiasm is adorable, teaching them to take treats gently is more than just a cute party trick. It’s a foundational lesson in impulse control, a crucial skill that translates to better behavior in all areas of their life.
Teaching your dog to take food gently from a fork is a fantastic, safe way to practice this skill. It protects your fingers, reduces the risk of your dog accidentally swallowing a utensil (it happens!), and reinforces a calm state of mind around high-value items. Plus, it’s a wonderful bonding activity that builds trust and communication between you and your canine companion.
In this guide, we’ll walk you through everything you need to know, from the simple tools you’ll need to a step-by-step training plan and troubleshooting common hiccups along the way. Get ready to transform your chomper into a connoisseur with impeccable table manners!
Setting the Stage for Success: What You’ll Need
Before we dive into the training, let’s gather our supplies. Setting up your environment for success is half the battle! You don’t need a lot of fancy equipment, just a few simple items and a positive attitude.
Essential Supplies
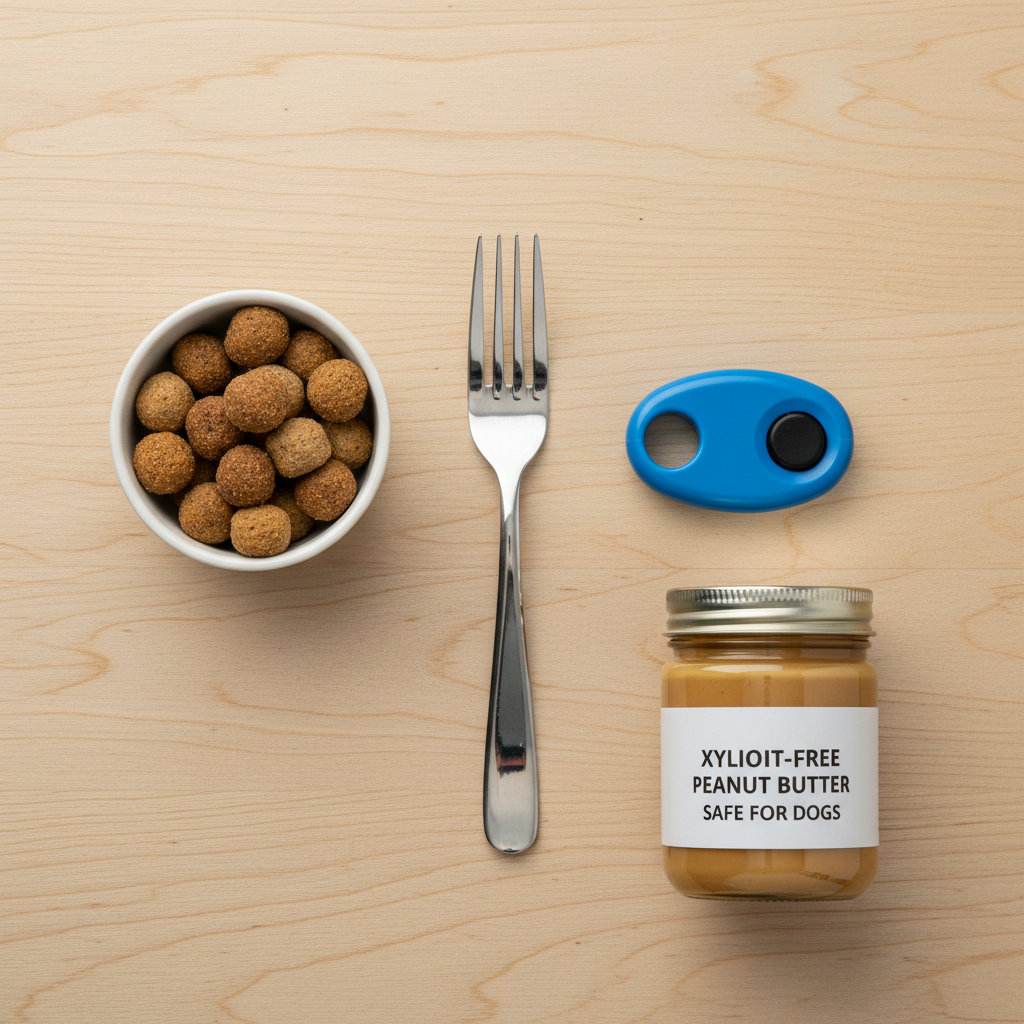
- A Sturdy Fork: Choose a regular dinner fork. Avoid anything too sharp or flimsy. A salad fork or a fork with blunted tines can be a great starting point if you’re nervous. The goal is for the tool to be safe and sturdy.
- High-Value Treats: This is the key to keeping your dog motivated! We need something they absolutely love and can’t resist. Think small, soft, and lickable. Great options include:
- A dab of peanut butter (xylitol-free, of course!)
- Plain Greek yogurt or cream cheese
- Small, soft training treats that can be speared on the fork
- Tiny pieces of boiled chicken or cheese
The treat should be small enough that your dog can lick it off easily without needing to chomp down.
- A Clicker (Optional but Recommended): A clicker is a fantastic tool for marking the exact moment your dog does something right. This precision communication can speed up the learning process significantly. If you’re not using a clicker, you’ll need a verbal marker word, like a crisp, happy “Yes!”
- A Quiet Training Space: Choose a location with minimal distractions. Your living room, a quiet kitchen, or a calm backyard are all great choices. We want your dog to be able to focus entirely on you, the fork, and the delicious reward.
Expert Tip: Keep your training sessions short and sweet, especially at the beginning. Aim for 3-5 minute sessions a couple of times a day. This prevents your dog from getting frustrated or bored and keeps the experience fun and positive.
The Step-by-Step Guide to Fork-Feeding Finesse
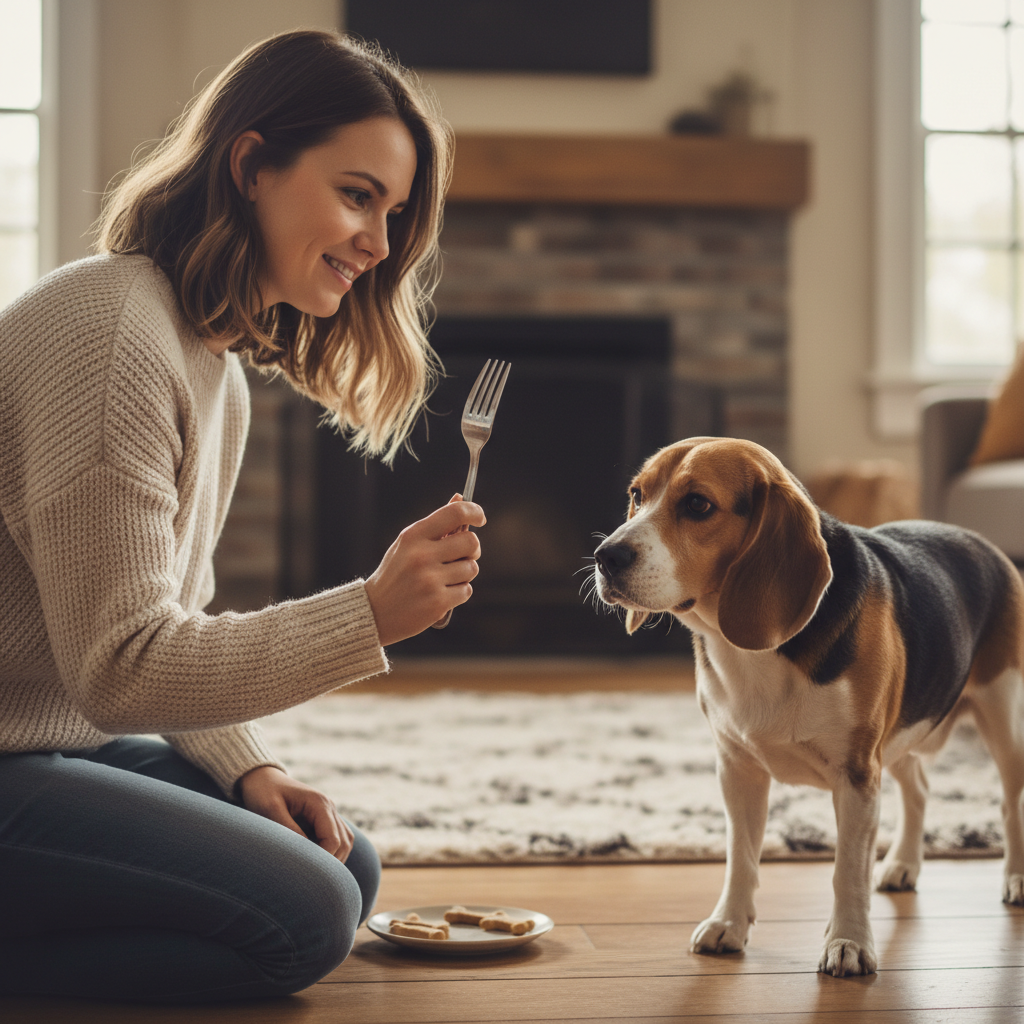
Alright, you’ve got your treats and your fork—it’s showtime! Remember to be patient and positive. Every dog learns at a different pace, so celebrate the small wins and enjoy the process. We’ll break this down into simple, manageable steps.
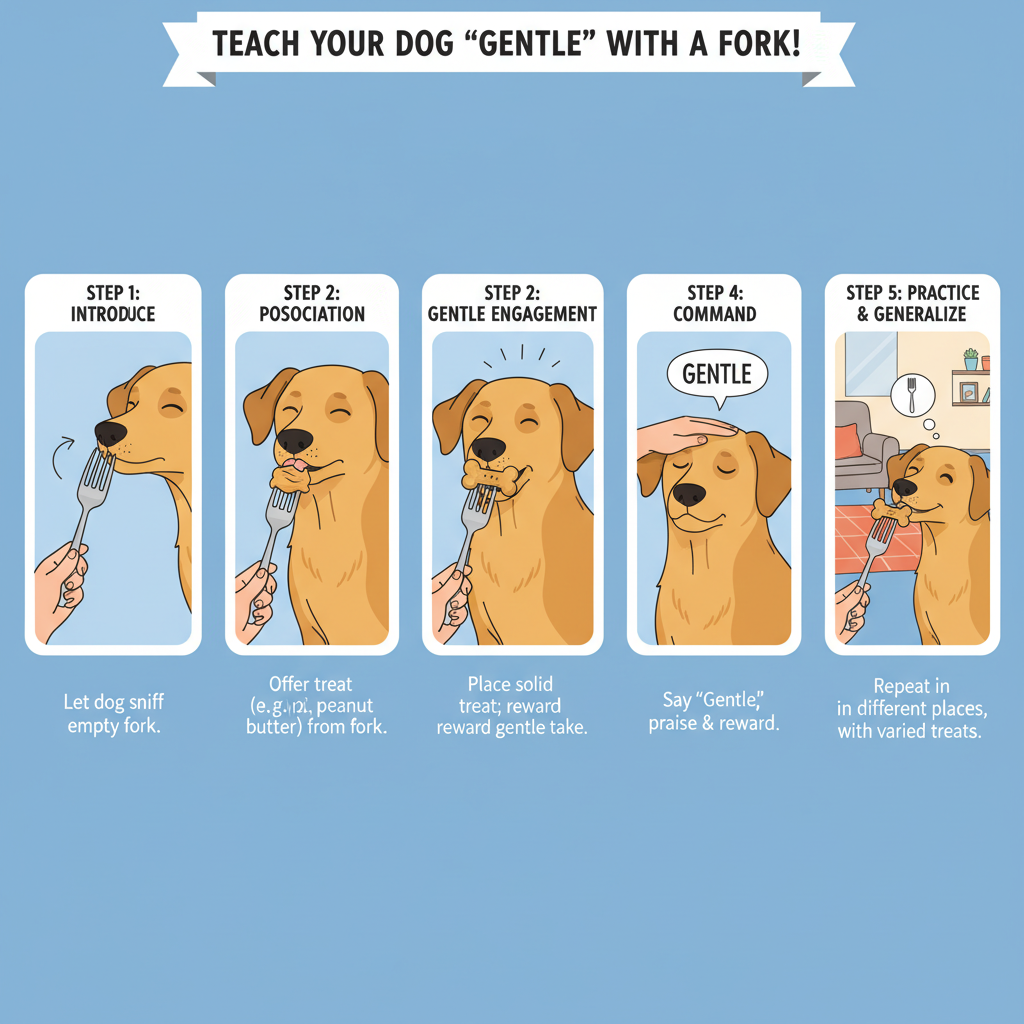
Step 1: Introduce the Fork (No Food!)
The first step is to create a positive association with the fork itself. Some dogs might be wary of a new object coming toward their face. Hold the fork out for your dog to investigate. The moment their nose touches it, click (or say “Yes!”) and give them a treat from your other hand. Repeat this several times until you see your dog eagerly touching the fork with their nose, anticipating the reward.
Step 2: Add a Lickable Treat
Now, let’s make the fork even more appealing. Smear a tiny bit of peanut butter or cream cheese on the tines of the fork. Hold it out to your dog. Most dogs will naturally start licking the treat off. Let them lick it clean. Don’t pull it away. The goal here is to teach them that licking, not biting, is how they get the reward from this object. Repeat this a few times.
Step 3: Transition to Solid Treats & Encourage Gentleness
Once your dog is a pro at licking the fork clean, you can move to a small, solid treat. Spear a tiny piece of chicken or a soft training treat onto the tines. Hold the fork very still and present it to your dog. Their first instinct might be to lunge or bite at it. This is the crucial part. If they are rough, simply and calmly pull the fork away. Don’t say “No” or scold them. Just remove the opportunity. Wait a second, then present it again. The moment you feel a soft, gentle mouth or a lick, click/Yes! and let them have the treat. They will quickly learn that only gentle behavior makes the fork give up its treasure.
Step 4: Introduce a Verbal Cue
When you notice your dog is consistently offering a gentle mouth, you can start adding a verbal cue. Just as you present the fork, say a word like “Gentle” or “Easy” in a calm, soft voice. They will begin to associate the word with the action of being soft with their mouth. This cue will be incredibly useful later for taking treats from your hand or even for gentle toy play.
Step 5: Practice and Proofing
Practice makes perfect! Once your dog has mastered the skill in your quiet training space, it’s time to ‘proof’ the behavior. Try practicing in different rooms of the house. Then, try it with a minor distraction in the background, like the TV on low. This process, known as generalization, helps your dog understand that the “gentle” rule applies everywhere, not just in one specific context.
Troubleshooting Common Training Hurdles
Training is rarely a straight line, and it’s perfectly normal to hit a few bumps in the road. Don’t get discouraged! Here are some common challenges and how to work through them with your furry student.
“My dog is way too excited and just lunges at the fork!”
This is a classic case of a dog with low impulse control—which is exactly what we’re trying to fix! If your dog is lunging, you’re likely holding the fork too close, too quickly. Start by holding the fork further away and rewarding your dog for just remaining calm in its presence. Gradually decrease the distance. You can also use a lower-value treat to dial down the excitement level a notch. If they lunge, calmly pull the fork back, ask for a ‘sit’ to reset their brain, and try again.
“My dog seems scared or suspicious of the fork.”
A metallic object coming towards the face can be intimidating for a timid dog. If this is the case, go back to Step 1 and spend more time on it. Place the fork on the ground and drop high-value treats around it, letting your dog approach it on their own terms. Never force the fork towards them. You can also try a plastic or silicone fork, which might seem less threatening. Your goal is to build a rock-solid positive association before you ever ask them to eat from it.
“We’ve been practicing, but my dog just isn’t getting it.”
If you feel stuck, take a look at your mechanics. Are you clicking at the exact right moment? Is your reward valuable enough to hold their interest? Are your sessions too long? Often, the issue lies in one of these three areas. Shorten your sessions to just a minute or two. Find a treat they would do anything for. And if you’re not using a clicker, consider trying one for its precision. It can make a world of difference in communicating exactly what you want.
Remember: Every interaction is a learning opportunity. If your dog is too rough, simply removing the fork teaches them a natural consequence: ‘Roughness makes the good thing go away.’ This is often more powerful than any verbal correction.
Top Mistakes to Avoid for a Smoother Training Experience
Sometimes, what we don’t do is just as important as what we do. By avoiding these common training pitfalls, you’ll set your dog up for success and keep the learning process fun and frustration-free for both of you.
Mistake #1: Moving Too Fast
The number one mistake owners make is rushing the process. They see their dog lick the fork once and immediately jump to spearing a big treat on it. Training a new behavior requires building a strong foundation. Spend plenty of time on each step, ensuring your dog is confident and successful before moving to the next. If your dog starts to fail, it’s a sign you’ve moved too fast. Simply take a step back to where they were last successful and build up again from there.
Mistake #2: Punishing the Dog for Being Rough
It can be instinctual to say “No!” or jerk the fork away if your dog chomps at it. However, this can create fear and anxiety around the fork and the training itself. We want our dogs to learn, not to be afraid of making a mistake. The simple, silent removal of the fork is a much clearer and more effective consequence. It teaches them that gentleness brings rewards, while roughness brings… nothing. It’s a lesson, not a punishment.
Mistake #3: Using Boring Treats
Are you trying to teach this skill with your dog’s regular dry kibble? If so, you might be struggling to keep their attention. When teaching a new skill that requires self-control, you need to make it worth their while! Use special, high-value treats that are reserved only for training sessions. This will boost their motivation and make them eager to figure out the puzzle you’re presenting.
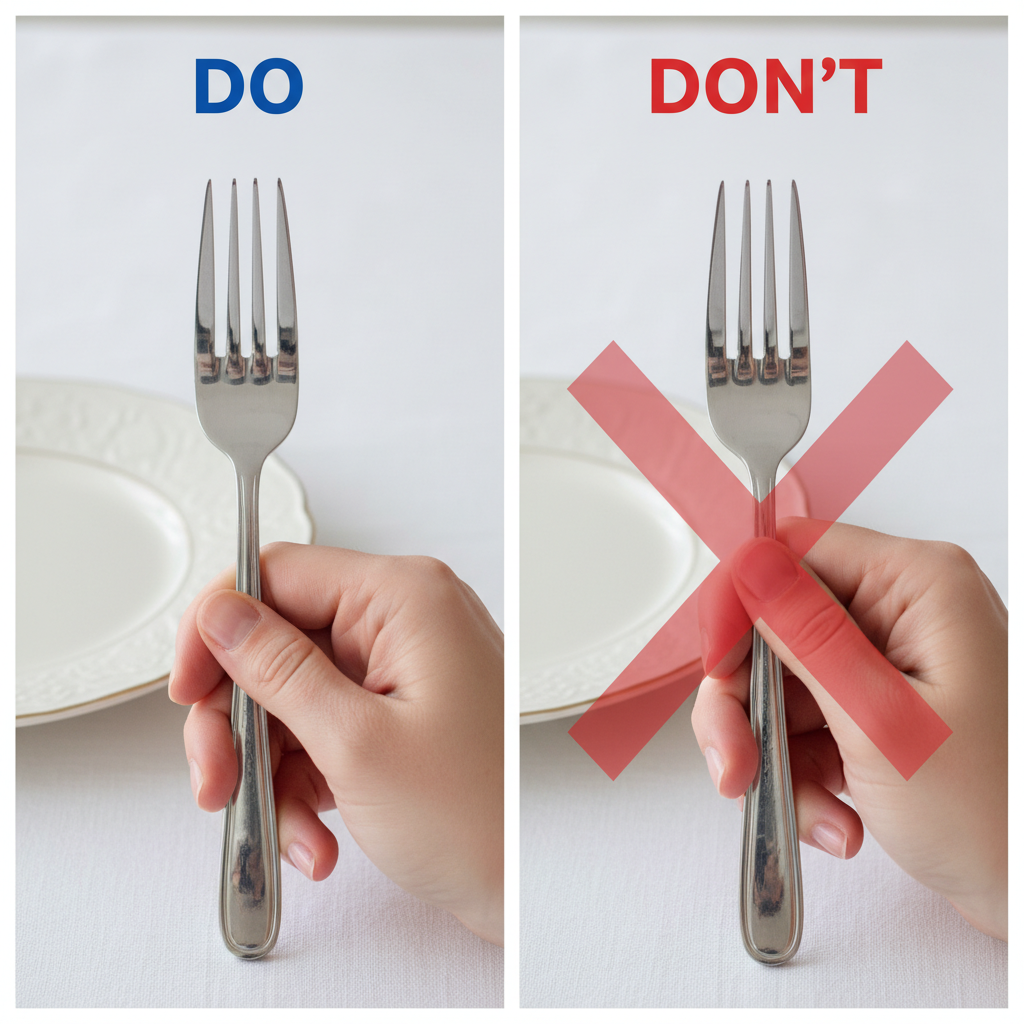
Mistake #4: Holding the Fork Incorrectly
Be mindful of how you’re holding the utensil. Don’t hold it in a way that your fingers are right behind the treat—this is just asking for an accidental nip. Hold the fork by the end of the handle, keeping your hand a safe distance from your dog’s mouth. This protects you and allows your dog to focus on the treat, not your hand.
Beyond the Fork: Advancing Your Dog’s Impulse Control

Congratulations! Your dog is now a master of taking treats gently from a fork. But the journey doesn’t have to end here. This new skill is a gateway to teaching a wide range of incredible impulse control behaviors that will make your dog a more well-behaved companion in every situation.
Transitioning to Gentle Hands
The same principle you used with the fork can be applied to your hands. Hold a treat in your closed fist. Let your dog sniff and lick your hand. The moment they get frustrated and back off or lick gently, open your hand and give them the treat. If they nibble or paw at you, keep your fist closed. They’ll learn that a calm, gentle approach is the only way to get the reward. You can use your “Gentle” cue to help them understand.
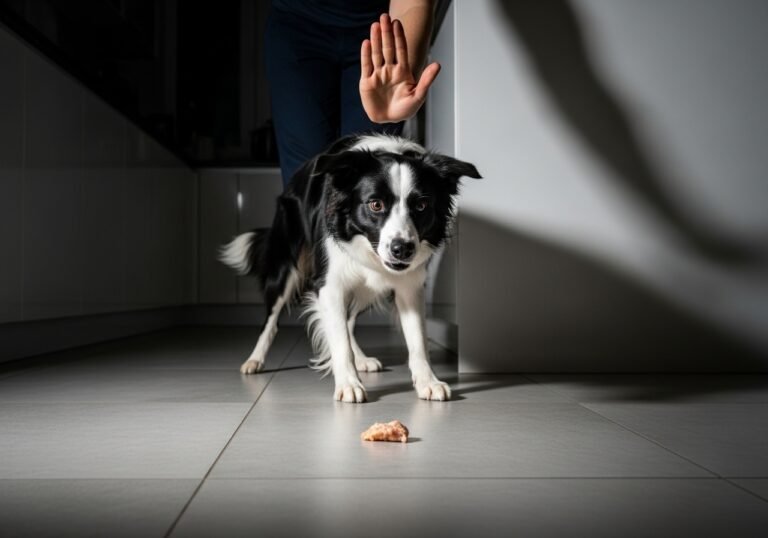
Introducing “Leave It”
“Leave It” is a potentially life-saving cue that teaches your dog not to pick up items without permission. Start by placing a low-value treat on the floor and covering it with your hand. When your dog sniffs your hand, say “Leave It.” The second they pull their head away, even for a split second, praise them and give them a different, higher-value treat from your other hand. This teaches them that ignoring the first item leads to something even better.
Playing Impulse Control Games
Turn training into a game! A simple game is to ask your dog to “Sit” and “Stay” while you place a treat on the floor. Give them a release cue (like “Okay!”) to let them know when they can take it. Gradually increase the time they have to wait. Another fun one is to place a treat on their paw and have them practice “Leave It” until you give the release cue. These games are mentally stimulating and build your dog’s self-control muscles in a fun, engaging way.
By expanding on the simple lesson of the fork, you’re not just teaching manners—you’re teaching your dog how to think, problem-solve, and manage their own excitement. This is the foundation of a truly well-behaved and happy dog.
Conclusion
From a frantic chomper to a gentle gourmet, your dog has come a long way! Teaching your dog to take treats gently from a fork is a simple exercise with profound benefits. You’ve not only made treat time safer and more pleasant, but you’ve also given your dog a valuable lesson in self-control, patience, and communication. This foundational skill strengthens your bond and opens the door to more advanced training and a more harmonious life together.
Remember to keep practicing, stay patient, and always celebrate the small victories. Every positive training session is an investment in your relationship with your best friend. Now, go ahead and enjoy sharing those little moments—and morsels—with your well-mannered pup!