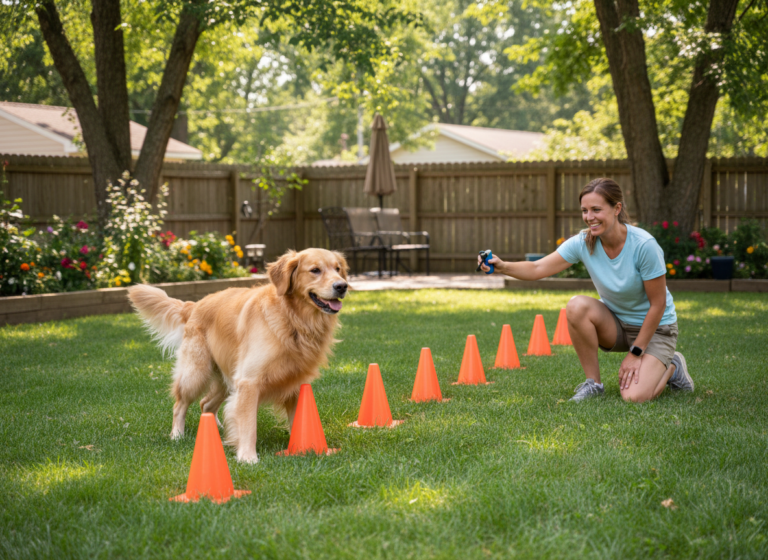
Puppies are little bundles of boundless energy and curiosity. They zoom, they pounce, they explore the world with an enthusiasm that’s both adorable and, let’s be honest, a little exhausting! As a pet owner, finding positive outlets for that energy is key to a happy, well-behaved companion. That’s where backyard agility comes in. You don’t need fancy, expensive equipment to start building your puppy’s confidence and skills. In fact, one of the best introductory tools is something you can build yourself this weekend: a balance beam.
This guide is your all-in-one resource for creating a safe, simple DIY balance beam and teaching your puppy how to master it. We’ll cover why this simple plank of wood is a powerhouse for your pup’s development, walk you through the building process, and provide a fun, step-by-step training plan. Get ready to strengthen your bond and watch your puppy’s confidence soar to new heights!
Why a Balance Beam is a Puppy’s Best Friend
More Than Just a Plank of Wood
You might look at a balance beam and see a simple obstacle, but for a developing puppy, it’s a world of learning. Engaging with a balance beam does wonders for your pup’s physical and mental growth. It’s not about training for a future agility competition (though it could be!); it’s about providing foundational skills that will benefit them for their entire life.
Key Benefits for Your Growing Pup:
- Proprioception Power-Up: This is a fancy term for body awareness. As your puppy carefully places each paw on the beam, they are learning exactly where their body is in space. This skill is crucial for preventing injuries and helps them navigate the world more confidently, whether they’re hiking a trail or just avoiding bumping into the coffee table.
- Confidence Building: The world can be a big, scary place for a little puppy. Successfully navigating a new object like a balance beam is a huge confidence booster. Each successful crossing tells them, “I can do this! I can figure out new challenges!” This confidence will translate to other areas of their life.
- Core Strength & Coordination: Walking on a narrow surface requires a surprising amount of muscle control. It engages the core muscles that support their spine and helps improve their overall balance and coordination. It’s like a tiny, fun workout for your pup!
- Focus and Problem-Solving: To walk the beam, your puppy has to concentrate. They can’t just barrel forward. They must think about their next step. This gentle mental stimulation is a fantastic way to tire out a busy puppy brain.
- Strengthening Your Bond: Training is a two-way street. By guiding your puppy through this new skill with patience and positive reinforcement, you’re building a powerful foundation of trust and communication. They learn to look to you for guidance, and you learn to better understand their body language and learning style.
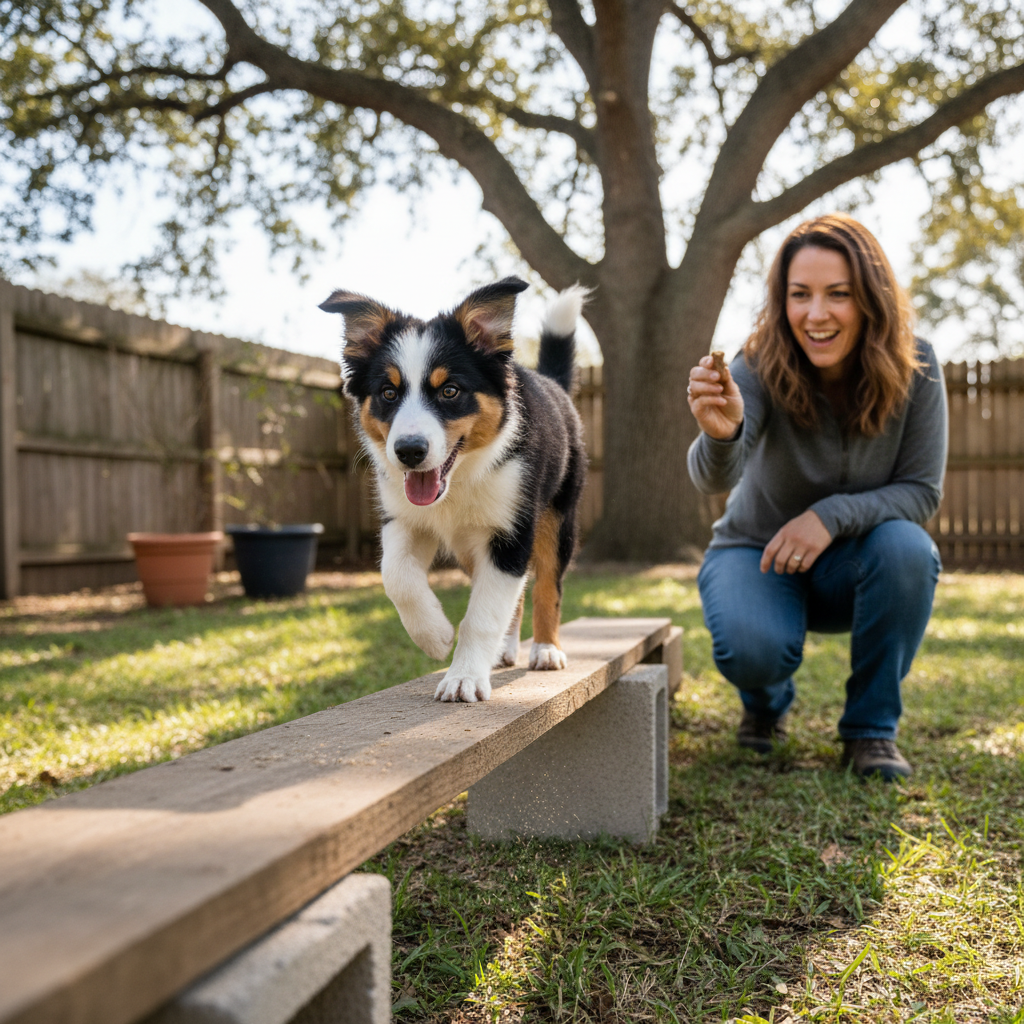
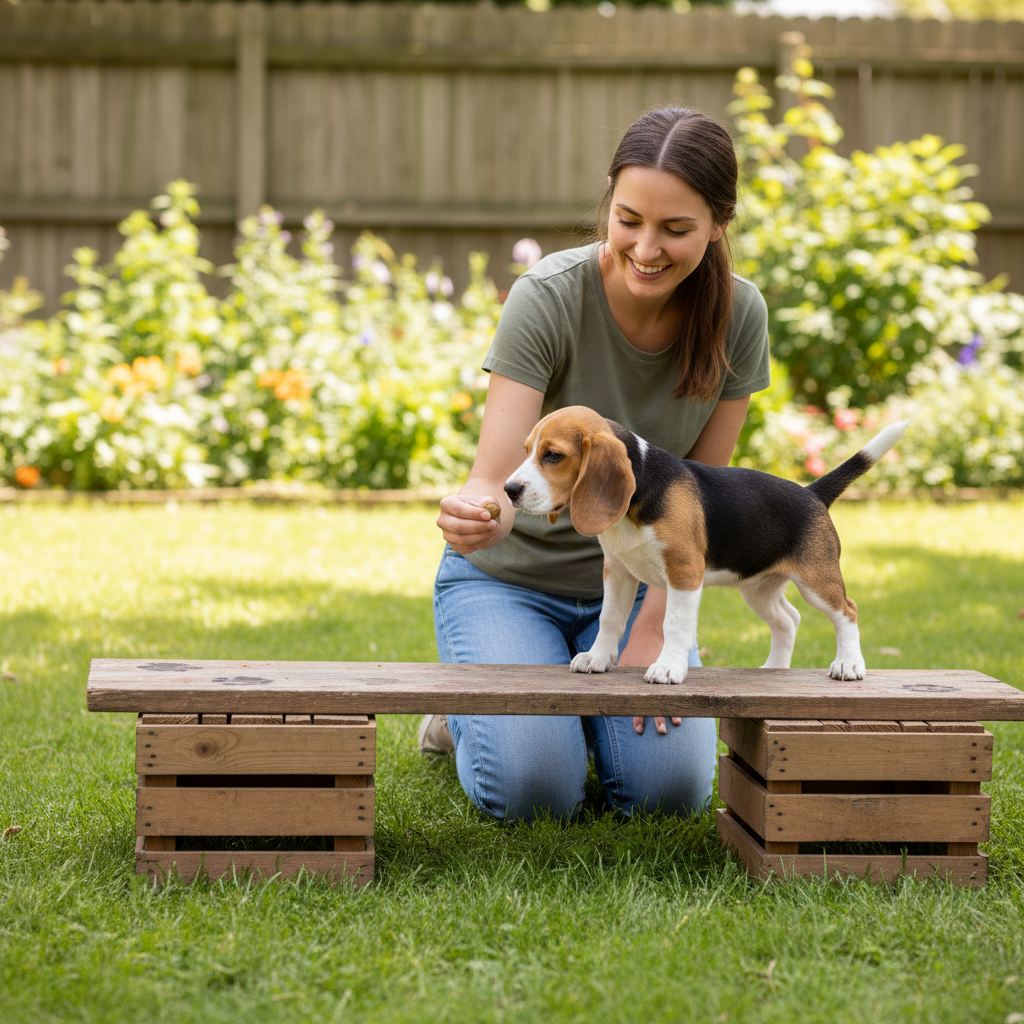
Your Weekend Project: Building a Safe & Simple DIY Puppy Balance Beam
The best part about this project is its simplicity. You don’t need to be a master woodworker to create a safe and effective balance beam for your puppy. The key priorities are stability and a non-slip surface. Remember, we’re building for a puppy, so it needs to be low to the ground!
Materials You’ll Need:
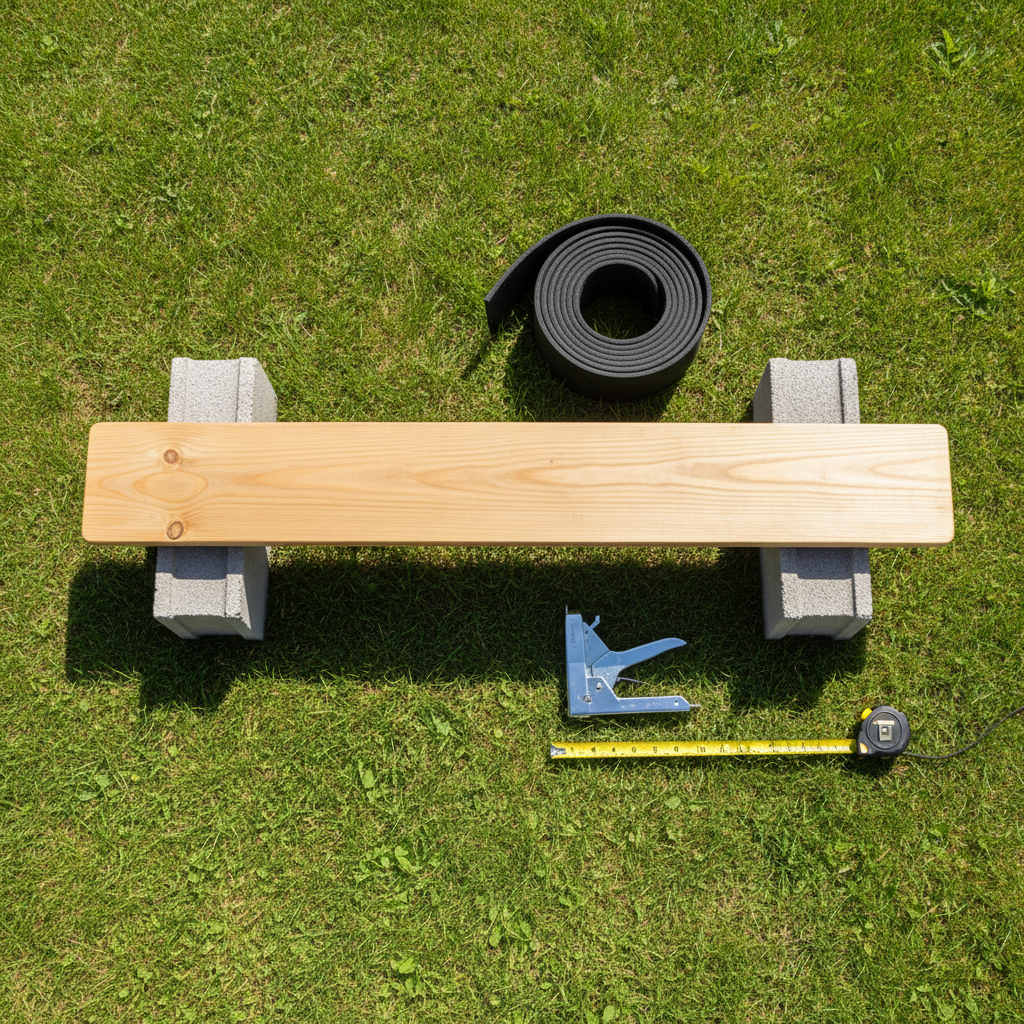
- The Beam: One untreated wooden plank. A 2×6 or 2×8 board that’s about 6-8 feet long is a great starting point. Make sure it’s wide enough for your puppy to feel secure. Avoid pressure-treated wood, which can contain chemicals harmful to pets if they chew on it.
- The Supports: Two sturdy, low supports. Cinder blocks turned on their lowest side are a perfect, stable option. Alternatively, you can use landscaping timbers or create simple supports from 2×4 scraps. The goal is to elevate the beam just a few inches off the ground.
- The Surface: Something to provide grip. This is non-negotiable! You can use a strip of outdoor carpet, a rubber runner mat stapled securely, or several coats of non-slip outdoor paint mixed with a bit of sand.
- Tools: A drill, screws or heavy-duty staples (depending on your surface choice), and a measuring tape.
Construction Steps: A Puppy-Proof Plan
- Prepare Your Plank: Start by thoroughly sanding your wooden plank to remove any splinters or rough edges. Your puppy’s paws will thank you!
- Add the Non-Slip Surface: Cut your carpet or rubber mat to the exact dimensions of the top of your plank. Secure it tightly using a staple gun every few inches along the edges. If you’re using paint, apply a coat, sprinkle a fine layer of sand while it’s wet, let it dry, and then apply another one or two coats to seal it in. The texture is key for grip.
- Position the Supports: Place your cinder blocks or wooden supports on a flat, level piece of ground in your yard. Measure the distance so they sit about one foot in from each end of your plank.
- Secure the Beam: Lay your prepared plank across the supports. Check for any wobbling. It should be completely stable. For extra security, you can use construction adhesive or L-brackets to fasten the plank to the supports, but if you’re using heavy cinder blocks on level ground, gravity often does the trick.
Expert Tip: Before you even start training, let the finished beam sit in the yard for a day. Let your puppy sniff it and get used to its presence without any pressure. This makes it a normal part of the environment, not a scary new ‘thing’.
Let the Training Begin! A Step-by-Step Guide to Mastering the Beam
Now for the fun part! Remember, the golden rules of puppy training are to keep sessions short, positive, and fun. We’re talking 3-5 minutes at a time, a couple of times a day. Always end on a high note! Grab some high-value treats—small pieces of chicken, cheese, or their absolute favorite training morsel—and let’s get started.
The Training Progression:
- Step 1: The Plank on the Ground. Before even elevating it, lay the plank flat on the grass. Let your puppy investigate it. Use a treat to lure them to step on it with one paw, then two, then all four. Praise and reward every tiny interaction. Then, lure them to walk the full length of the plank while it’s still on the ground. Make it a super fun game! Repeat this until they are happily walking across it.
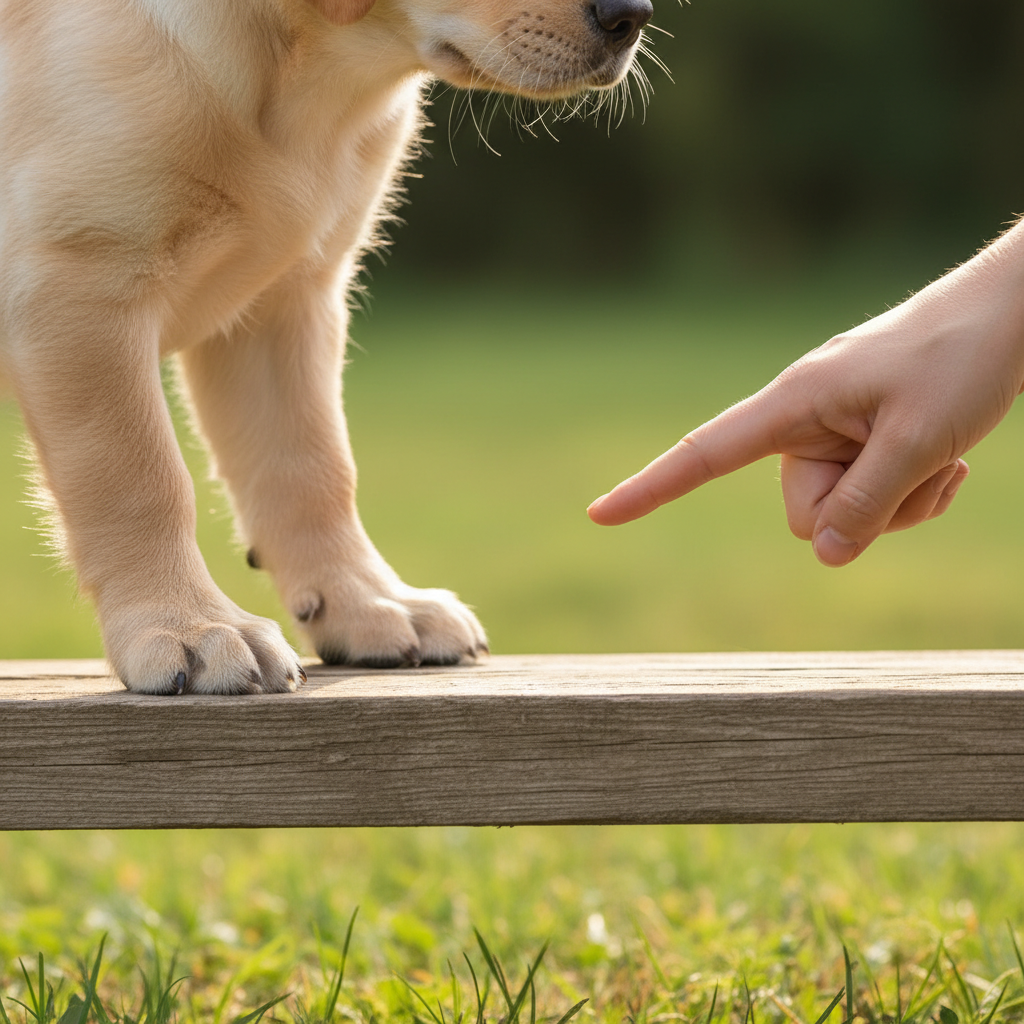
- Step 2: The Lure. Now, place the beam on its low supports. Hold a smelly, delicious treat right in front of your puppy’s nose. Use the treat to lure them up onto one end of the beam. As soon as they put a paw on it, praise them and give them a treat. Then, slowly move the treat forward, encouraging them to take another step, and another. Reward them for every couple of steps. Keep the lure low and close to the beam to encourage a straight path.
- Step 3: Walk the Plank! Once they are comfortable taking a few steps, use the lure to guide them all the way across. The moment their last paw hits the grass on the other side, have a ‘jackpot’ reward ready—a shower of praise, a few extra treats, or a toss of their favorite toy. Make the end of the beam the best place on earth!
- Step 4: Add a Verbal Cue. When your puppy is consistently and happily walking the beam with a lure, you can add a verbal cue. Just before you start to lure them, say your chosen word in a happy, upbeat tone. Good cues are short and distinct, like “Beam!”, “Walk it!” or “Plank!”. They will quickly associate the word with the action.
- Step 5: Fade the Lure. The final step is to reduce their dependence on the treat in your hand. Start by using an empty hand to guide them, but still reward them at the end. Then, transition to just pointing. Eventually, you’ll be able to stand a few feet away and simply give your verbal cue.
Common Wobbles: Troubleshooting & Safety First
Training is never a straight line, especially with a puppy. You’re bound to hit a few snags or ‘wobbles’ along the way. The key is to stay patient, positive, and never force your puppy to do something they are scared of. And above all, safety is paramount.
Troubleshooting Common Issues:
- My puppy is scared of the beam. Go back a step! Take the plank off the supports and play the ‘plank on the ground’ game for a few more days. You can also try feeding them their dinner near the beam to build a positive association. Never drag or push them onto it.
- My puppy keeps jumping off the side. This is very common! It usually means you’re moving the lure too fast or holding it too high. Keep the treat low, right at their nose level, and move it slowly in a straight line down the center of the beam. You can also try making the beam wider temporarily by placing another plank next to it.
- They only go halfway and then stop. That’s okay! Reward them for going halfway. End the session there on a positive note. In the next session, see if they’ll offer one more step for a treat. We’re building confidence in small increments, not asking for perfection right away.
Safety Rules to Live By:
- Always Supervise: Never leave your puppy unattended with the balance beam, even for a second.
- Keep It Low: For a puppy, the beam should be no higher than their wrist or hock (ankle) height. This prevents injury if they do happen to fall or jump off.
- Check for Stability: Before every single training session, give the beam a good push and wiggle to make sure it’s completely stable and won’t tip over.
- Listen to Your Puppy: Pay attention to their body language. If they are showing signs of stress (tucked tail, yawning, lip licking), it’s time to end the session with a fun, easy win (like a simple ‘sit’) and try again another day. The goal is fun, not fear.
Conclusion
Congratulations! You’re now equipped with everything you need to build a fantastic training tool and start an exciting new journey with your puppy. Remember, building and training on a DIY balance beam is about so much more than just learning a trick. It’s about building a language of trust, celebrating the small victories, and channeling your puppy’s amazing energy into something productive and confidence-boosting.
Every step they take on that beam is a step towards becoming a more coordinated, confident, and well-adjusted adult dog. So grab your tools, some tasty treats, and get ready to have some fun. You’re not just building a balance beam; you’re building an incredible bond with your new best friend.