Have you ever watched a video of a talented pup performing an incredible trick and thought, ‘I wish my dog could do that!’? Well, get ready to be the proud pet parent on the other side of the screen! Teaching your dog to play bucket drums isn’t just an impressive party trick; it’s a fantastic journey in communication, confidence-building, and pure, unadulterated fun for both of you.
Forget boring obedience drills. This activity taps into your dog’s natural intelligence and desire to engage with you. It provides crucial mental stimulation that can help curb boredom-related behaviors and strengthens your bond like nothing else. In this guide, we’ll break down the entire process into five simple, positive-reinforcement-based steps. No prior musical or training experience is needed—just a bucket, some tasty treats, and a willingness to have a great time with your best friend. Let’s make some joyful noise!
Gathering Your Percussion Pup’s Gear: What You’ll Need
Before you can kick off your dog’s drumming career, you’ll need to assemble a few key items. Think of this as setting the stage for success! Having the right tools on hand makes the training process smoother, clearer, and much more enjoyable for your canine student.
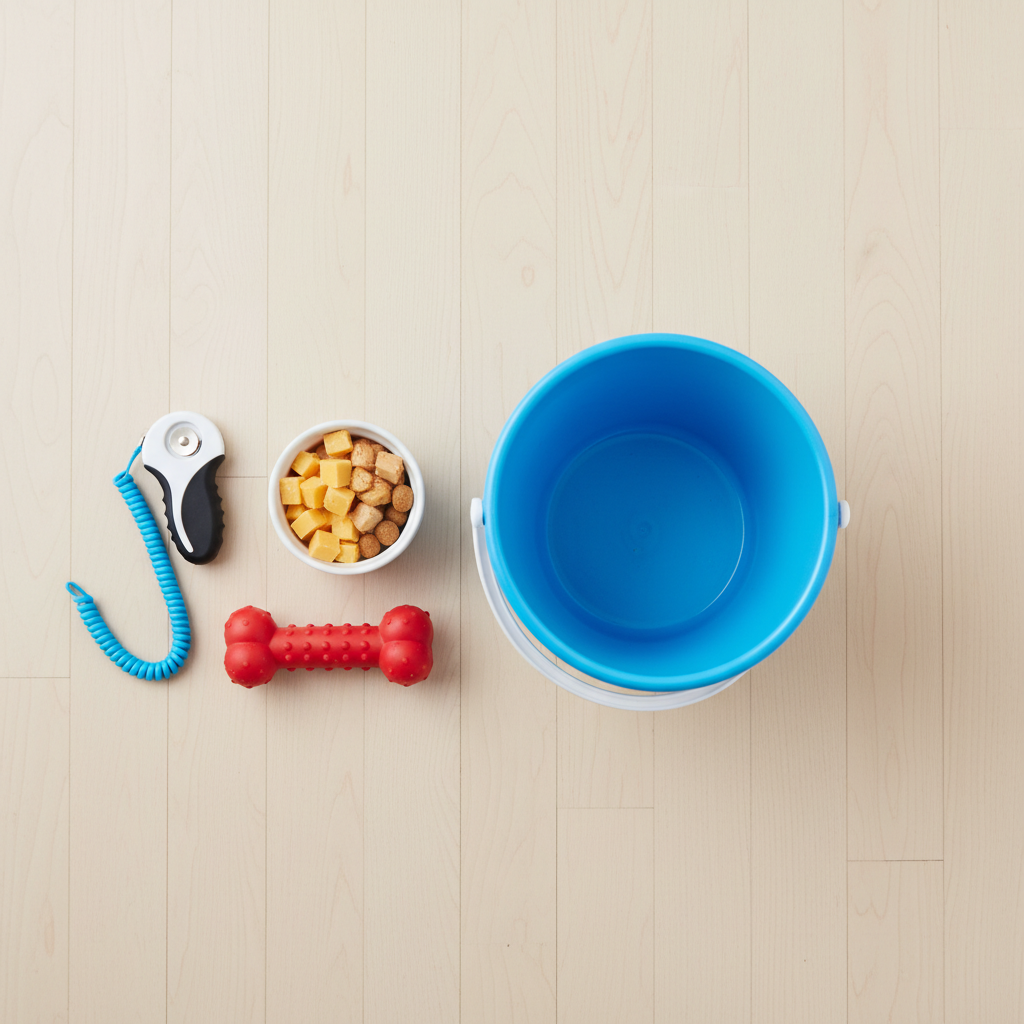
The Instrument and The Rewards
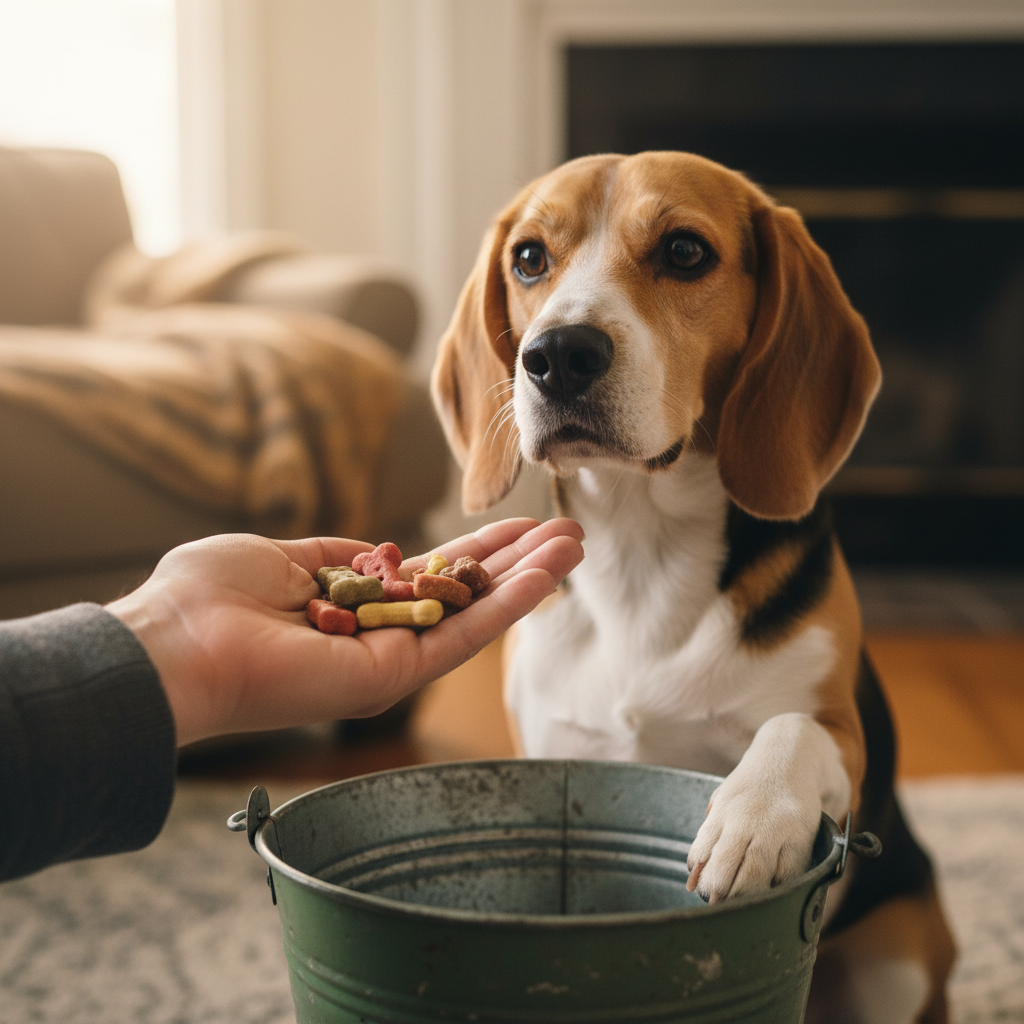
- A Sturdy Bucket: The star of the show! A simple, plastic 5-gallon bucket from a hardware store is perfect. Choose one that’s sturdy enough not to tip over easily when tapped. Avoid metal buckets initially, as the loud noise might startle some dogs. The goal is fun, not fear!
- High-Value Treats: This is non-negotiable. You’re asking your dog to learn a complex new skill, so their payment needs to be amazing. Forget the dry kibble. Think small, soft, smelly morsels like boiled chicken, cheese, or commercial training treats that your dog absolutely adores.
- A Clicker (Optional but Recommended): A clicker is a powerful tool for marking the exact moment your dog does something right. This precision communication can speed up the learning process significantly. If you’re new to clicker training, don’t worry! The concept is simple: click for the correct action, then give a treat. The click becomes a promise of a reward.
- Dog-Safe Drumsticks (Optional Advanced Gear): For a more advanced version of the trick, you can teach your dog to hold a ‘drumstick.’ This must be something lightweight and safe, like a small rubber chew toy or a specially designed dog-safe stick. Never use actual wooden drumsticks, which can splinter. This is a step to consider much later in the process.
Setting the Scene
Find a quiet, comfortable space free from distractions. A living room or a quiet backyard is ideal. You want your dog to be able to focus on you and the new, exciting bucket game. Keep initial training sessions short—just 5 to 10 minutes once or twice a day is plenty. Always aim to end on a high note when your dog is still engaged and having fun. This leaves them eager for the next session!
The Beat Begins: Your 5-Step Guide to Canine Drumming
Alright, the stage is set, and your gear is ready. It’s time to start the training! Remember, patience and positivity are your best friends here. Every dog learns at a different pace, so celebrate the small wins and focus on having fun. We’ll break this down into clear, manageable steps.
Step 1: Introduce the Bucket (The Stage)
The first goal is to make the bucket the most exciting object in the room. Place it on the floor. The moment your dog shows any interest in it—sniffing it, looking at it, walking towards it—click and treat! We’re building a positive association. The bucket is not scary; it’s a predictor of wonderful things (treats!). Don’t ask for any specific action yet. Just reward curiosity. Do this for a minute or two, and then put the bucket away.
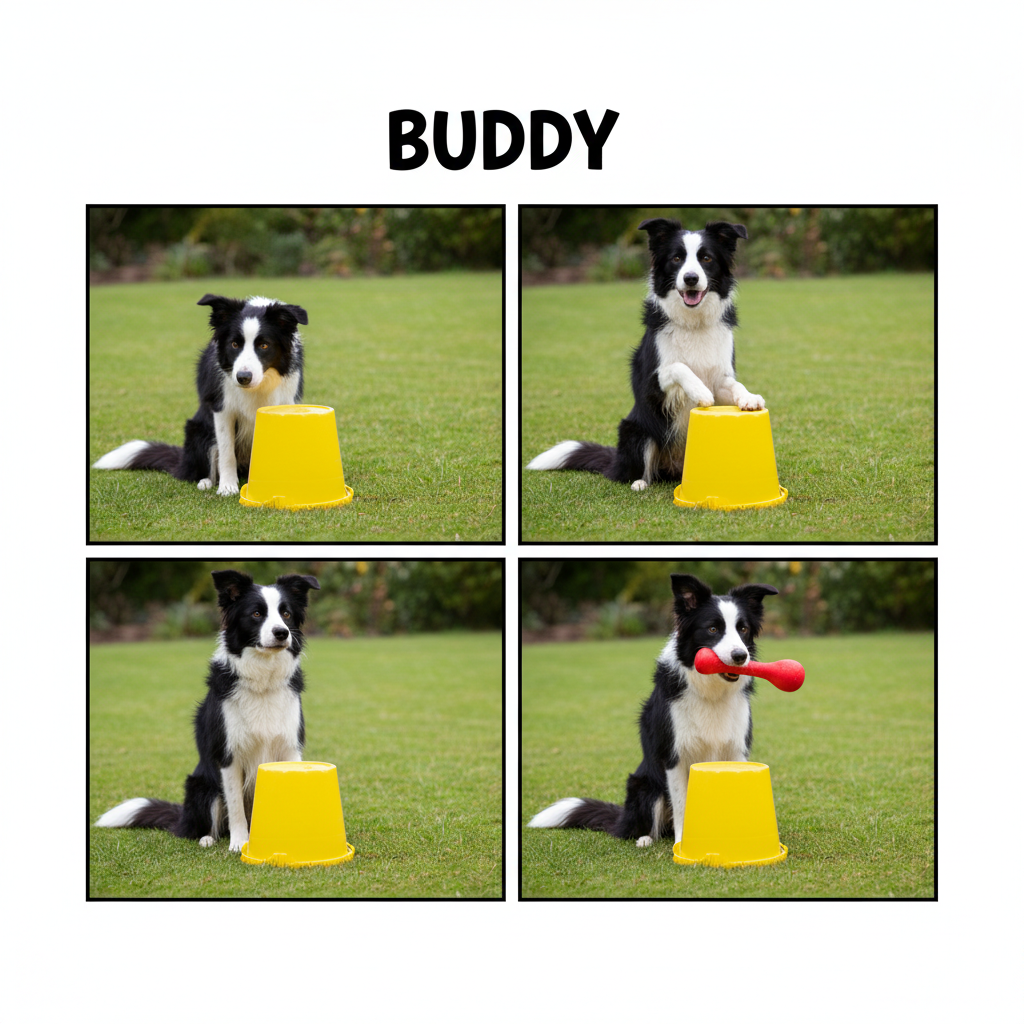
Step 2: Paw Targeting (The First Tap)
Now, we want to shape that curiosity into a physical touch. Specifically, a paw touch. Hold a treat in your hand and place it on top of the bucket. When your dog moves to get the treat, they will likely place a paw on the bucket for balance. The instant their paw touches the bucket, click and give them the treat. Repeat this several times. Soon, your dog will start offering a paw-touch without the lure of the treat on top. When they do, that’s a jackpot moment! Give them lots of praise and several treats. Start adding a verbal cue like “Tap” or “Drum” just as they are about to touch the bucket.
Step 3: Building Rhythm and Repetition (The Drum Solo)
Once your dog reliably taps the bucket on cue, it’s time to build on it. Now, you’ll only click and treat for more enthusiastic taps or for multiple taps in a row. If your dog gives one soft tap, praise them but don’t click or treat. Wait a second. They might try again, a little harder. That’s the moment you click and reward! You are ‘shaping’ the behavior to be more like actual drumming. You can encourage them by tapping the bucket yourself and acting excited. Your energy is contagious!
Expert Tip: Keep your reward delivery exciting! Sometimes, instead of just handing over the treat, toss it a short distance away. This ‘resets’ the dog, and they get to run back to the bucket to play the game again, which keeps the energy high.
Step 4: Adding the ‘Sticks’ (Optional Advanced Move)
This step is for the overachievers! If your dog has mastered paw-drumming and already knows a ‘hold’ or ‘take it’ cue, you can transition to drumsticks. First, practice the ‘hold’ cue with the dog-safe stick. Once they can hold it reliably, bring the bucket back. Hold the stick near the bucket and give your ‘Tap’ cue. Your dog will likely move their head (and the stick) towards the bucket. Click and treat any contact the stick makes with the bucket. Over time, you can shape this into a deliberate tap.
Step 5: Putting It All Together (The Performance)
Now it’s time to add a final cue and generalize the behavior. Choose a fun performance cue like “Play the drums!” or “Time to rock!” Start saying this new cue right before you give your old ‘Tap’ cue. After several repetitions, try giving only the new performance cue. Your dog should start drumming! Practice in different rooms, in the backyard, and eventually (if you’re brave) in front of a small, supportive audience of family or friends. This helps your dog understand the cue works everywhere, not just in your training spot.
Fine-Tuning the Performance: Pro Tips for a Flawless Drum Solo
Your dog is tapping away, and you’re starting to see a real drummer emerge! That’s fantastic. Now let’s talk about polishing the performance and keeping the fun alive for the long haul. These professional tips will help you solidify the skill and ensure your training sessions remain the best part of your dog’s day.
Keep Sessions Short and Sweet
A dog’s attention span, especially when learning something new, is shorter than ours. It’s far more effective to have two 5-minute sessions a day than one frustrating 30-minute marathon. Always aim to end the session on a positive note, after a successful repetition. This ‘peak-end rule’ ensures your dog remembers the session as a success and is excited to train again next time.
The Power of the Jackpot
Did your dog just figure something out? Maybe they offered five taps in a row for the first time, or they tapped the bucket with extra enthusiasm? That’s a breakthrough moment, and it deserves a jackpot! A jackpot is a huge reward—a handful of their favorite treats, a shower of praise, and maybe a quick game of tug. It’s a way of saying, “YES! That’s exactly what I wanted!” Jackpots help solidify learned behaviors and keep motivation sky-high.
Creating a Practice Schedule
Consistency is key in dog training. A loose schedule can help you stay on track without overwhelming your dog. Here’s a sample schedule you can adapt:
| Day | Morning Session (5 mins) | Evening Session (5-10 mins) |
|---|---|---|
| Monday | Step 1 Review: Positive association with the bucket. | Step 2 Practice: Paw targeting. |
| Tuesday | Step 2 Review: Paw targeting on cue. | Step 3 Intro: Rewarding multiple taps. |
| Wednesday | Rest Day / Play Day | Rest Day / Play Day |
| Thursday | Step 3 Practice: Building rhythm. | Step 3 Practice: Adding excitement and energy. |
| Friday | Step 2 & 3 Combo: Quick review of both. | Step 5 Intro: Introduce the final performance cue. |
| Weekend | Practice in a new location (e.g., backyard) to generalize the skill. Keep it fun! | |
Read Your Dog’s Body Language
Your dog is always communicating with you. If they start yawning, licking their lips excessively, or avoiding eye contact, they might be feeling stressed or tired. This is your cue to wrap up the session with one last easy success and try again later. Training should always be a ‘want to’ activity, never a ‘have to’.
Hitting a Sour Note? Troubleshooting Common Drumming Dilemmas
Even in the most fun training sessions, you can sometimes hit a snag. Don’t get discouraged! Every training challenge is simply a communication puzzle waiting to be solved. Here are some of the most common issues that pop up when teaching bucket drumming and how to work through them with patience and positivity.
- Problem: My dog is afraid of the bucket or the noise it makes.
Solution: Go back to square one. Place the bucket on a soft surface like a rug or grass to dampen the sound. Put the bucket on its side so it’s less imposing. Reward your dog just for looking at it from a distance. Gradually decrease the distance over several sessions. Use extremely high-value treats to change their emotional response from ‘scary object’ to ‘magic treat dispenser.’ - Problem: My dog keeps trying to chew the bucket or the drumsticks.
Solution: This is common, especially with puppies and mouthy breeds! If they chew the bucket, immediately but calmly withdraw your attention and the treats for a few seconds. When they stop, re-engage them in the tapping game. This teaches them that tapping brings rewards, while chewing makes the fun stop. For drumsticks, ensure you’ve first taught a rock-solid ‘drop it’ or ‘leave it’ cue separate from your drumming sessions. - Problem: My dog just taps with his nose, not his paw.
Solution: It’s great that your dog is interacting, but we need to shape the right body part! Stop rewarding nose-boops. You can gently lift their paw and touch it to the bucket yourself, then immediately click and treat. Another method is to hold a treat in your closed fist against the bucket; most dogs will paw at a hand to get a treat inside. Click and treat the moment the paw touches the bucket (or your hand against the bucket). - Problem: My dog was doing great, but now they seem bored and uninterested.
Solution: You’ve likely hit a motivation wall. Ask yourself: Are the treats still exciting enough? Are the sessions too long? Are you showing enough enthusiasm? Try switching to an even better treat, cutting session time in half, and celebrating every little tap like your team just won the Super Bowl. Your energy is a huge part of the reward for your dog!
Remember the Golden Rule: If your dog is struggling, the task is likely too difficult. Break the step down into even smaller, more manageable pieces. The goal is to set your dog up for success, not to test them.
Conclusion
And that’s a wrap! You now have all the tools, steps, and troubleshooting tips you need to teach your dog to be a bucket-drumming superstar. From gathering your gear to taking your final bow, this journey is about so much more than just the final trick. It’s about spending quality time together, learning to communicate more effectively, and discovering just how incredibly smart your canine companion is.
Be patient with your pup and with yourself. Celebrate every tiny step forward—every curious sniff, every hesitant tap, and every enthusiastic drum solo. The real prize isn’t the applause from your friends; it’s the wagging tail, the focused eyes, and the strengthened bond you’ll build during your practice sessions.
So go ahead, grab that bucket, pocket some treats, and start making some joyful noise together. We’d love to see your progress! Share a video of your percussion pup on social media and be sure to tag us—you might just inspire another pet parent to start their own canine band.